Did you know you can add YouTube videos to your My Media area in Kaltura? This doesn’t mean you are copying the actual video, but you can add links to YouTube videos so that those videos appear as part of your My Media area, meaning you can then embed them in a Content page (through Insert Stuff in the HTML editor). Why pull them in to My Media when you can embed YouTube videos directly through Insert Stuff? Well, if you add them to My Media, you can add them to Playlists in the Course Media gallery area, but most importantly, if you add YouTube videos to My Media, when you embed them in the HTML editor, Kaltura will strip out that annoying final screen in YouTube videos which tempt students to click on another video.
How do you do this? This tutorial will show you how, and in addition, will show you how to embed the videos to avoid the current issue with viewing embedded YouTube videos in Chrome. There are several steps, so please contact desupport@camosun.ca if you encounter difficulties.
This tutorial is designed for faculty who have previous experience using D2L and My Media in D2L and will cover the steps involved when you wish to add a YouTube video to your My Media space in D2L and embedding it in the HTML editor (for example, in a Content page). Note that this is a workaround as viewing a Kaltura YouTube video is not currently working in Chrome (Jan. 2020).
Steps
- Go to your course in D2L.
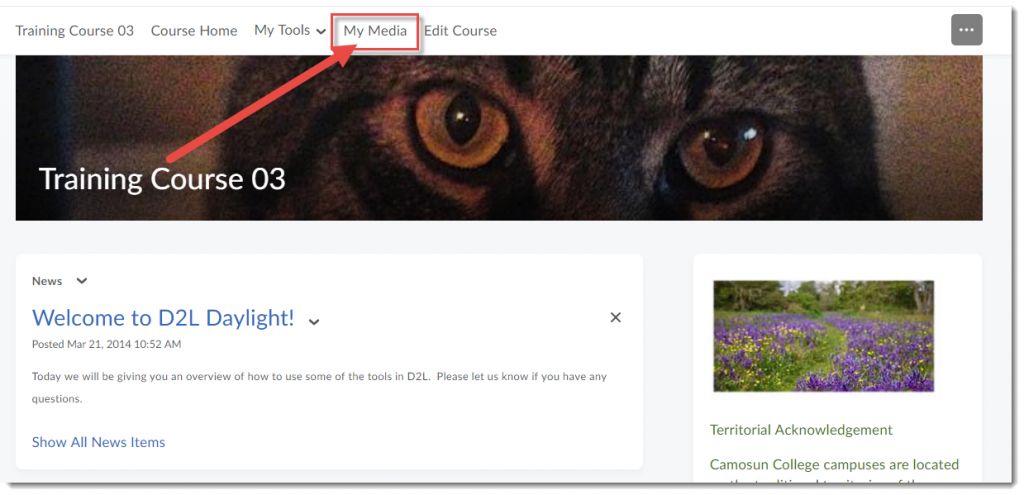
- Go to My media (through the link on your Navbar, or in your My Tools drop-down menu, or in a draft Topic in the Content tool).
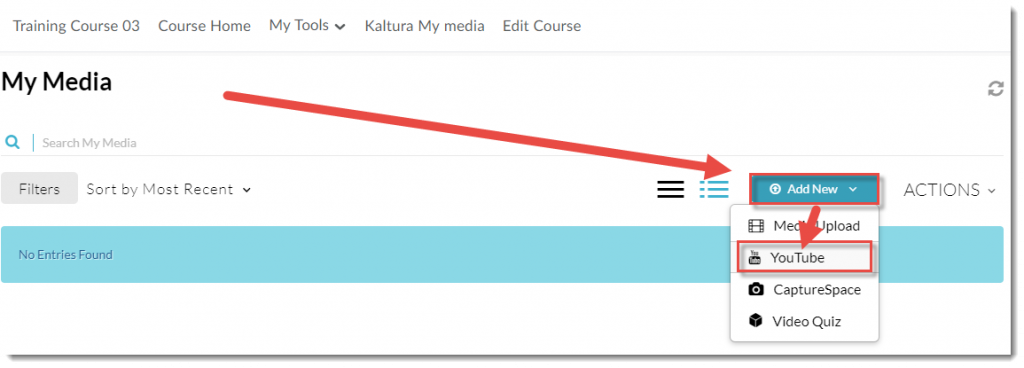
- Click Add New and select YouTube.
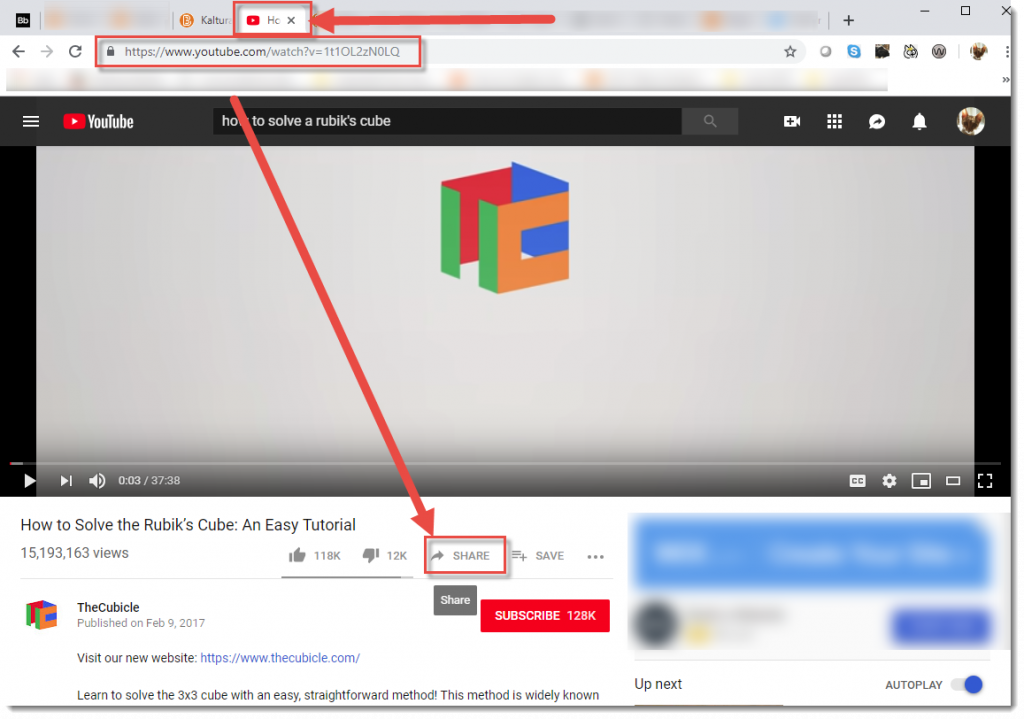
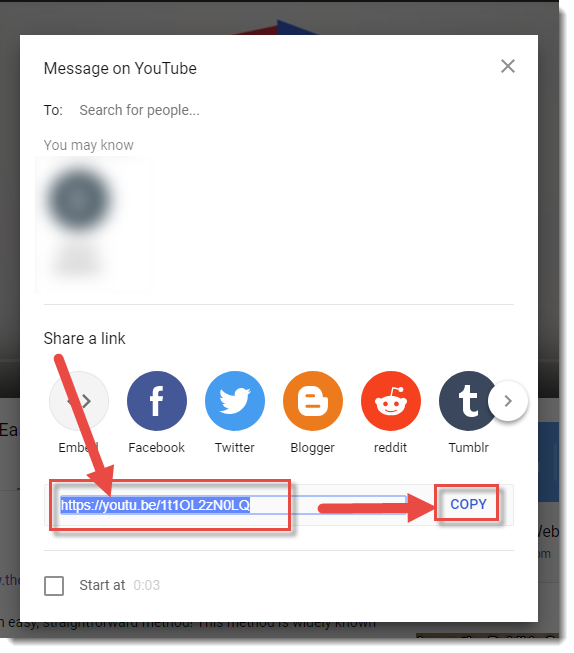
- Open another tab in your Browser and go to YouTube. Find the YouTube video you want to add and click Share. Then select the video’s URL and click Copy.
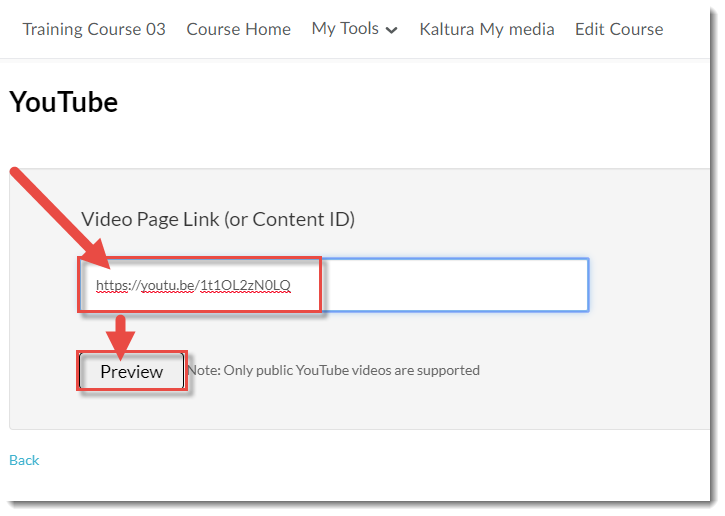
- Go back to your D2L course, and paste the copied URL into the Video Page Link box. Click Preview.
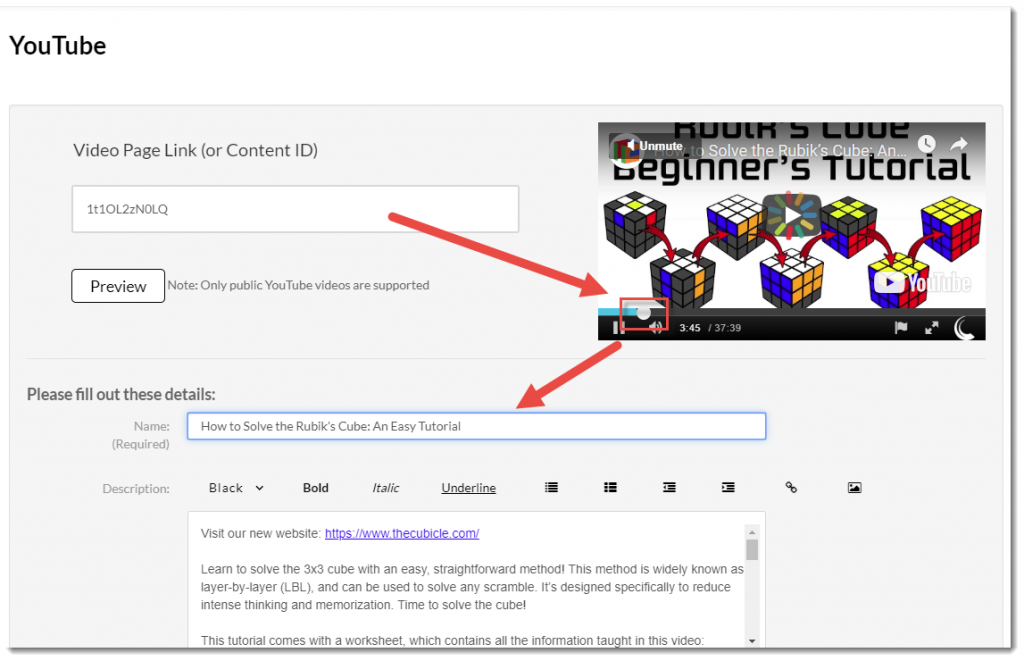
- It will take a few minutes for the YouTube video to completely be pulled into My Media – the longer the video, the longer it will take. If the video appears to be taking a longer time to load than you think it should, pull the play bar across for a little bit and the video information editing area will appear in the main window. If this does not work, wait a little longer (it may take upwards of 20 minutes) and try again.
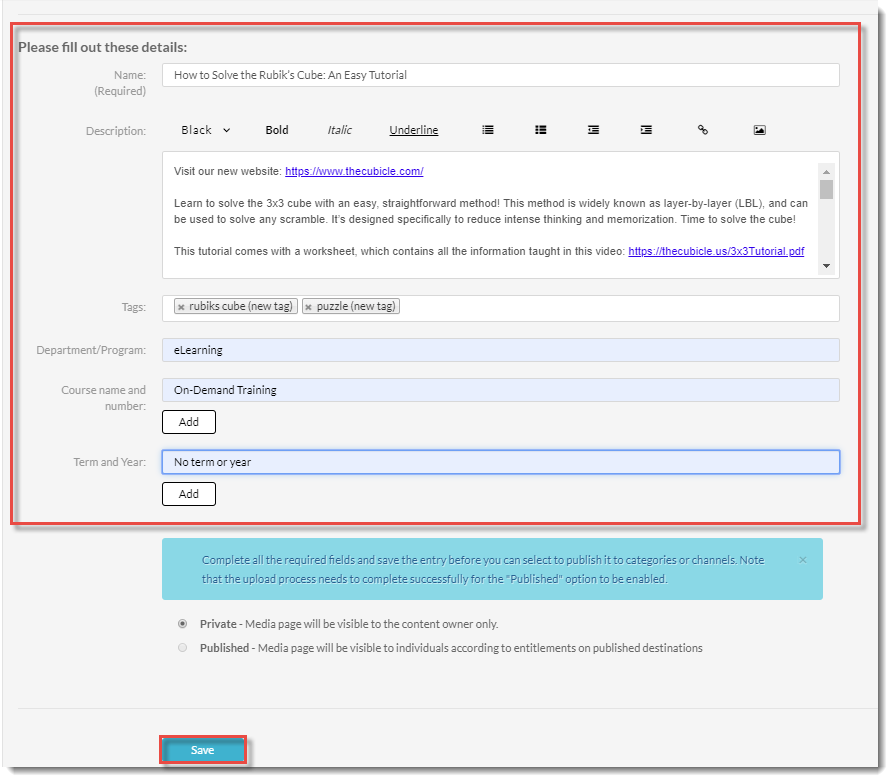
- Edit and add details as needed. We highly recommend adding information to all the listed fields to help you filter/sort media files as you build your collection, and to help your students search for specific media files. Note that you do NOT need to Publish the video for it to be available for use in your course. Click Save. The YouTube video will now appear in your My Media space.
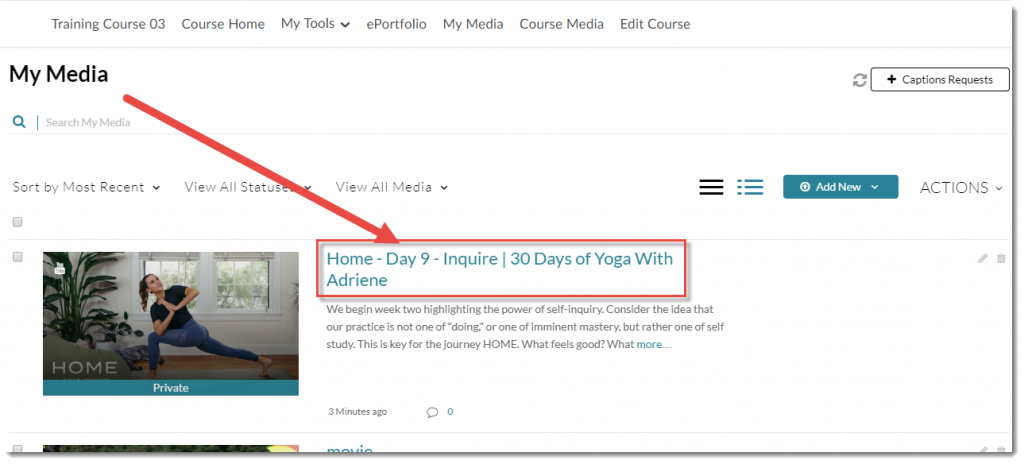
- To allow students to see the YouTube video you just set up in My Media, you will now need to embed it in the HTML editor, in whichever tool you are using. In this scenario, we will embed it into a Content page. So, first go back to My Media and click the title of the YouTube video you want to embed.
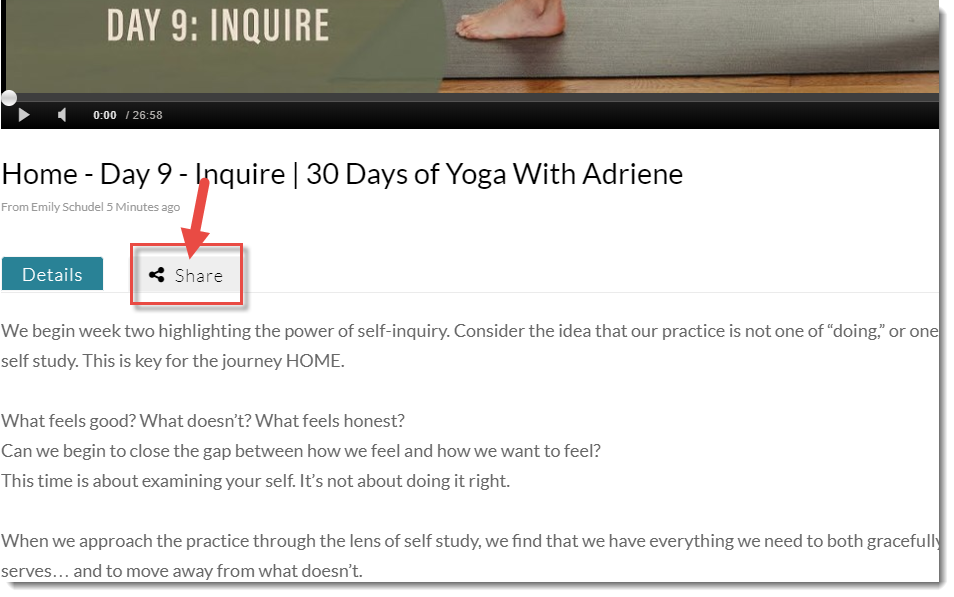
- Scroll down below the video, and click the Share tab.
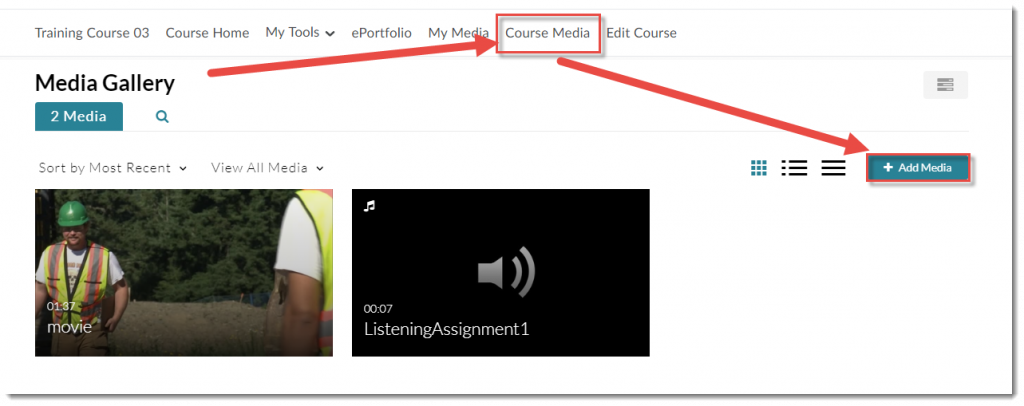
- This next step is the first part of the workaround for embedding YouTube videos in your Content pages. This will require that you have added the Course Media link to your NavBar. Once you have done that, click Course Media, then click Add Media.
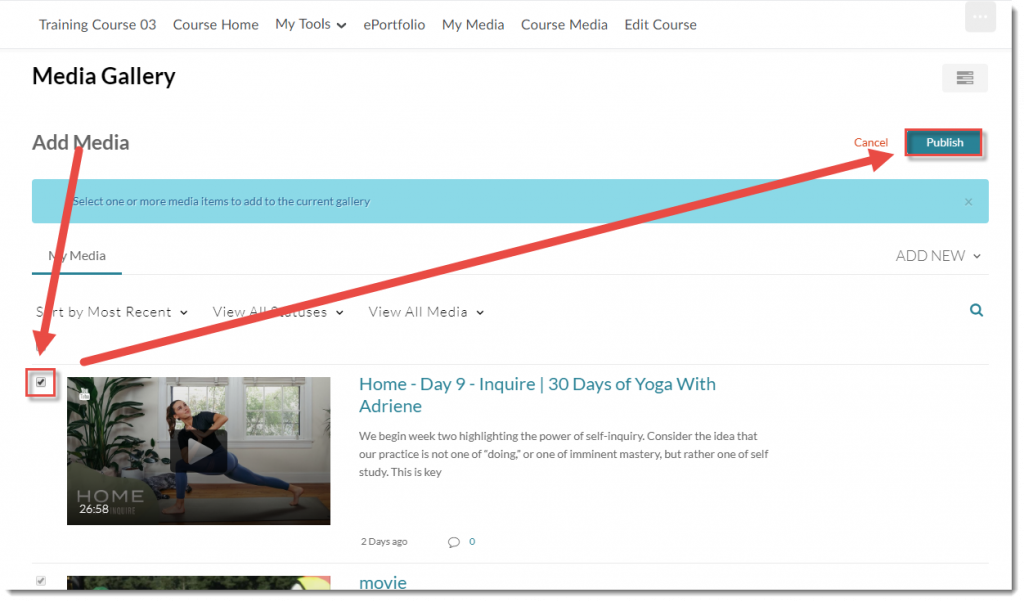
- Click the select box next to your YouTube video ad click Publish.
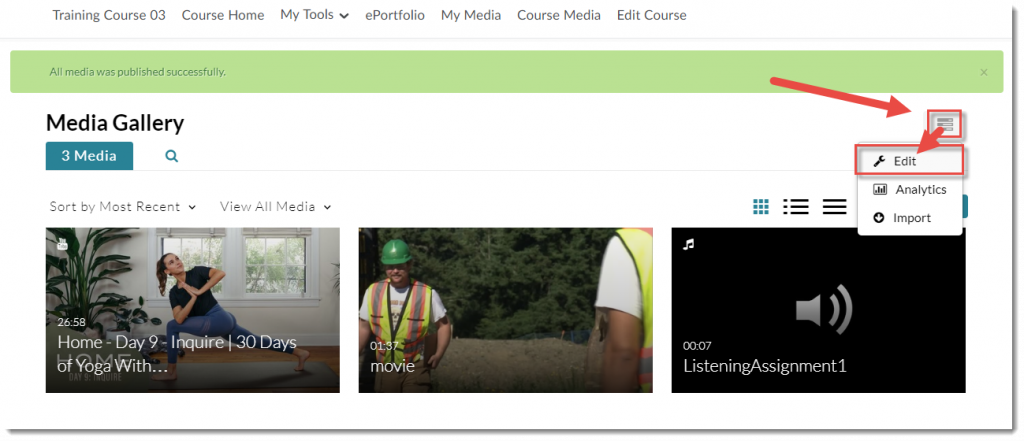
- Click the Channel Actions menu (top right) and select Edit.
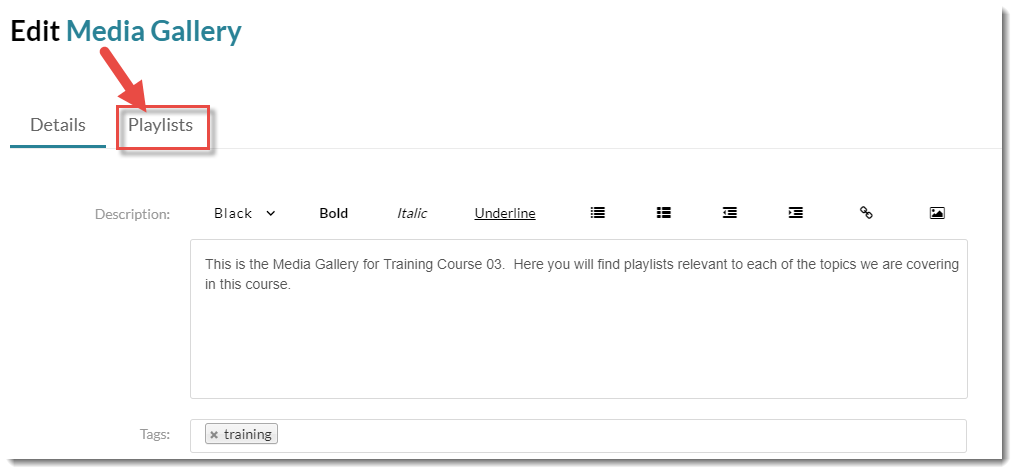
- Click Playlists.
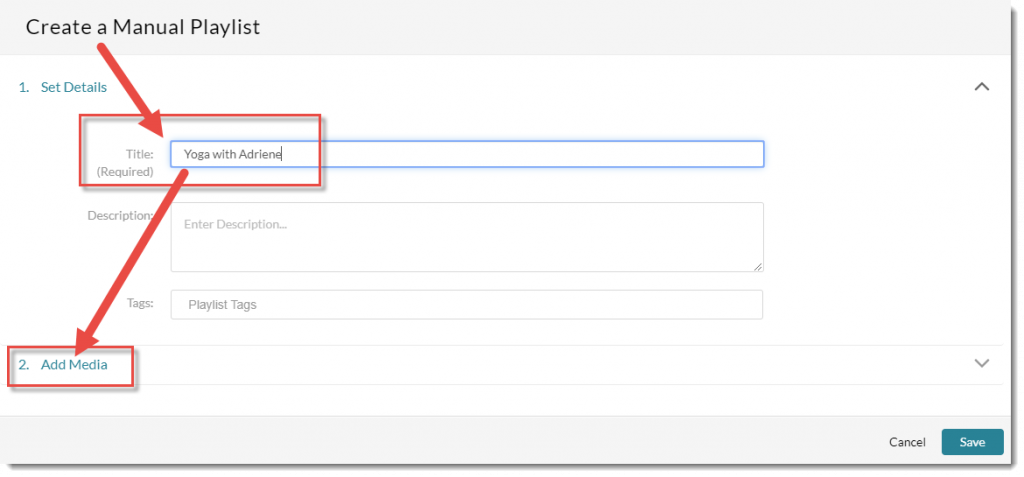
- Click Create New and select Manual Playlist.

- Give your Playlist a Title – for this scenarios, we will use the title of the YouTube video we are going to embed. Then click Add Media.
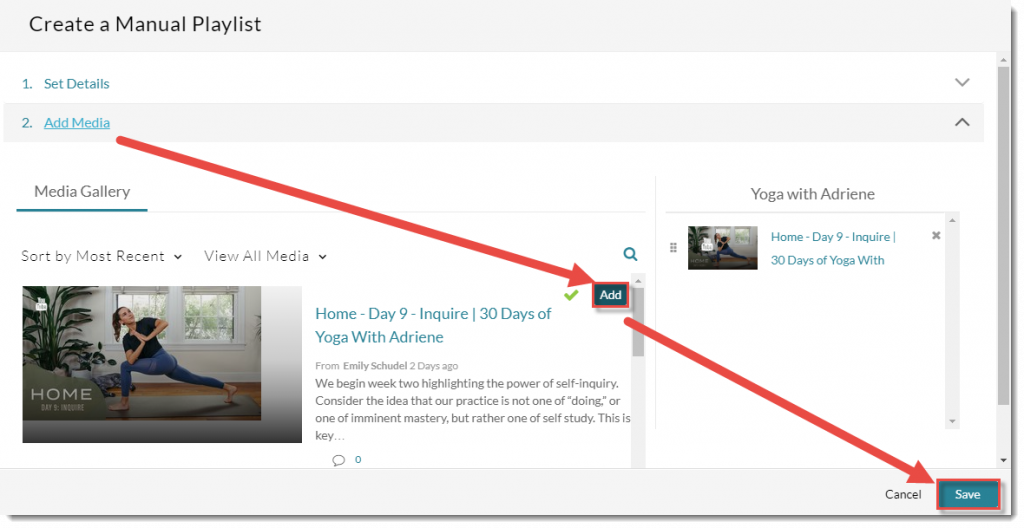
- Click Add next to your YouTube video. Then click Save.
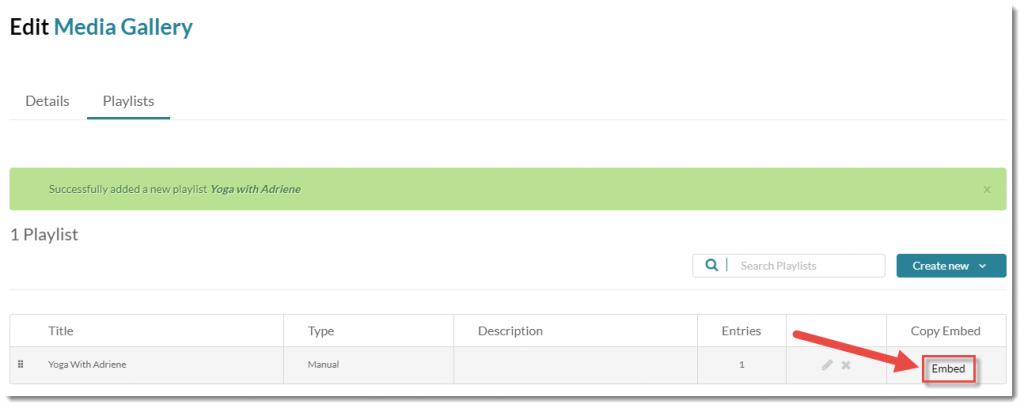
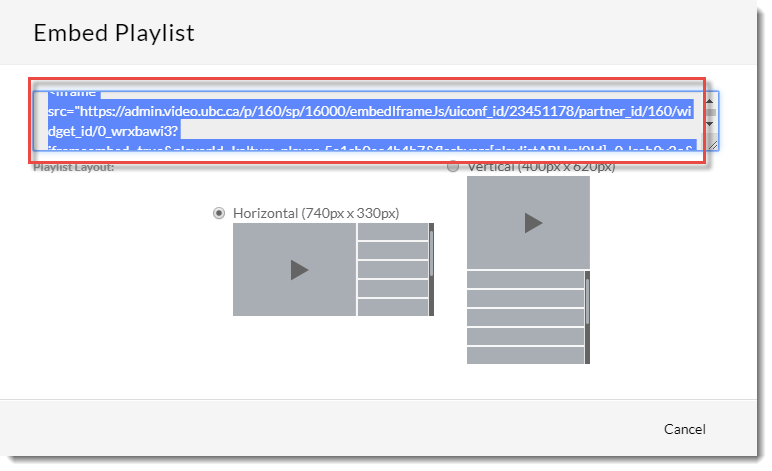
- Click Embed.
- Copy the Embed code in the Embed Playlist pop-up box (you will paste it into the HTML editor later in the following steps).
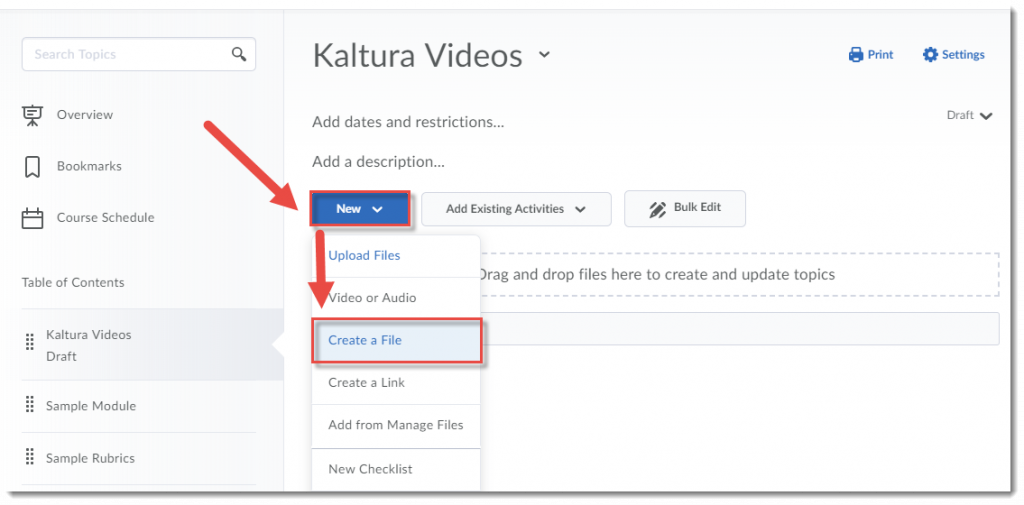
- Now, go to the Content tool in your course and click on the title of the Module you want to add your video to. Click New and select Create a File.
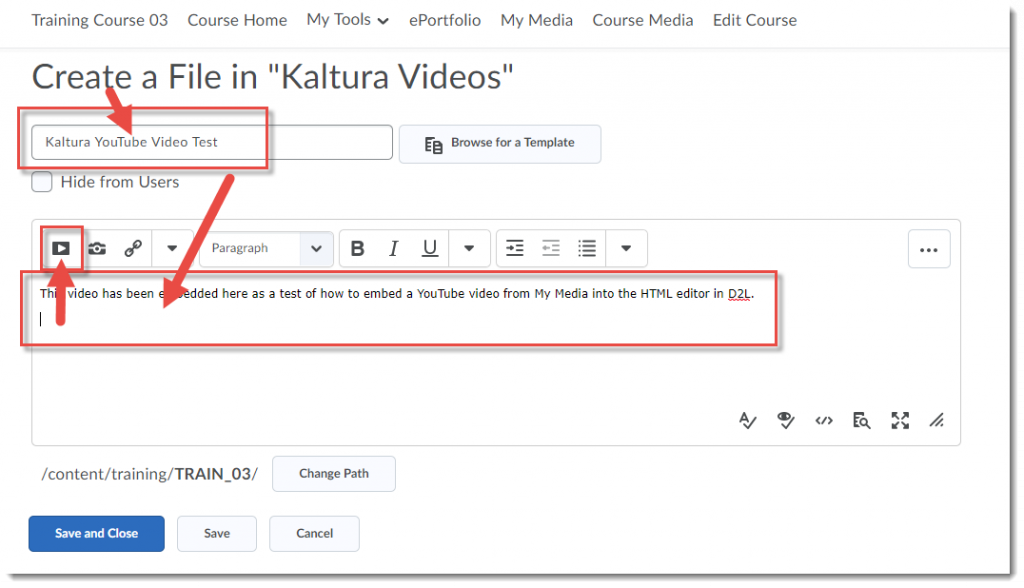
- Give your Topic a Title. Then click in the HTML editor box and add some text to provide a context for the video you will be embedding. For example, explain to your students what the video is about and what they should be watching/listening for. Make sure to hit your Enter key so your cursor appears below the text you just typed in, otherwise your video may not appear where you want it to! Click on the Insert Stuff icon at the top left of the HTML editor.
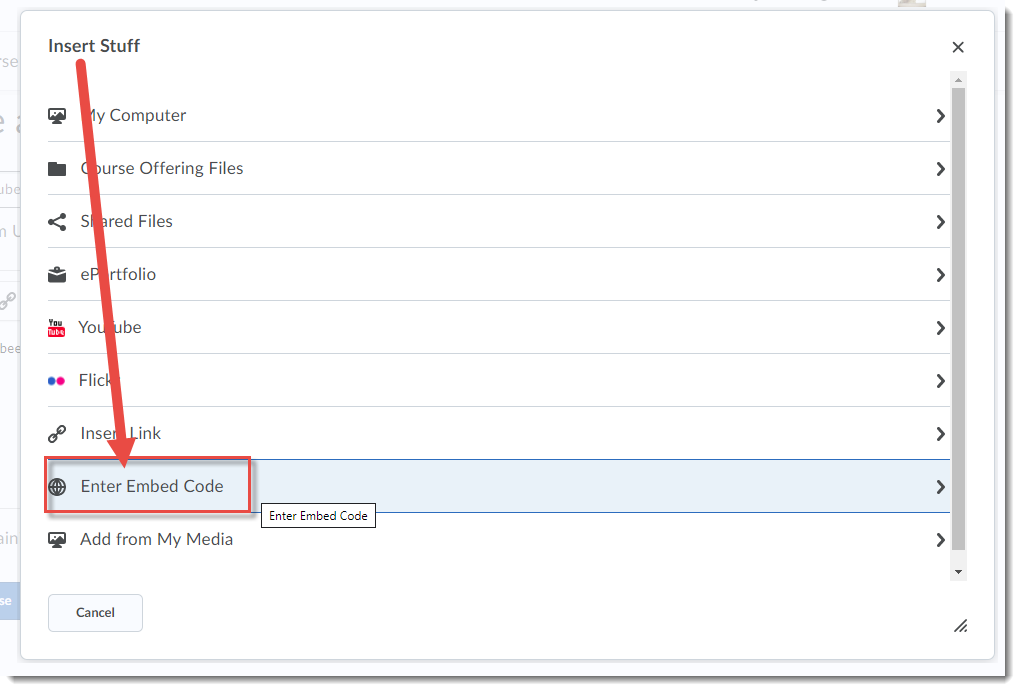
- In the Insert Stuff pop-up, click Enter Embed Code.
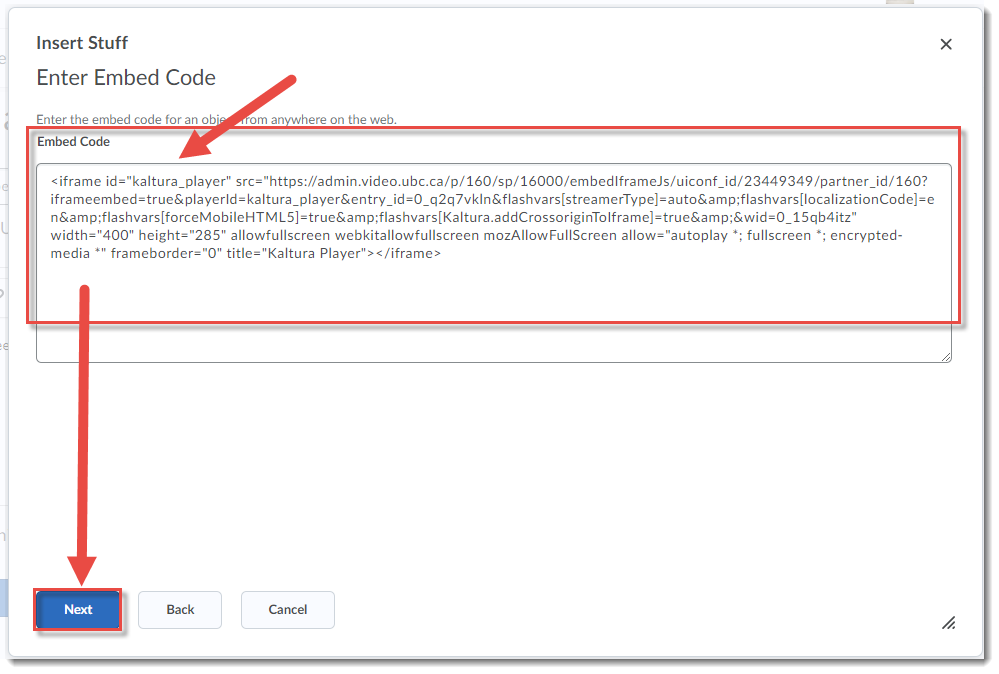
- Paste the Embed code you copied from the My Media area into the Embed Code box, and click Next.
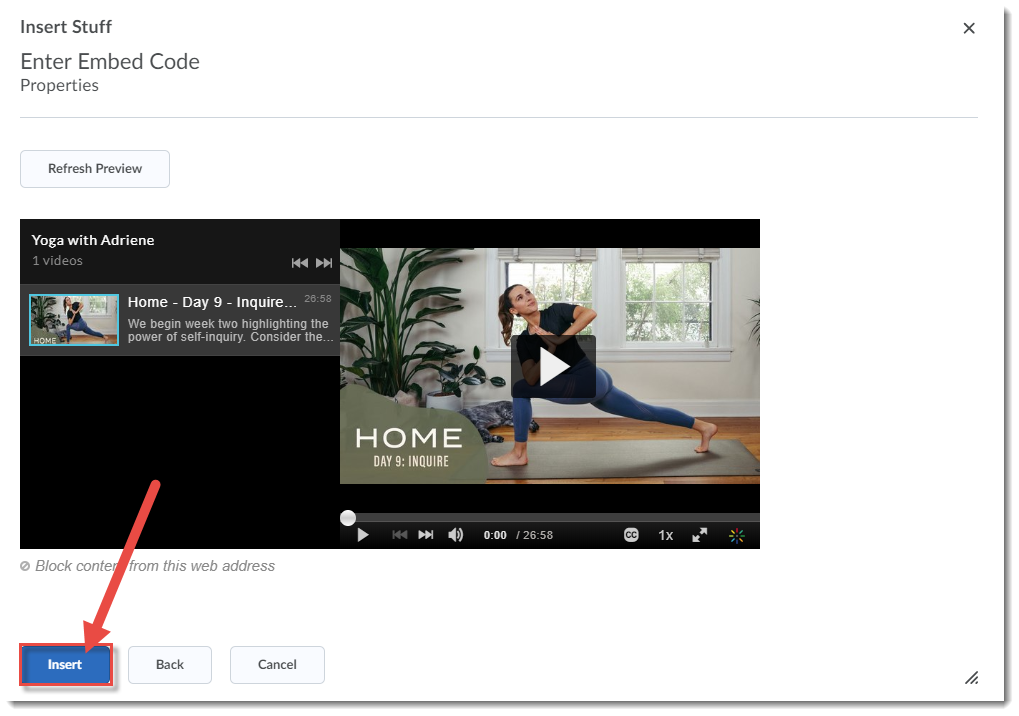
- Once the video appears in the Preview area, click Insert.
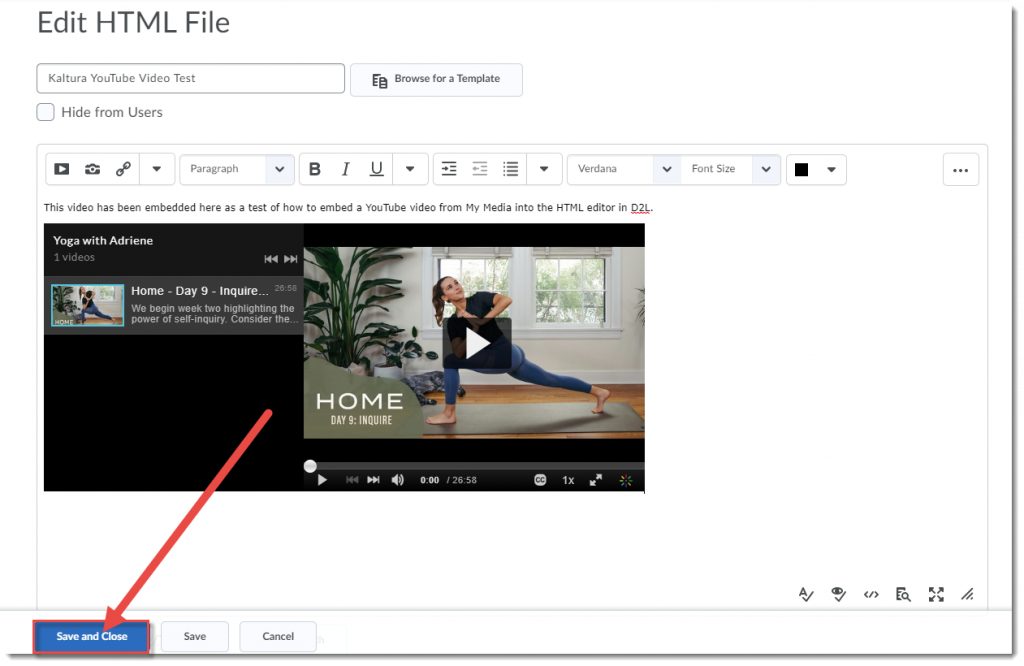
- Your video will now appear in your Content Topic page, and you can click Save and Close to publish your Topic page. Your Topic will now appear with the embedded video in it.
Things to Remember
When you embed a YouTube video you have added to your My Media space into a D2L page, the video will not show advertising or additional videos as it does when embedding it from YouTube directly.
![]() This content is licensed under a Creative Commons Attribution 4.0 International Licence.Icons by the Noun Project.
This content is licensed under a Creative Commons Attribution 4.0 International Licence.Icons by the Noun Project.
