D2L Tool Tip of the week: Setting up Quizzes with Special Access (for example, for students requiring accommodation, time extensions, etc.)

This tutorial will walk you through setting up Special Access options in a quiz for a student requiring accommodation (for example, more time to write exams).  It will also note some considerations to keep in mind when setting up the quiz, depending on the kind of accommodation required by the student.

  1. Go to the Quizzes tool in your course
  2. Open an existing quiz, or click on the New Quiz button to create a new quiz.

3.

Setting Special Access 1

4.

Setting Special Access 2

5.

Setting Special Access 3

6.

Setting Special Access 4

7.

Setting Special Access 5

8.  Note that you cannot Preview the Special Access version of the quiz yourself, but here is an example of what the student with Special Access will see…

Setting Special Access 6

…as compared to the “regular” access

Setting Special Access 7

Things to remember

If you will be requiring students to complete their quiz in the Respondus Lockdown browser, make sure to include this information for them somewhere BEFORE they click on the quiz (for example, in the title of the quiz) so that they know they need to go to Respondus LockDown Brower BEFORE opening the quiz.

Specific accommodation considerations Special Access WON’T help with

If you have students requiring spellcheck to be on you will likely need to set up a separate quiz to accommodate for exams with long answer questions if you want to keep spellcheck off for other students.

If you have students requiring larger font for their questions as well as for question textboxes (i.e., for answering Long Answer questions), note that this issue is still being explored and solutions will be added to this tutorial as they are discovered.

Reminders for the week

Remember the ID drop-ins.  Only 2 weeks left!

  • Tuesday,. March 31 from 12-1 at Lansdowne, in LLC156
  • Wednesday, April 1 (it’s no joke) from 12-1! at Interurban in CC235

And don’t forget to register now for our Distributed Education Spring 2015 Workshop Series.  Only one month before the excitement begins!!

The Distributed Education (DE) Workshop Series is designed to assist faculty (beginner to advanced) with incorporating various educational technologies (including Desire2Learn (D2L) and Camtasia) into their teaching.  Make sure to register for the session(s) you would like to attend (click on the links below to view the sessions, and then on the Register Here button at the bottom of the page) so that we can notify you if there is a room change or cancellation.

Note:  This schedule is subject to change.  Please check back to confirm dates, times and locations for the workshops.  Don’t see what you’re looking for?  Contact DE Support (desupport@camosun.ca) to book a consult with an Instructional Designer.

Go to DE Workshop Series – Spring 2015 for more information, and to register.

Friday Fun Fact: Back in the day…

I thought today I would share what I think about when I hear people complaining about the speed of their Internet connection and computers, and the lack of memory on their various devices (and, yes, I have been known to be one of those people).

Does anyone remember this?

Commodore PET computer

The Commodore PET

This file is licensed under the Creative Commons Attribution-Share Alike 2.0 France license.  Attribution: Photograph by Rama, Wikimedia Commons, Cc-by-sa-2.0-fr

THIS was the first computer I ever used.  I was in grade 11, and our high school had just started its first Computer Science (I think that’s what it was called) class.  And we used PET computers.  What a disappointment – I was expecting Star Trek, and I got a teeny tiny monitor (the Commodore site – http://www.commodore.ca/commodore-products/commodore-pet-the-worlds-first-personal-computer/ – says it was 9 inches), and a “practical storage device”, in reality a cassette tape drive (yes – cassette tape!), which took FOREVER to save the simplest code onto.  I don’t remember much about what we coded into the PETs, but I do remember having to spend hours and hours flowcharting everything first, and then hours and hours entering code praying it would work, then hours and hours saving the code onto the practical storage device to hand in.

I didn’t touch a computer again for several years.  I was in university, and it was my brother’s Apple IIE– or was it an Apple IIc, no definitely a IIe…  Anyway, it had no hard drive, but at least saved everything onto a floppy disc instead of a cassette tape – a 5 ÂĽ inch disc, mind you.  But that’s a story for another day.

The Apple IIe

The Apple IIe computer

This file is licensed under the Creative Commons Attribution-Share Alike 2.5 Italy license.  Attribution: http://www.allaboutapple.com

D2L Tool Tip of the Week: Hiding Topics and/or Modules in the Content tool in D2L

This tutorial will cover the steps involved when you wish to hide topics from students NOT using the dates and restrictions option.

1. Go to the Content tool in your D2L course.

2.

Content-HidingTopicFromStudents1

3.

Content-HidingTopicFromStudents2

4.

Content-HidingTopicFromStudents3

5.

Content-HidingTopicFromStudents4

6.

Content-HidingTopicFromStudents5

Things to Remember

Setting Topics to Draft requires that you go back to Content and Publish them for your students to see them.  You can also set a Topic to Published, but Add dates and restrictions to automate its release to students.

Don’t forget to register for May/June Workshops!!!

Register now for our Distributed Education Spring 2015 Workshop Series!

The Distributed Education (DE) Workshop Series is designed to assist faculty (beginner to advanced) with incorporating various educational technologies (including Desire2Learn (D2L) and Camtasia) into their teaching.  Make sure to register for the session(s) you would like to attend (click on the links below to view the sessions, and then on the Register Here button at the bottom of the page) so that we can notify you if there is a room change or cancellation.

Note:  This schedule is subject to change.  Please check back to confirm dates, times and locations for the workshops.  Don’t see what you’re looking for?  Contact DE Support (desupport@camosun.ca) to book a consult with an Instructional Designer.

Go to DE Workshop Series – Spring 2015 for more information, and to register.

Friday Fun Fact: What was the first ONLINE LMS (Learning Management System)?

The critical word here is ONLINE, because according to a brief scour of the Interwebs, the first LMS’s were actually developed in the 1920s (one of them at the University of Alberta – http://en.wikipedia.org/wiki/History_of_virtual_learning_environments), but those most assuredly would NOT have been online since the Internet was not around quite yet (there’s another fun fact – when was the Internet “invented”, although I am sure you all know the answer to that one!  And if not, go to http://www.internetsociety.org/internet/what-internet/history-internet/brief-history-internet).

Now, the first online LMS I remember (and worked with) was WebCT.  It no longer exists as WebCT, but was subsumed under Blackboard in 2005.  I’ve also worked with Moodle (an open source LMS) and am now working with Desire2Learn.  I’ve also taken courses in Angel (which was acquired by Blackboard in 2009) and Canvas (another open source LMS).  There are MANY other LMS’s out there.  Here is a list at Wikipedia:  http://en.wikipedia.org/wiki/List_of_learning_management_systems.

But enough of that.  Back to the original question:  the first online LMS.  Why is it so hard to find an answer to these questions?  Right now, my bet is on something called EKKO, which was an online LMS developed at NKI Distance Education in Norway in 1987.  What did EKKO look like?  I’m not sure.  It’s referred to as a computer conferencing system (http://www.irrodl.org/index.php/irrodl/article/view/17/354) and consisted of “four main modules:  user directory, email, bulletin boards, and conferences.” (https://books.google.ca/books?isbn=0262082365)  What I can say for sure is that it did NOT look like any of the LMS’s we are used to seeing today.

Some references:

Random Online Teaching Post: Instructor Presence, part 1

Today I am going to post #1 of a short series of posts on instructor presence in the online classroom that will explore the following questions:

  1. What is instructor presence?
  2. How do you establish it?
  3. How do you maintain it in a way that does not lead to the online class taking over your life?

In this first post I am going to talk a bit about what instructor presence is and what it might look like, as well as discuss some best practices around establishing presence.

Instructor presence

… a sense of presence is “being there” and “being together” with online learners throughout the learning experience. It looks and feels as if ….the instructor is accessible to the learners and that the learners are accessible to the instructor and each other, and that the technology is transparent to the learning process.

Lehman, R.M. and Conceição, S.C.O (2010) Creating a Sense of Presence in Online Teaching, Jossey-Bass, p. 3

Online presence involves interacting in some way with your students in your online course site.  This could be as simple as saying “hello!” or answering questions posted in a discussion forum, or posting reminders in the News tool.  Remember that while you may go into your online course frequently to read postings and grade assignments, your students can’t see you there unless you “talk” to them.  And if you don’t talk to them once and a while, they will begin to think you are not there at all.  The trick comes with finding a way to be present without taking too much of the lead and dampening student to student interaction.

Establishing presence

There are many ways to establish your presence in an online classroom, but a large part of establishing presence lies in how you design your course.  For example, in addition to organizing your course site so it is easy to navigate,

  • Plan for what tools you will use to keep in touch with your students and create spaces for interaction.
  • Set course expectations as part of the course design, and place this information in easy-to-access locations.
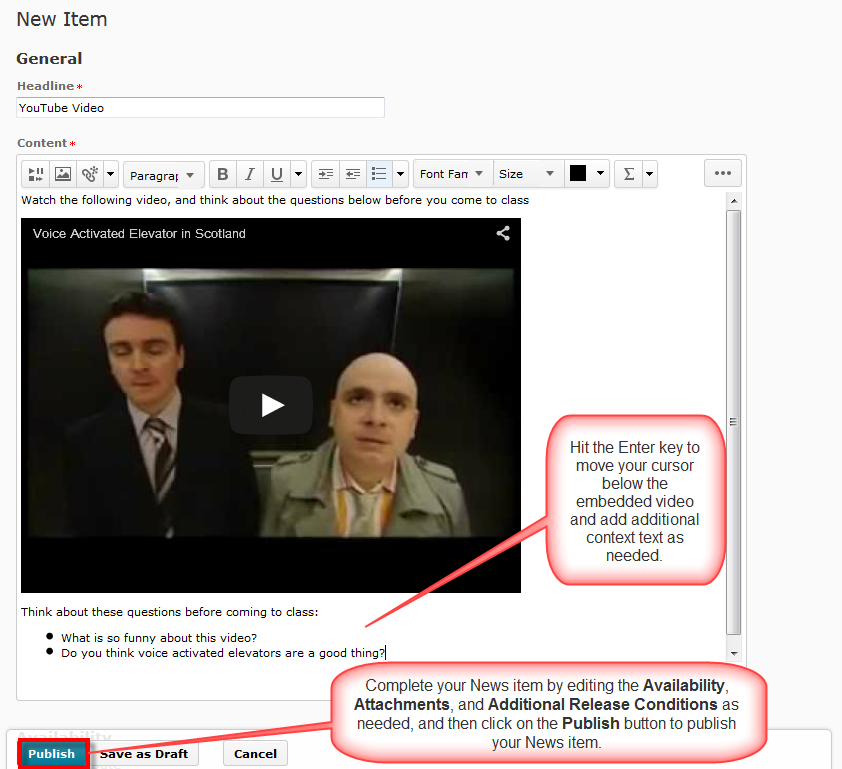
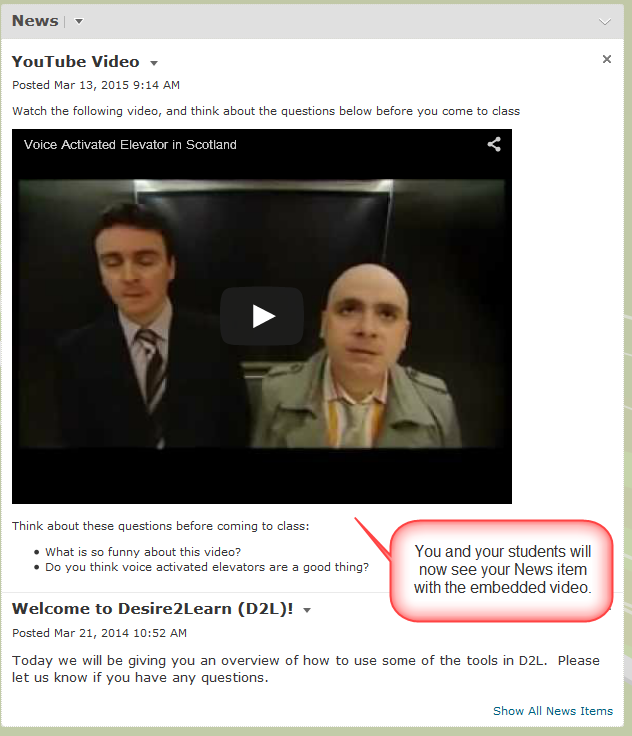
  • If you are going to use media (audio or video, for example) to enhance your presence in your online classroom, plan for this early so you have time to create your media pieces and set them up on your course site.

Strangely enough, another way to inject your presence is through the tone of your writing voice.  If you plan on providing students with text-based content (and you definitely will be if you are teaching blended or completely online), read it aloud to yourself (or to a friend or colleague) and ask yourself if it sounds like you’re speaking to students or reading a textbook.  Writing your course notes in a style that mimics how you would talk to your students in a face-to-face class will help bring you to life even without audio or video.

Once your course starts, the easiest way to establish your presence is to use your course discussion forums.  For example,

  • Post an introduction to yourself, including some personal information, a picture, and perhaps an audio or video clip so students can put a face and voice to your name.
  • In addition to an introduction, post a Welcome message to help set the tone for the course.
  • Communicate immediately where students can expect to hear from you during the course (i.e., is there an Instructor Messages forum they should be checking? Will you be using the News tool to send regular messages?), as well as how often (i.e., will you be checking the site daily? In the morning? Evening? How often will you be replying to student questions, etc.?) Once you’ve established your plan, stick to it. And if it has to change for some reason, let your students know.

This is just the beginning – once you establish your presence, you need to maintain it.  So, in my next post on online presence (which may be a few weeks away), I will take a closer look at some best-practice examples around maintaining your presence in the online classroom, and discuss some tips and tricks to help you find a good balance between too much presence and not enough.

For further information about Instructor Presence and examples of establishing presence online:

D2L Tool Tip of the week: Embedding a YouTube video in a News item

This tutorial is designed for faculty who have previous experience using the News tool or the HTML editor in D2L.  For further information, please contact desupport@camosun.ca for assistance.

This tutorial will cover the steps involved with embedding a YouTube video into a News item (and by extension, into any HTML editor page in D2L).  (Note:  Embedded video image from the Voice Activated Elevator in Scotland video available at https://www.youtube.com/watch?v=SqbnRD9qHZQ).

First, go to the Homepage of your course, then:

1.

HTMLEd-EmbeddingYouTube1

2.

HTMLEd-EmbeddingYouTube2

3.

HTMLEd-EmbeddingYouTube3

4.

HTMLEd-EmbeddingYouTube4

5.

HTMLEd-EmbeddingYouTube5

6.

HTMLEd-EmbeddingYouTube6

7.

HTMLEd-EmbeddingYouTube7

8.

HTMLEd-EmbeddingYouTube8

9.

HTMLEd-EmbeddingYouTube9

Things to remember

The advantage of embedding a video, YouTube or any other video, into the HTML editor (whether in the News tool, in Content, etc.) is that it gives you the option of providing your students with context around the video.  For example, you can add text before the video explaining what the video is and what the students should be watching for in the video, and text after the video explaining what the student should be doing next (i.e., going to a Discussion forum to answer questions, completing a Quiz, etc.)

When embedding a video, you do not need to worry that you are violating copyright.  You are NOT copying the video into D2L, but just basically adding a link to it.  This, however, does mean that you will need to keep an eye on the video in case the link to it disappears.

Drop-in Session Reminders for the Week

Don’t forget our Instructional Design drop-in sessions this week.   Come with your questions to LLC156 (Lansdowne) on Tuesday from 12-1, or to CC235 (Interurban) on Wednesday from 12-1.

Planning your SD for May and June?  We will also be available during the drop-in sessions to help you determine which DE Spring workshops will benefit you the most.

Not available on these days/times?  No problem.  Email desupport@camosun.ca to get linked up with an instructional designer for a one-on-one consult at a time that works for you.

Friday Fun Fact: What was the first online course ever offered?

This was a hard question to find a quick answer to.  From what I can tell from a brief online search, the first online program was started by the Western Behavioral Sciences Institute (specifically in the School of Management and Strategic Studies) in 1981 (http://www.worldwidelearn.com/education-articles/history-of-distance-learning.html, http://en.wikipedia.org/wiki/Western_Behavioral_Sciences_Institute).

What did this program look like?  Well, here it is described generally:

The equipment was expensive and primitive. We used Apple IIE’s with 48K of memory and 300 baud modems. (Multiply by 1000 and 100 respectively to get current averages.) The complexity of basic computer operations in those days was such that it took a full page of printed instructions just to connect. A variant of email called computer conferencing was the only available electronic mediation.

Computer conferencing was suited to our application since it facilitated the sort of many-to-many communication that goes on in the classroom, but no one knew how to use it for education. None of us had ever been a student in an online class or seen one in operation, and we did not know the answers to the most elementary pedagogical questions, such as how to start a class, how long or short messages should be, and how often the teacher should sign on and respond to the students.  (http://www-rohan.sdsu.edu/faculty/feenberg/TELE3.HTM)

Targeting “high level executives who could not afford long absence from their jobs, the electronic delivery system provided these executives with an exciting initiation to computers through a communications application suited to their skills and interests.” (http://www-rohan.sdsu.edu/faculty/feenberg/wbsi3.htm)  But, of course, there were some challenges:

The real problems began when the participants returned home [after the initial face to face meeting].  Since no one had ever been taught on a computer network before, there were no models. The first courses consisted either in professorial monologues that made interesting reading but were unsatisfactory as computer conferences, or telegraphic questions followed by days of inactivity while the teachers waited for responses. Meanwhile, various technical problems inhibited the participants from joining in the conversation, such as it was.…

WBSI’s first attempts at online teaching were disastrous. Great teachers were helpless in front of a class of sympathetic but sceptical students scattered between Caracas, Philadelphia and San Francisco. One teacher offered elaborate presentations that resembled written lectures. While interesting, these had the undesirable effect of reducing the participants to silence. In a face-to-face classroom teachers can determine from subtle clues whether students’ silence signifies fascination or daydreaming. But silence on a computer network is unfathomable; it is intensely disturbing to address the electronic void.  (http://www-rohan.sdsu.edu/faculty/feenberg/wbsi3.htm)

I think we’ve come a long way since then (although some of the challenges remain the same)!  But we might not be here now if it weren’t for those pre-Internet pioneers.