 Here’s a topic from the Getting the Most out of the Content Tool in D2L workshop: Did you know that you can set a Module in Content so that any file you upload to it automatically is saved in the same folder in the Manage Files area?
Yes. You can set a Module so that all files uploaded to that Module are automatically saved in a specific folder in Manage Files. Why is this important? Well, managing your files in D2L is important to ensuring that you can find files that you upload and link in Content. So, in this post we will look at the steps involved when you wish to set a Default Path to a specific Manage Files folder for a Module in the Content tool.
Steps
- Go to the Content tool in your course.
- In the Table of Contents box, click on the title of the Module you want to work with.

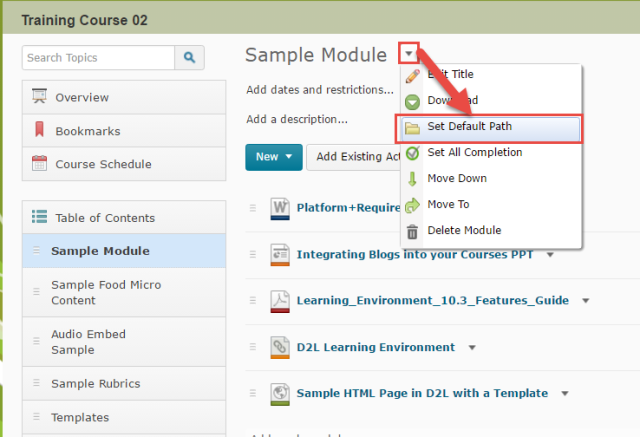
- Click on the down arrow next to the title of the Module and select Set Default Path.
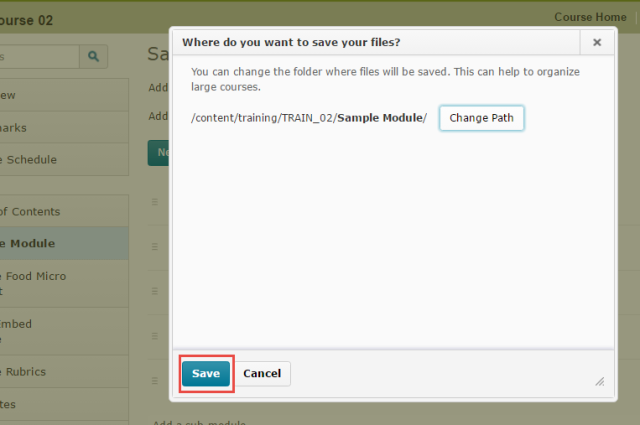
- In the pop-up box, click on Change Path. You will then see a list of the folders you have available in the Manage Files area.

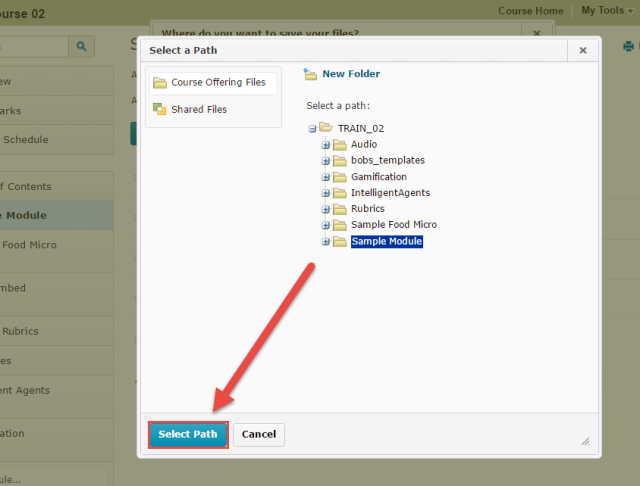
- Select the title of the folder you want to connect to your Module. If you don’t see the folder you want, either use the + signs to open the folders to check for sub-folders, or click on New Folder at the tops to create a new folder.

- Once you have selected a folder, click Select Path.
- Then click Save. All files you upload to the Module will now be automatically saved in the folder you selected.


Things to Remember
Remember to set up your Default Paths at the same time as you create your Modules. This will save you from having to reorganize your files in Manage Files later.
Want to know more? Contact desupport@camosun.ca to book an appointment with an instructional designer!