This tutorial is for faculty who have previous experience using the Quizzes tool in D2L. For further information, please contact desupport@camosun.ca for assistance.
Scenario
This tutorial will cover the steps involved with making some of your quiz questions bonus questions (counting above the total grade for the quiz).
Steps
- Go to the Quizzes tool in your course.
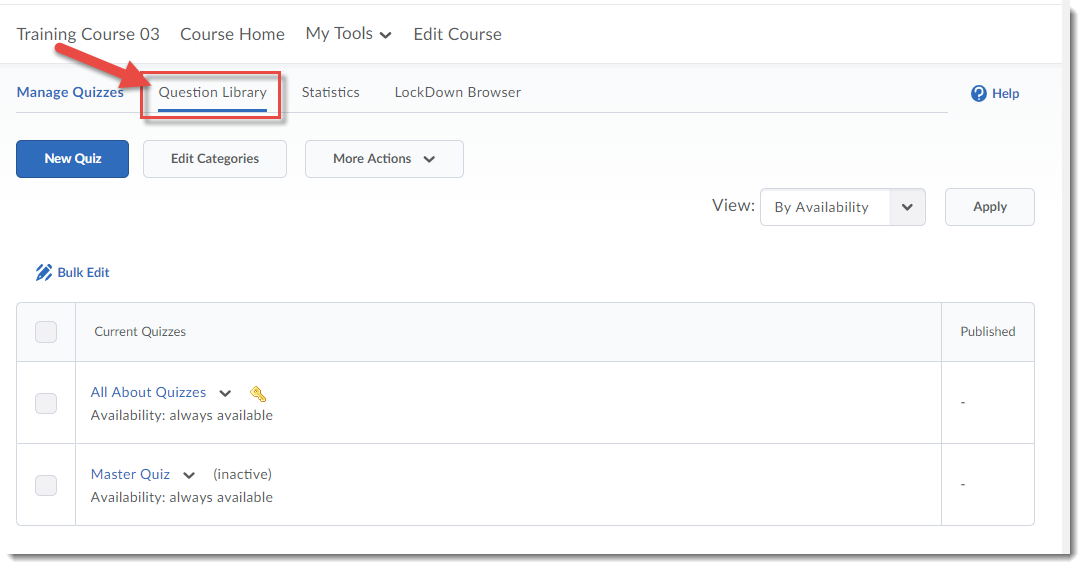
- Click Question Library.

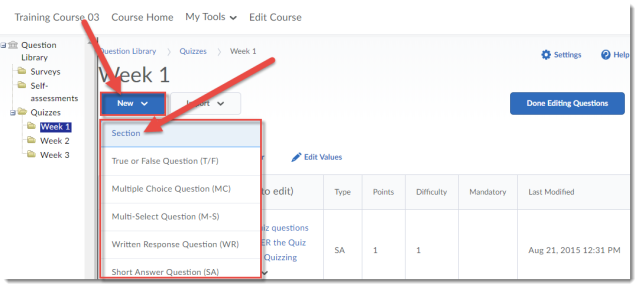
- Select a Section to add your Text or Image information to, or create a new section (for the purposes of this tutorial, we want to create a Case Study text that accompanies a set of questions in the Week 1 Quiz, so we will click the Week 1 section to open it).

- Click New and select Section.
- Give your Section a Title and click Hide Section Title from students if you like (we will keep it unselected to show you want it looks like in a quiz). Add your text or image to the Section Text box. This is where your case study text would go, for example. If you would like all the questions in this section shuffled (so that each student sees the questions relating to the case study in a different order), click Shuffle questions in this section. Then click Save.

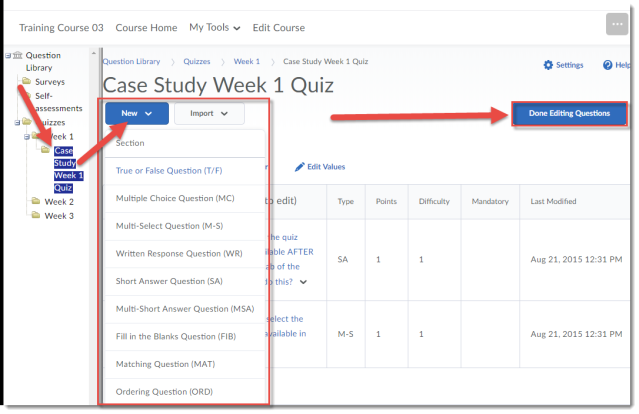
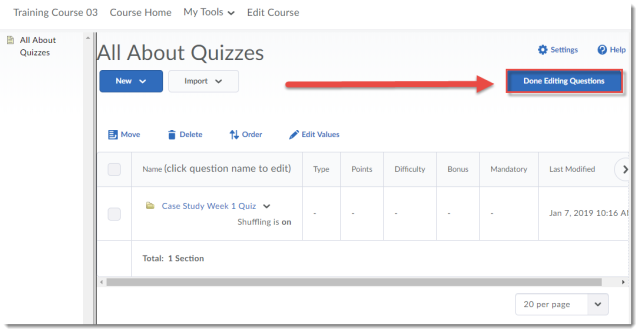
- Click on the title of the Section you just created, and using the options under the New button, add your questions to it. Click Done Editing Questions when you have finished.
- Now, you can add your Section (along with your questions) to a Quiz. Click on the title of the quiz you want to add your Section to (or create a new Quiz).

- If you need to, give your Quiz a Name, then click Add/Edit Questions.

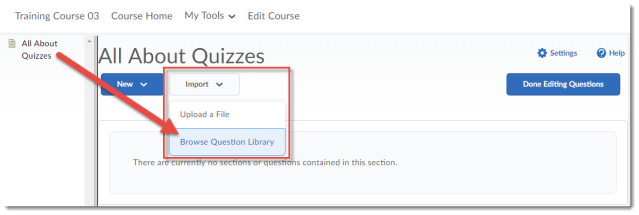
- Click Import, and select Browse Question Library.
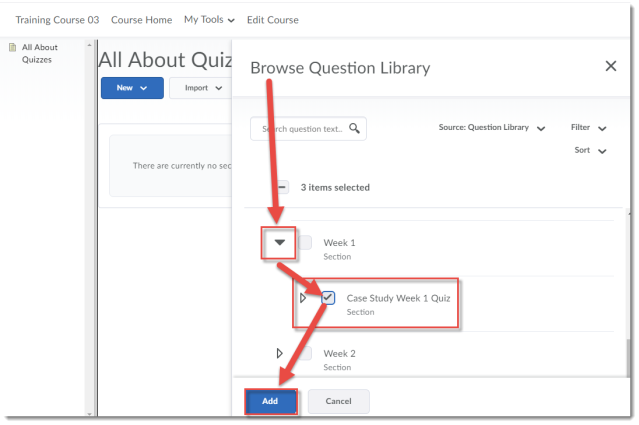
- Find your Section – you may need to scroll down in the Browse Question Library window and click the down arrows next to Section titles to open them to find it. Click the select box next to your Section, and click Add.
- Click Done Editing Questions.
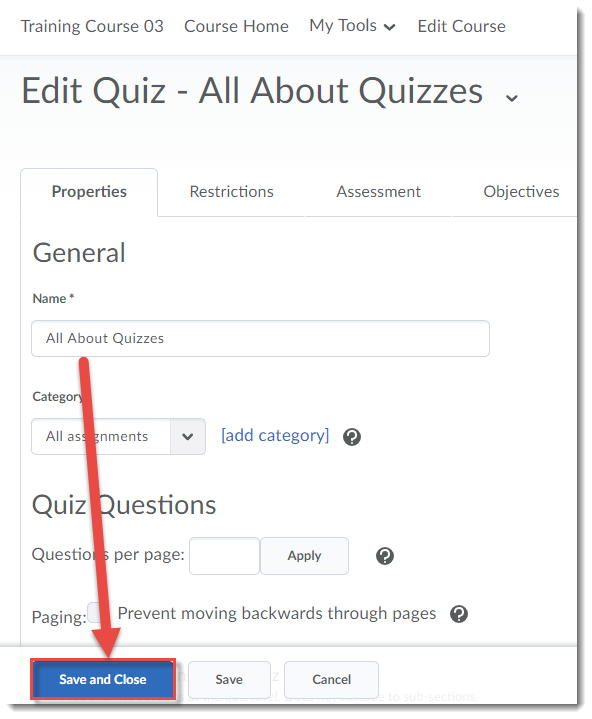
- Finish setting up your Quiz, then click Save and Close. Make sure to Preview your Quiz to check that your Section text or image appears above the questions you placed in it.


Things to Remember
NOTE: If you have old quizzes in your course site (for example, if you have copied them from Master or Dev or old course sites), you may have old versions of Text or Image information “question types” that have been converted into Sections called “Untitled [converted from a Text/Image Information Item]”. You will want to check your quizzes to make sure these sections work the way you want them to in the context of your quiz, and may even want to take the time to give them an appropriate title and move the questions the original “question type” was associated with so that they are inside the section.