The Checklist is a neat little tool in D2L which you can use to create a list of tasks (for a Module, for a Week, for a Course) that students can check off as they complete them. This tutorial will cover the steps involved in creating a Checklist for your students, and for integration into the Content tool.
Steps
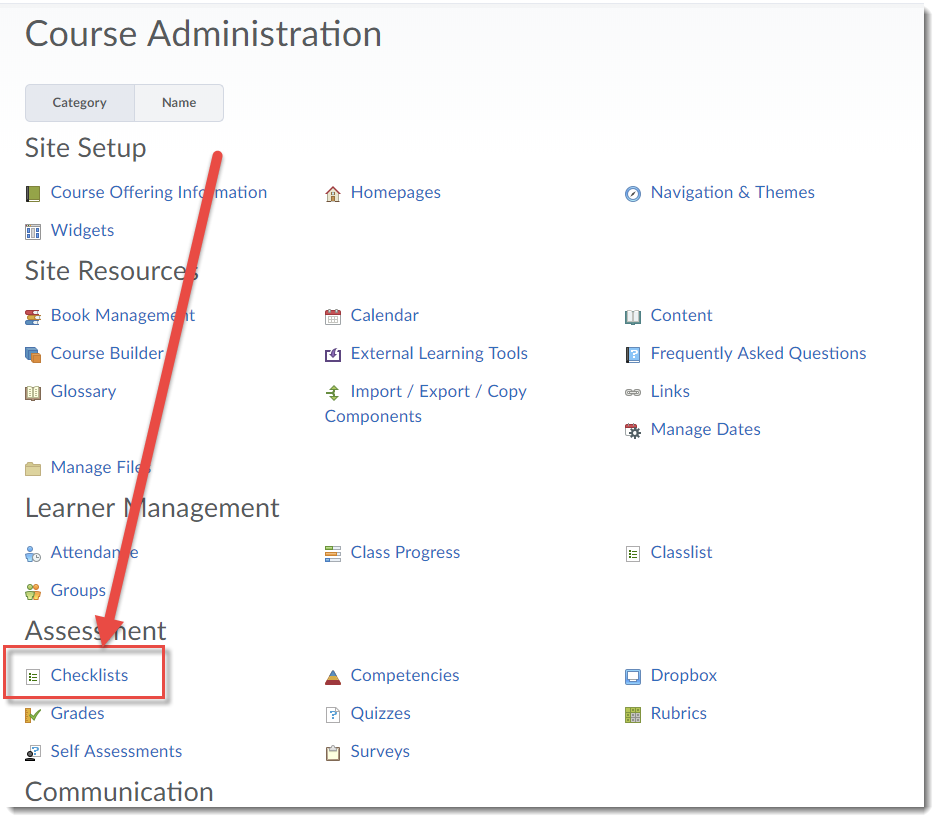
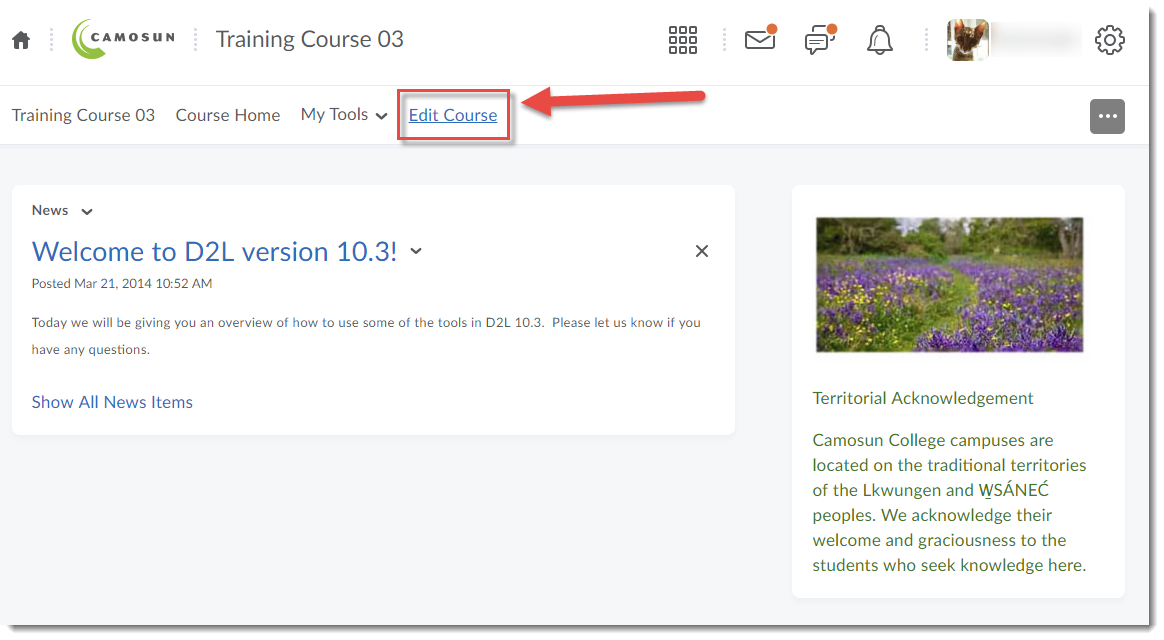
- Go to your course homepage, and click Edit Course.
- Click Checklist.
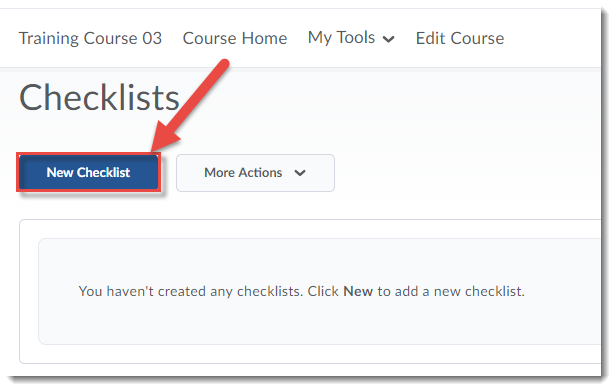
- Click New Checklist.
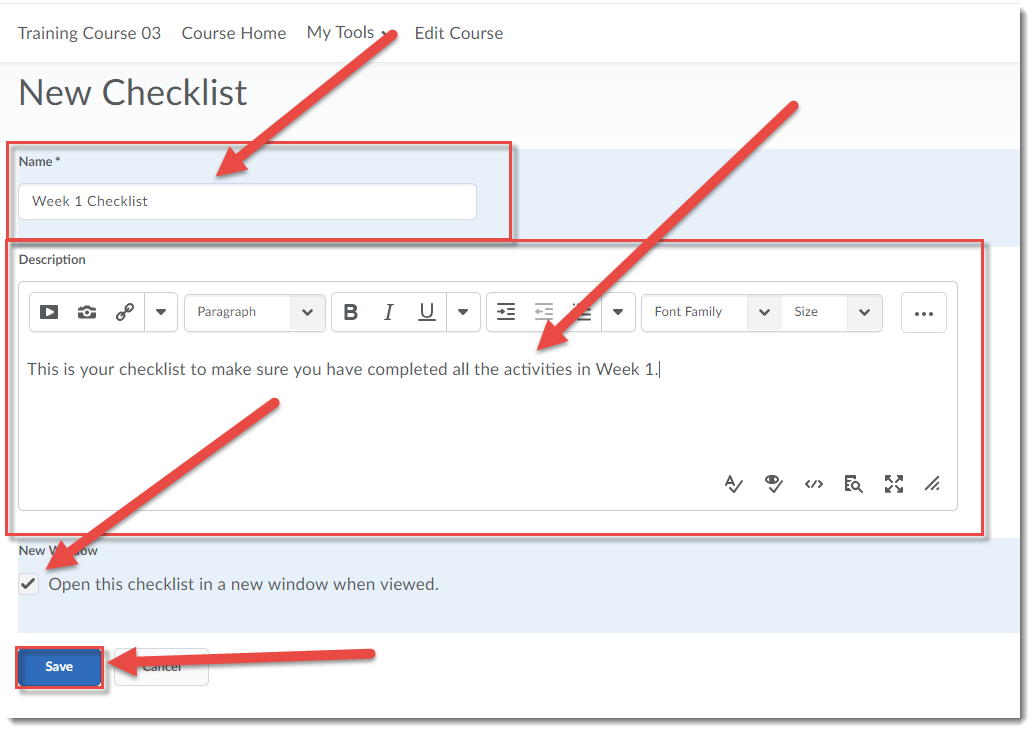
- Give your Checklist a Name, add a Description if you like. Select Open this checklist in a new window when viewed – this will allow students to have the Checklist open as they complete tasks in the course. Click Save.
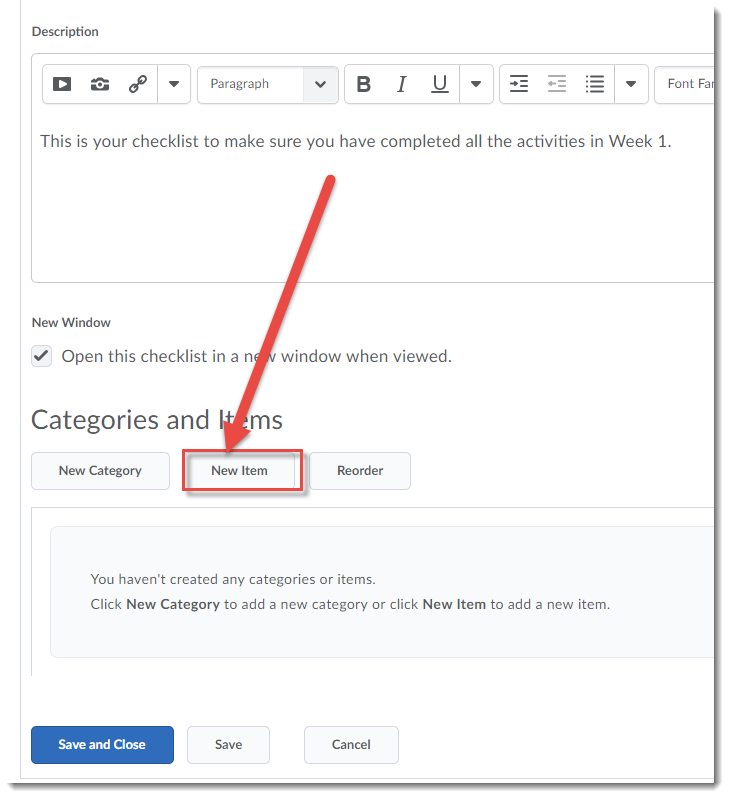
- Now you can add tasks (items) to your Checklist. Scroll down, and click New Item to get started.
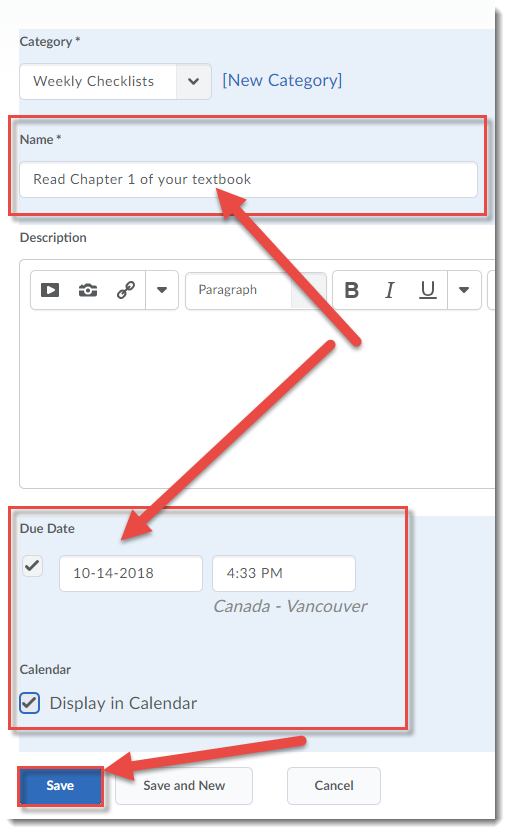
- Select a Category for your item using the Category drop-down, or create a New Category for it by clicking on New Category. Items MUST be in a category!
- Give your item a Name, and a Due Date if you like. Then click on Save. Click on Save and New if you would like to create another New item.
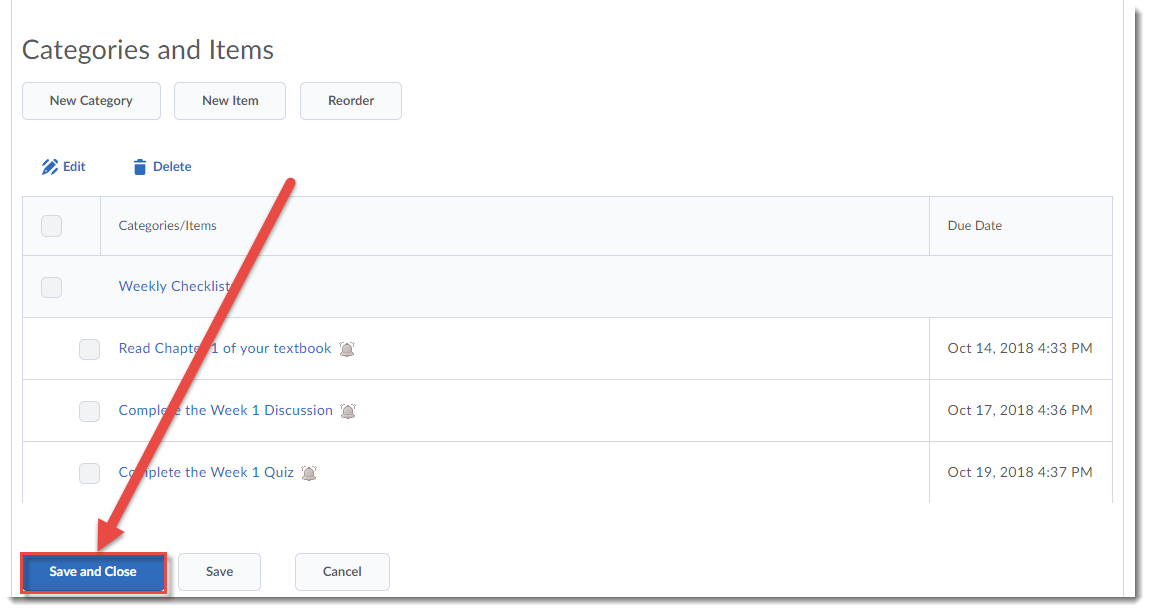
- Continue adding Items until your Checklist is completed. Click Save and Close.
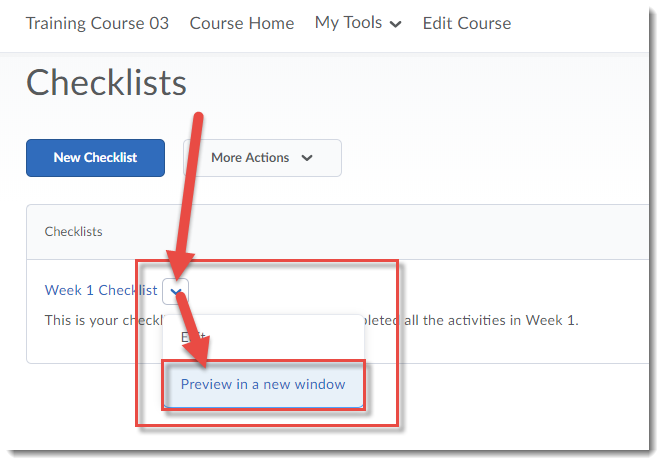
- Preview your Checklist by clicking on the drop-down menu (down arrow) next to the Checklist’s title and selecting Preview in a new window.
Things to Remember
Once you have created your Checklists, you can either add the Checklist tool link to your Navbar or My Tools drop-down menu, or link to it in Content using Add Existing Activities (see the Adding Links to Activities in Content tutorial for more information).
You can also Reorder your Checklists or Delete them by clicking on the More Actions button in the Checklists tool.

