I posted a version of this tutorial about 4 years ago (can you believe it?), but things in D2L have changed a bit, so I thought it would be a good time for a refresher! So, here I will cover the steps involved with adding licensed library e-resource permalinks into the HTML editor. For the purposes of this tutorial, we will work in the Content tool. For further information, please contact desupport@camosun.ca for assistance.
Steps
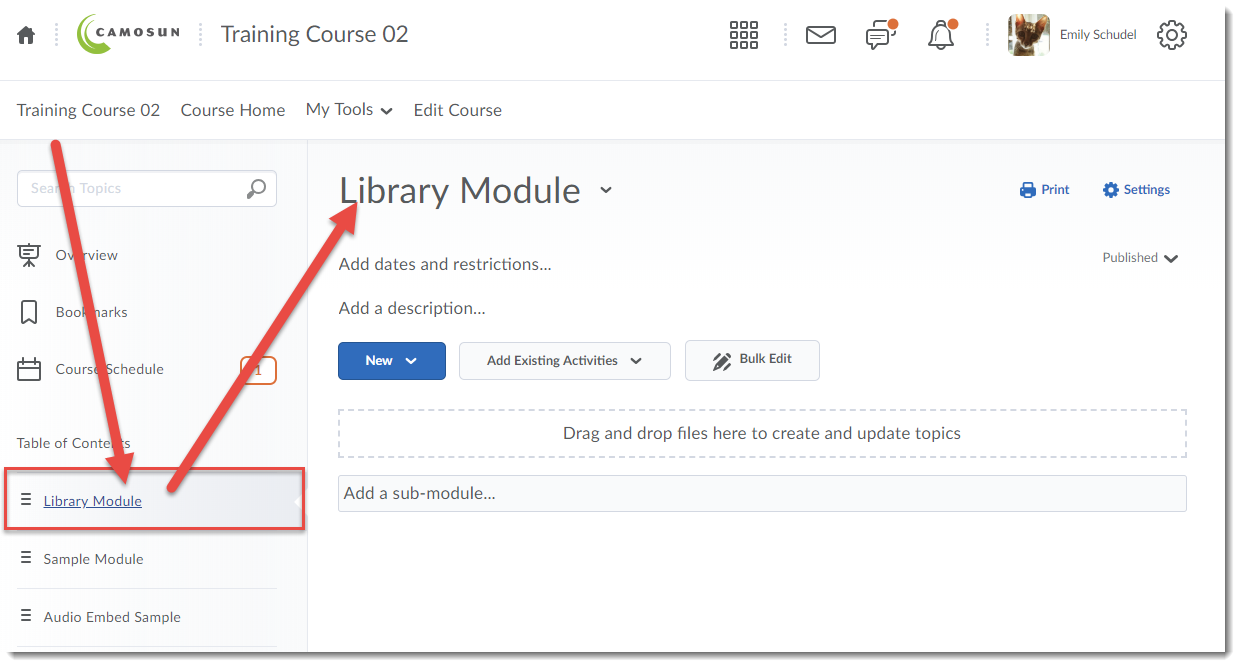
- Go to the Content tool in your course.
- In the Table of Contents box, click on the title of the Module to which you wish to add your library resource links.

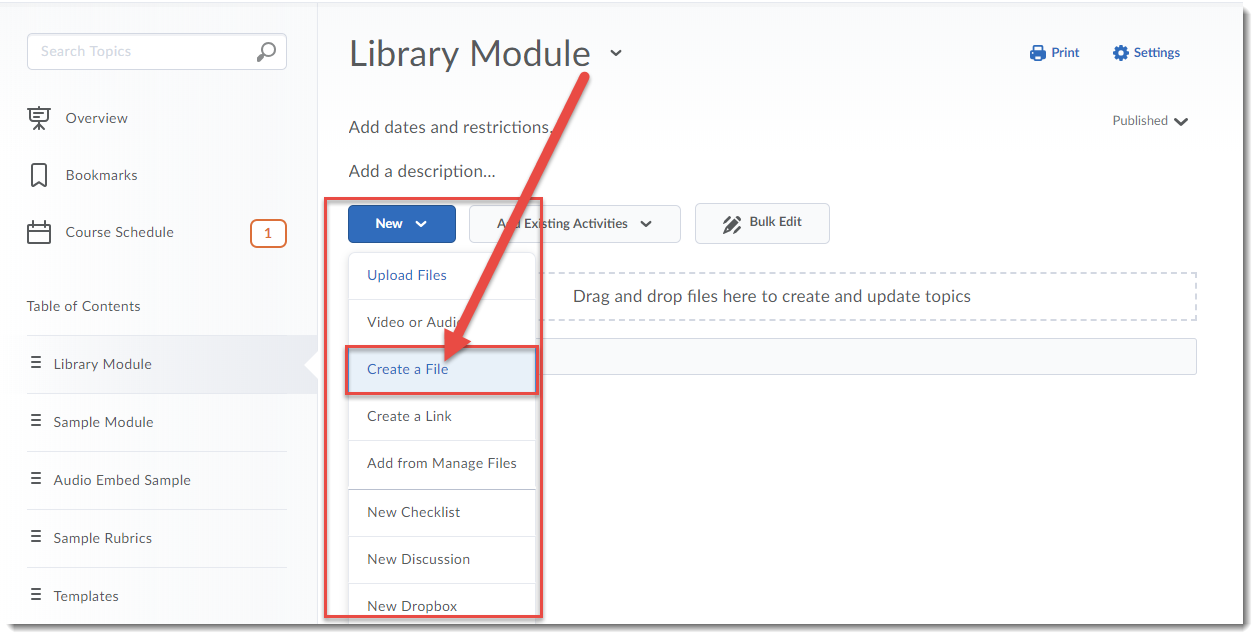
- Click on the New button and choose Create a File.

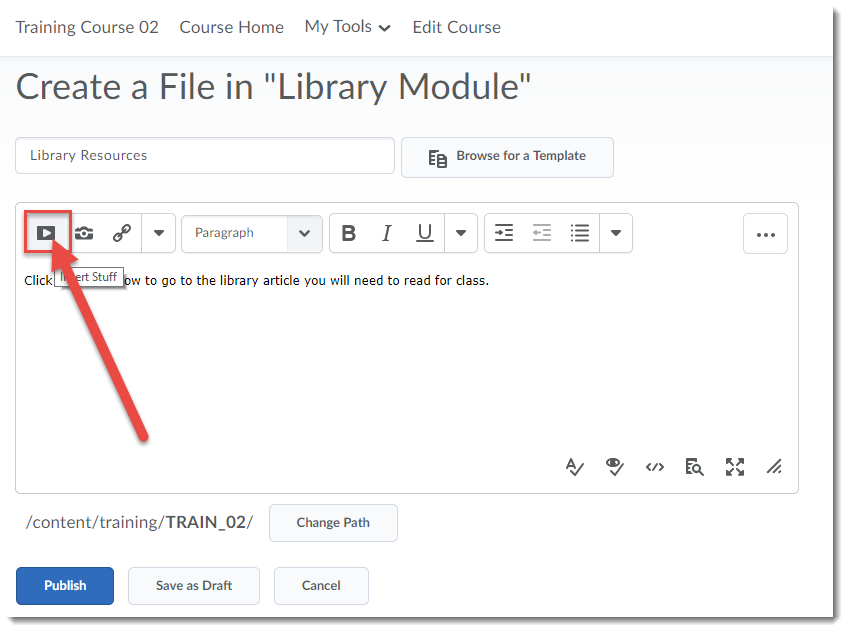
- Give your new Content page a Title, then add some text into the HTML editor (for example, to set the context for the article you are going to link to), then put your cursor where you would like the link to the library resource to appear (in the image below, the cursor is below the text). Then click the Insert Stuff icon.
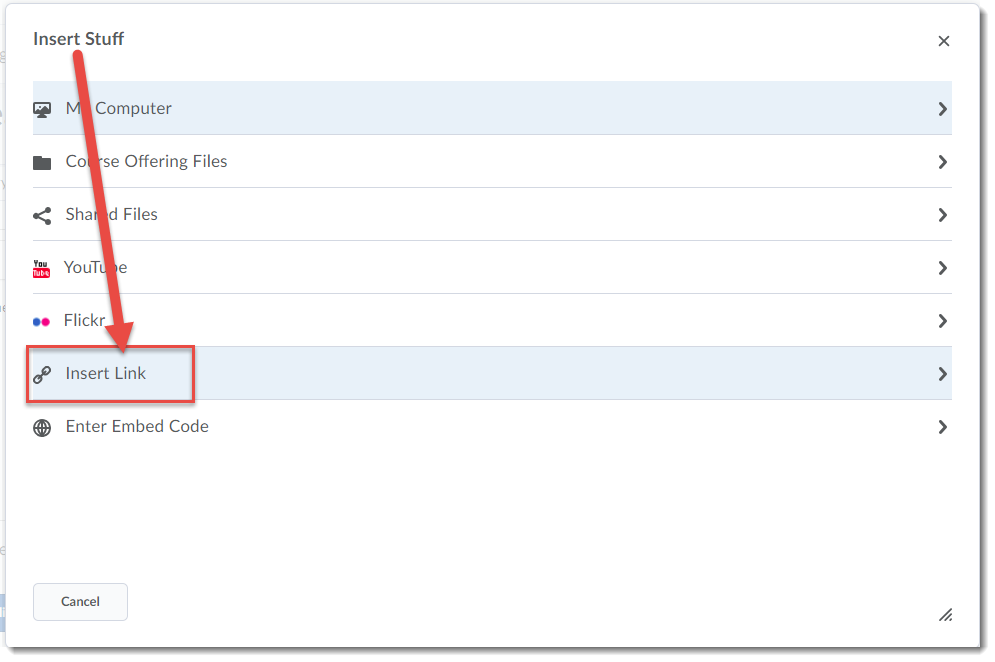
- In the Insert Stuff box that opens, click Insert Link.
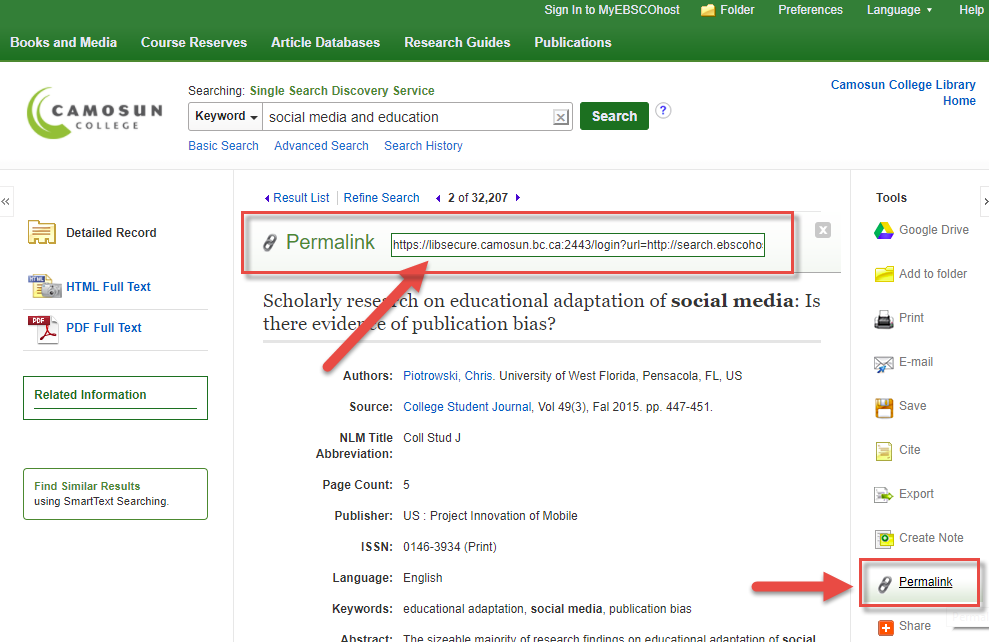
- Open a new browser tab or window, and go to the Camosun Library website to search for the article you wish to link to in D2L. (For more information on permalinks, persistent links and stable URLs, go to the Camosun Library’s Libguides (http://camosun.ca.libguides.com/c.php?g=92275&p=1238057).
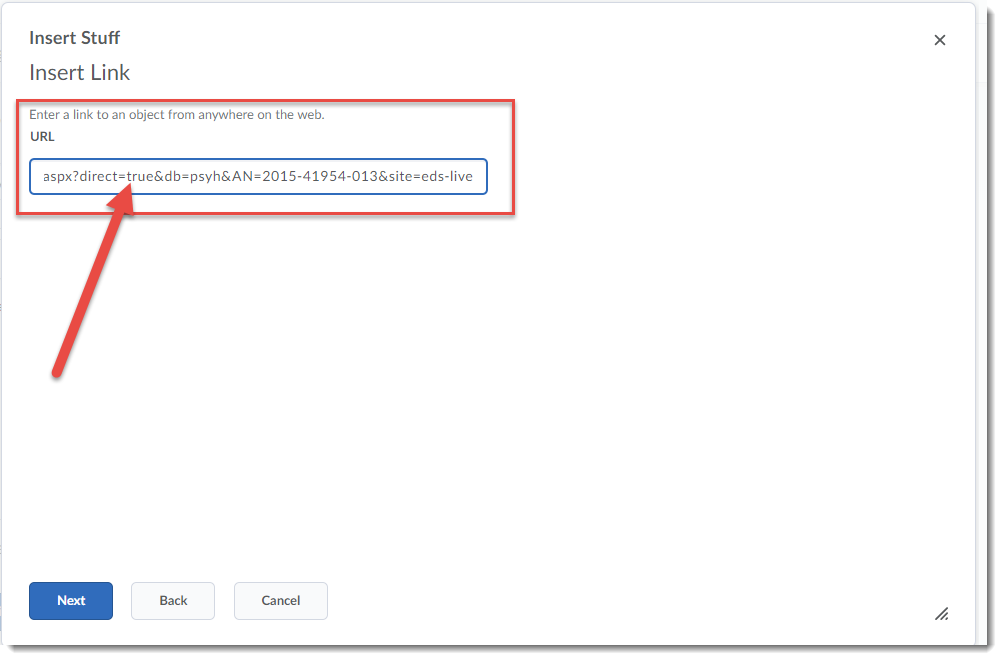
- If your licensed library e-resource has a permalink (or persistent link/stable URL) option, first click on the Permalink option, then copy the link that appears in the Permalink box and paste the permalink into the Insert Link URL box.

- If your licensed library e-resource does NOT have a permalink option, contact Camosun Library staff for help.
- If your licensed library e-resource has a permalink (or persistent link/stable URL) option, first click on the Permalink option, then copy the link that appears in the Permalink box and paste the permalink into the Insert Link URL box.
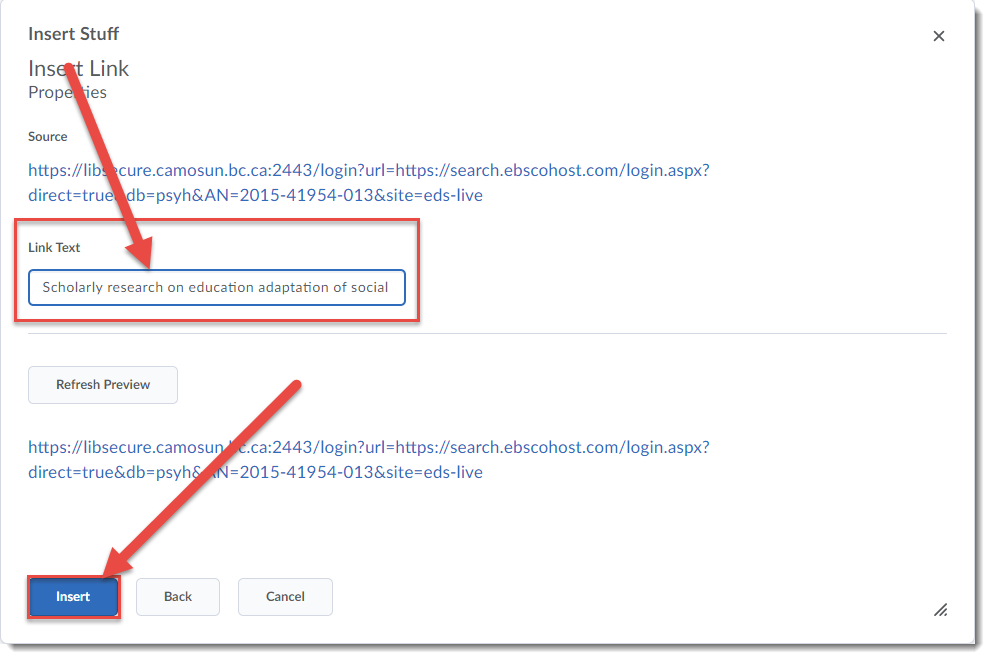
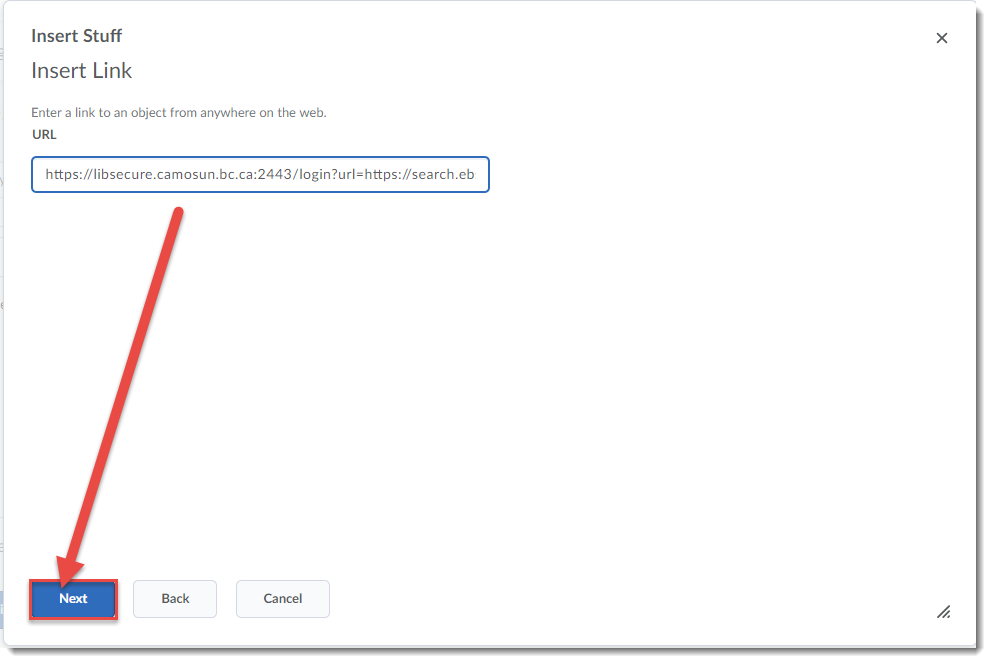
- Once you have copied the appropriate link into the Insert Link box, click Next.

- Add the title of the article into the Link Text box. If you don’t add anything here, students will see the full URL (which can be a bit long). Click Insert. The library resource has now been linked in your Content page. Note that the link will open in a new tab or window when the students click on it.
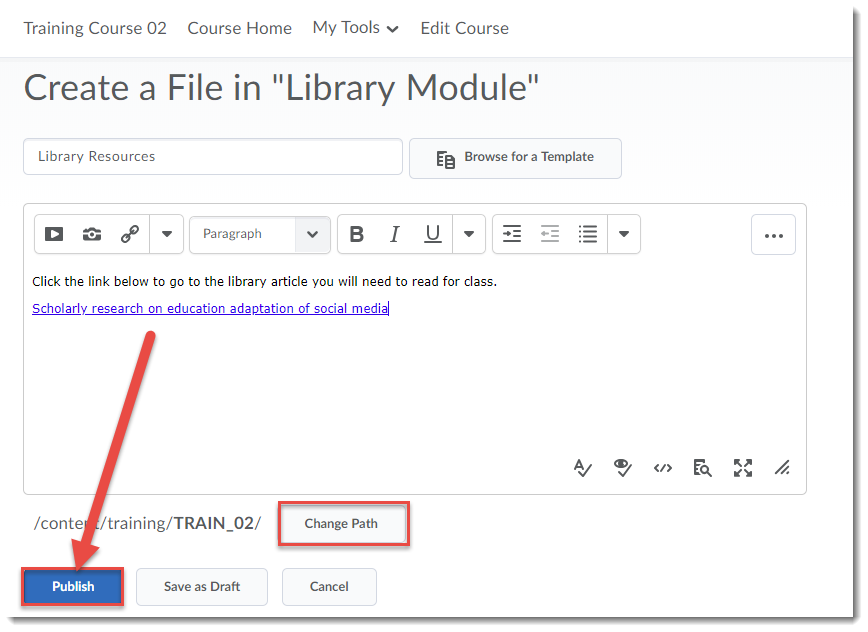
- Make sure that you use the Change Path button to save your file to the appropriate folder in your Manage Files area. Then click Publish or Save as Draft. Remember that if you save your file as draft, you will need to publish it before students can see it.


Things to Remember
DO NOT use the Quicklink –> URL option to add permalinks to the HTML editor in D2L. Always use Insert Stuff. In fact, we recommend you always use Insert Stuff when adding web links of any kind into an HTML page in D2L.
It’s a good idea to test the link to your library resource once you have Published or Saved as Draft to ensure that it works, and that it opens the page/document you wish it to open. We also recommend you test opening the link from off-campus to make sure students will also be able to access it from off-campus (using their C# and password.)
![]() This content is licensed under a Creative Commons Attribution 4.0 International Licence.Icons by the Noun Project.
This content is licensed under a Creative Commons Attribution 4.0 International Licence.Icons by the Noun Project.