This tutorial is designed for faculty who have previous experience using Kaltura in D2L, who have already downloaded Kaltura Capture, and will cover the steps involved when you wish to record a PowerPoint presentation with voiceover using Kaltura Capture through D2L. For further information, please contact desupport@camosun.ca for assistance.
Steps
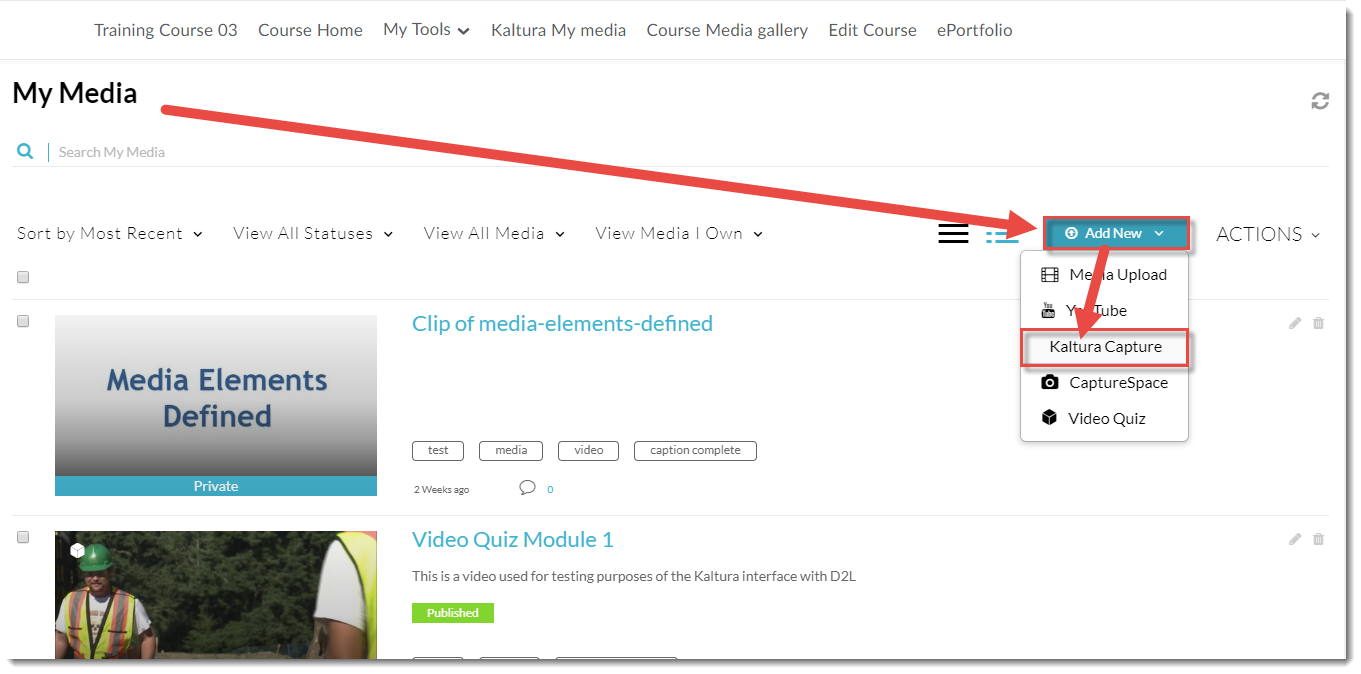
- Go to your course in D2L.
- Go to My media (through the link on your Navbar, or in your My Tools drop-down menu, or in a draft Topic in the Content tool).
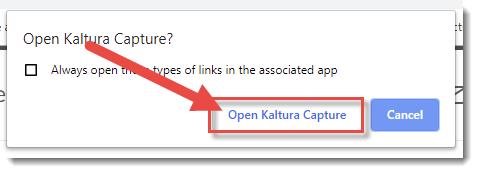
- Click Add New and select Kaltura Capture, then click Open Kaltura Capture.
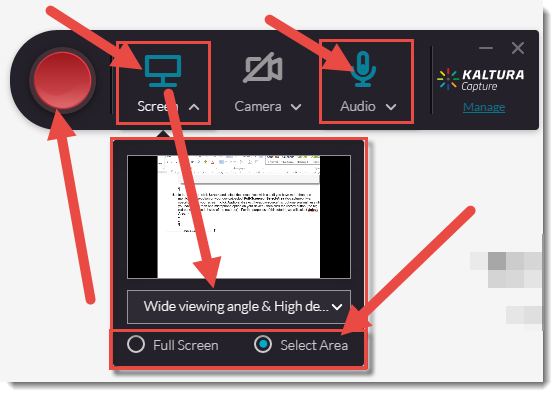
- First, open your PowerPoint presentation so you are ready to play the presentation once you start recording.
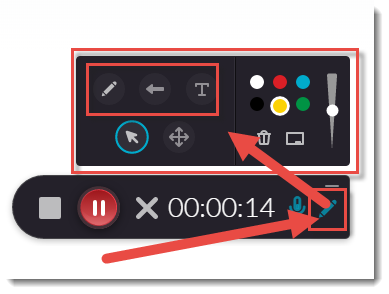
- In order to record a PowerPoint presentation with voiceover, you need to record your Screen and Audio, so in the recorder, click on Camera to turn that feature off (the icon will appear with a line through it).

- In the recorder, click Screen and select the screen you wish use (if you have more than one monitor source option on your device), select Full Screen or Select Area (to capture only a specific part of your screen), click Audio and select the audio source/microphone you wish use (if you have more than one microphone option on your device), then click the record button (the big red button on the left side of the recorder). For the purposes of this tutorial, we will select Full Screen.
- Click the record button. There will be a 3-second countdown before the recording started (you can click Cancel at any time).
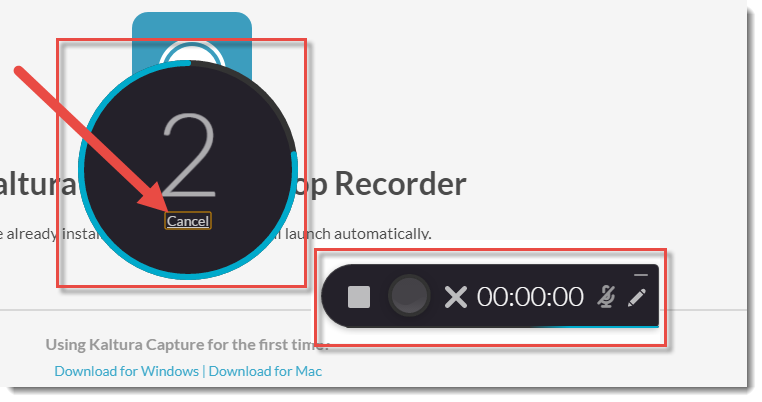
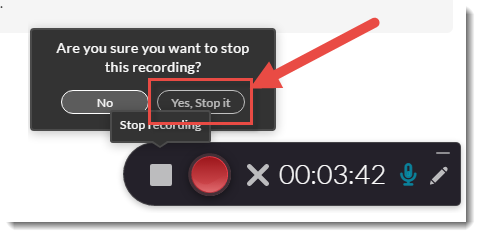
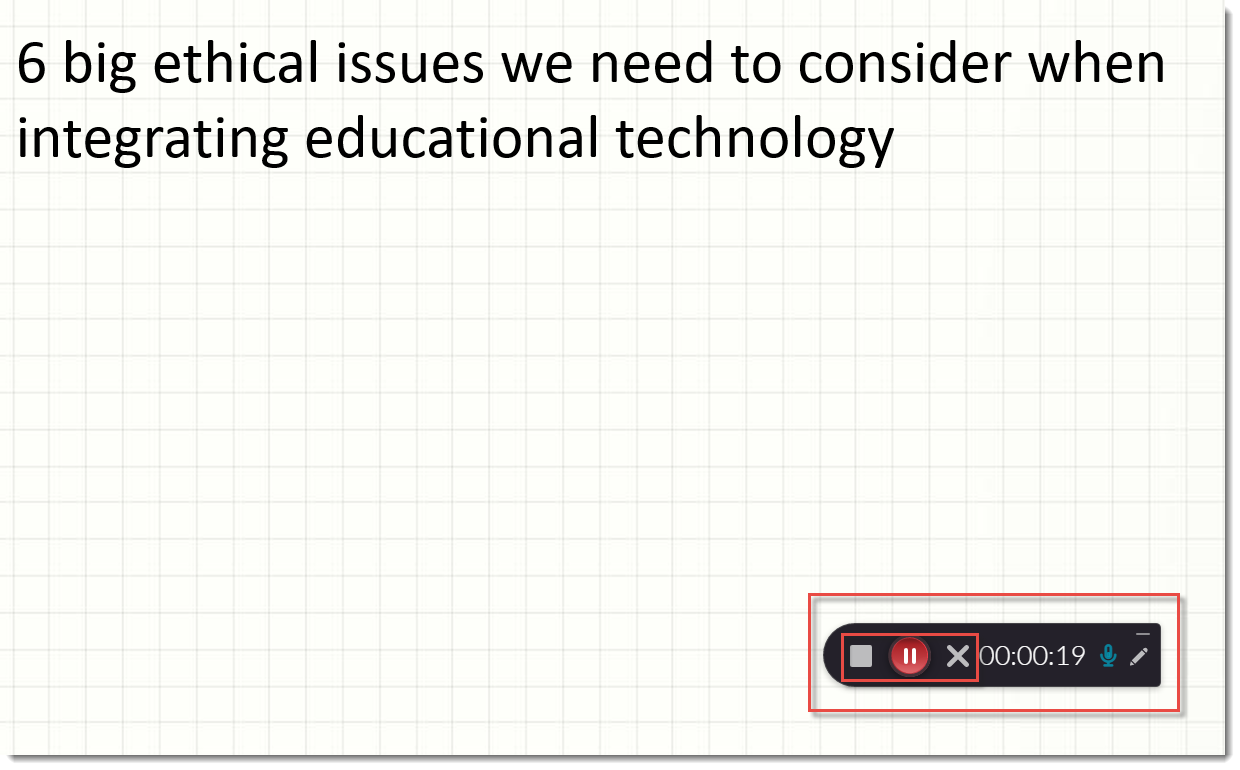
- When the recording begins, start your PowerPoint presentation, and begin clicking through it while talking about the slides. Click the Stop button when you are finished and want to save your recording, the Pause button to pause the recording, and the X to cancel the recording (this will NOT save it).

- You can also click the Pencil icon to open the drawing tools options. You can circle, point, add text, and change the colour and size of any of these options.
- When you click the Stop button, click Yes, Stop it to stop and save the recording.
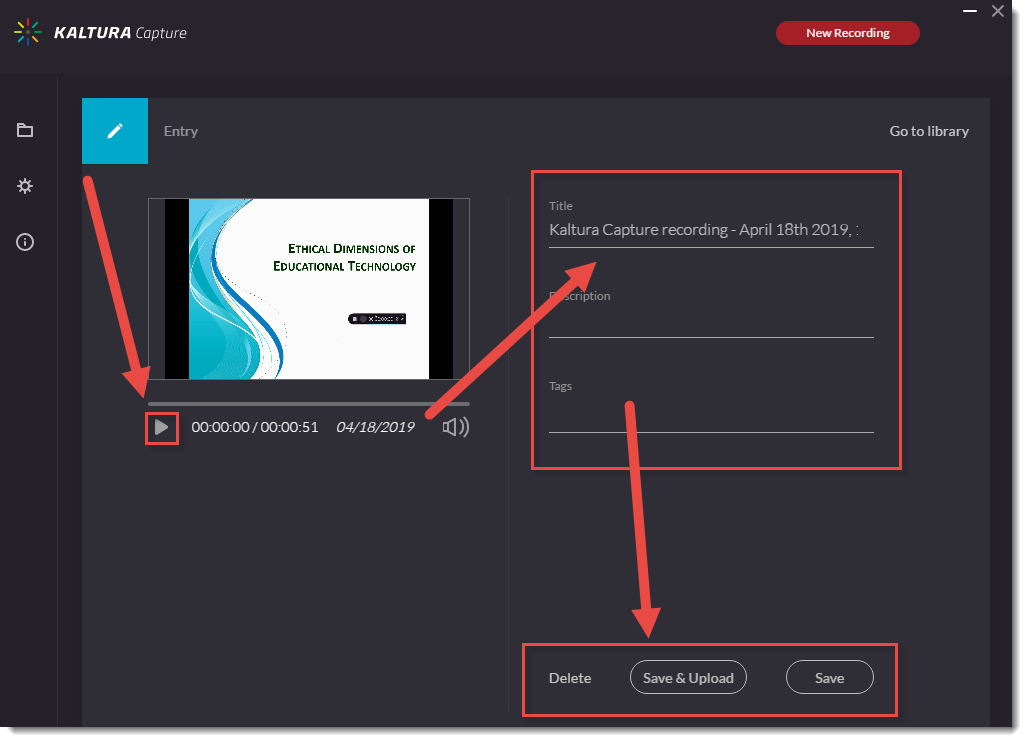
- The recording preview will then appear. You can play the recording, edit the Title, and add a Description and Tags. Click Save to save your changes, Save and Upload to save the recording and upload it to your My Media space, or Delete to delete the recording.
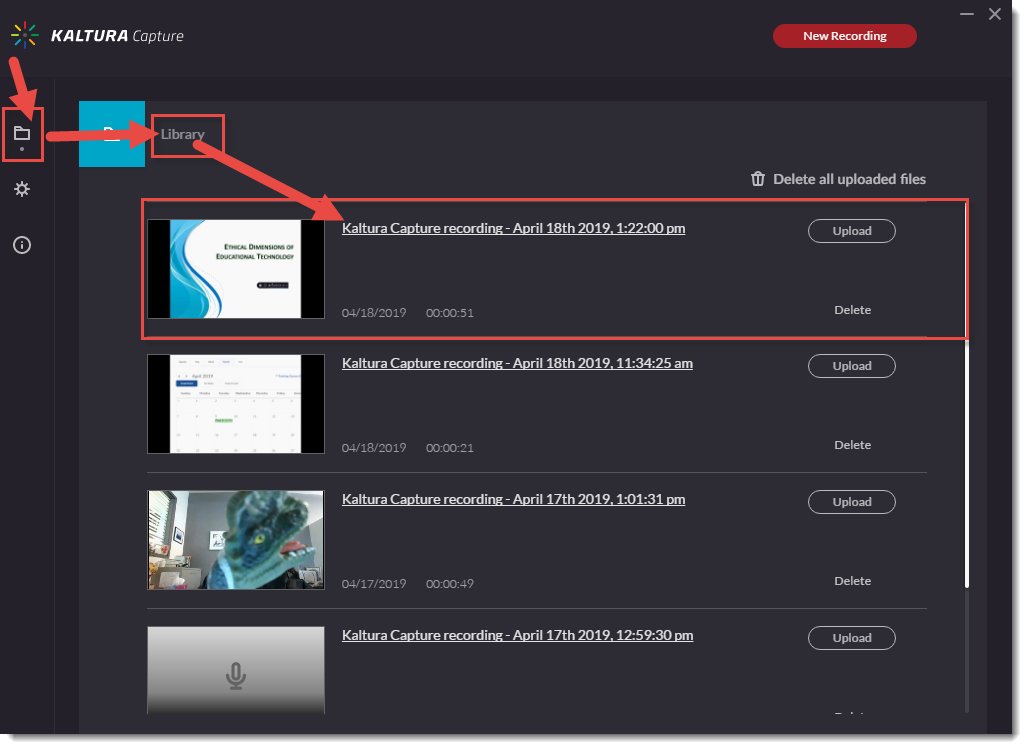
- The video recording will now appear in your Kaltura Capture Library.


Things to Remember
Before starting your recording, make sure to write down what you want to say, and what you will be doing in your presentation – where will you click, what and when will you circle things, what order are the steps, etc.? This is your script, and it will come in handy to keep you on track while you record, and to upload as an attachment with your recording for students who like to read along while they listen.
![]() This content is licensed under a Creative Commons Attribution 4.0 International Licence.Icons by the Noun Project.
This content is licensed under a Creative Commons Attribution 4.0 International Licence.Icons by the Noun Project.