If you use the Rubrics tool in D2L, you probably pull your hair out a little every time you try to add levels and criteria, and try to figure out what marks to apply to each criteria. So, let me take a moment to welcome you to the new Rubrics Creation Experience, which has now been enabled in Camosun’s D2L!
For the next several months, you will be given the option to opt-in or out of the new interface, but I highly recommend you opt in as this will eventually be the default rubric creation interface. This is what the Opt-In looks like when you click New Rubric:

Click Turn it on to enable the new creation experience.
You can turn off the new experience, if you don’t like it, by clicking on the little down arrow in the top right,

and then clicking Turn it off (or Leave it on if you decide to keep it!).

Now, let’s look at the new interface.
First, you only have one screen to work in. In the old interface, you had a Properties tab (where you gave the rubric a Name, set its Status, chose what kind of rubric you wanted to create, etc., and a Levels and Criteria tab. In the new interface, everything is selectable on one screen. The top part has the Name field, as well as Type and Scoring drop-down menus, and a Reverse Level Order option. You can change the Type and Scoring as you create the rubric if you want to see what different rubrics will look like. Let’s take a look:

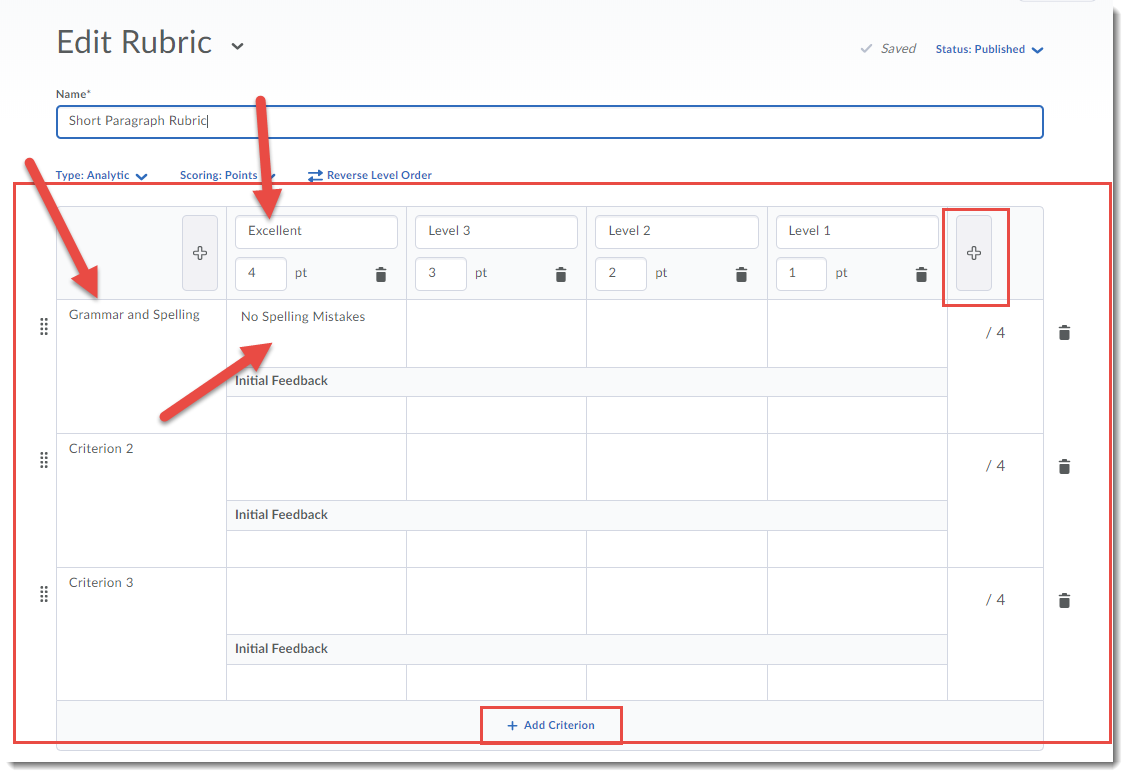
Underneath this, you have the Criteria and Levels table. You can click in the boxes to change the Criterion and Level names, the points, and the Feedback (each Feedback box is an HTML editor). You can add Levels by clicking the + at the far right, and add Criteria by clicking + Add Criterion at the bottom.
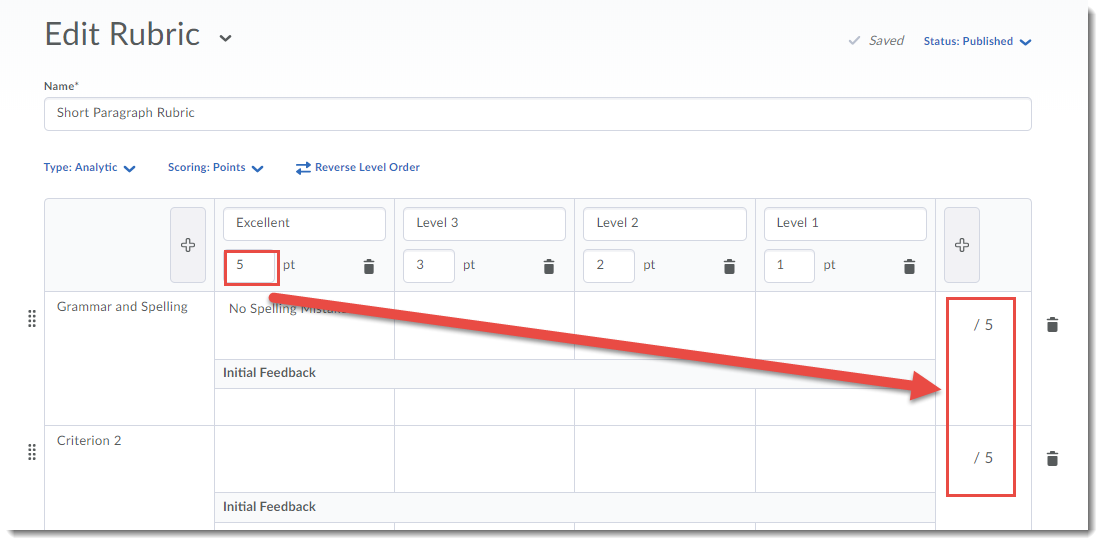
If you change the default points values, the points values at the end will also change automatically.
You still have to adjust the Overall Score table manually, so that the Level names match the main table, and the overall score matches the calculations from the main table. The Options listed are also the same, as is the Advanced Availability. Remember a rubric has to Allow new associations in Competencies for you to attach it to an assessment. Your changes will save automatically, so when you are finished working on your rubric, you can click Close.

Also a reminder – if you have rubrics in Dropbox or Discussions, and those assessments are connected to a Grade Item, those rubrics will automatically appear in the Grades Feedback area once you have published the feedback in the associated Dropbox or Discussion Topic.
If you have never used the Rubrics tool in D2L, we highly recommend that you either attend a Rubrics workshop (two are offered this May/June – one at Lansdowne and one at Interurban) or book an appointment with an instructional designer by emailing desupport@camosun.ca.
Have you investigated where the rubric feedback shows for students? It is not longer inserting into the Dropbox textbox on the individual submission.
Hi Julia! Can you give me a bit more information? Perhaps email me directly with a course name/code I can look at to see what might be going on…schudele@camosun.ca Thanks!