Now that Kaltura is available in Camosun’s D2L, and we have run the first round of workshops for faculty, it’s time to start sharing our tutorials on using Kaltura in D2L. Remember, Kaltura is our new streaming media service which you (and your students) can use to house your media files, create videos/audio, and integrate your media into your D2L course.
This first tutorial is designed for faculty who have previous experience using D2L, including adding items to a course Navbar and My Tools drop-down menu, and will cover the steps involved when you wish to add Kaltura’s My Media space to your D2L course. There are three scenarios covered – choose the one that works best for your purpose. For further information, please contact desupport@camosun.ca for assistance.
My Media is your own personal media storage space in D2L. The My Media link gives you access to only YOUR media space, and if a student can see the My Media link, it will give her access to HER media space. In addition, any media added to My Media will be available across D2L. This means you can add videos stored in your My Media to any of your D2L courses.
Scenario 1: Adding My Media to your NavBar
If My Media is linked on your NavBar or My Tools drop-down menu, students will also have access to their own media space in Kaltura (this will NOT have an impact on your My Media space.) Use this option if you would like students to be able to create or upload their own media for sharing in your D2L course (for example, if you would like them to add video/audio as an Assignment, or embed video as part of a Discussion).
Steps
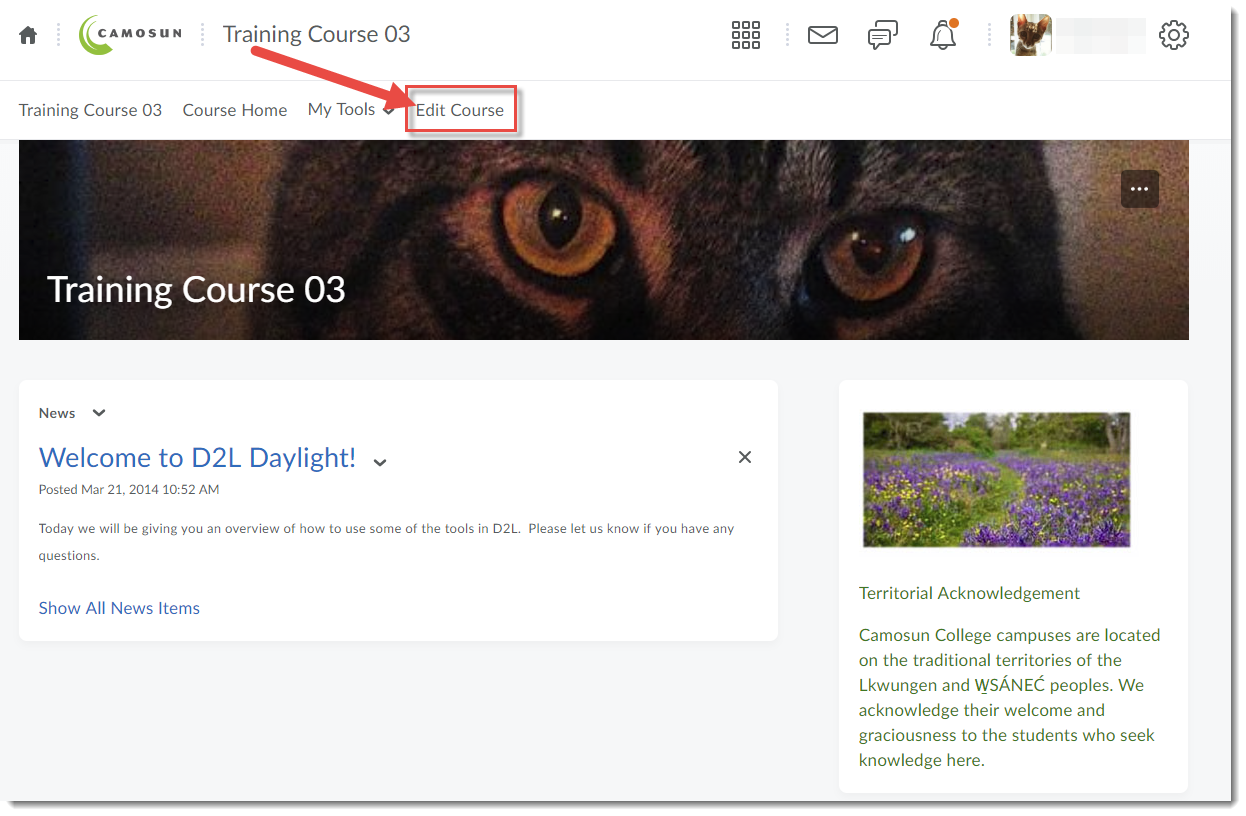
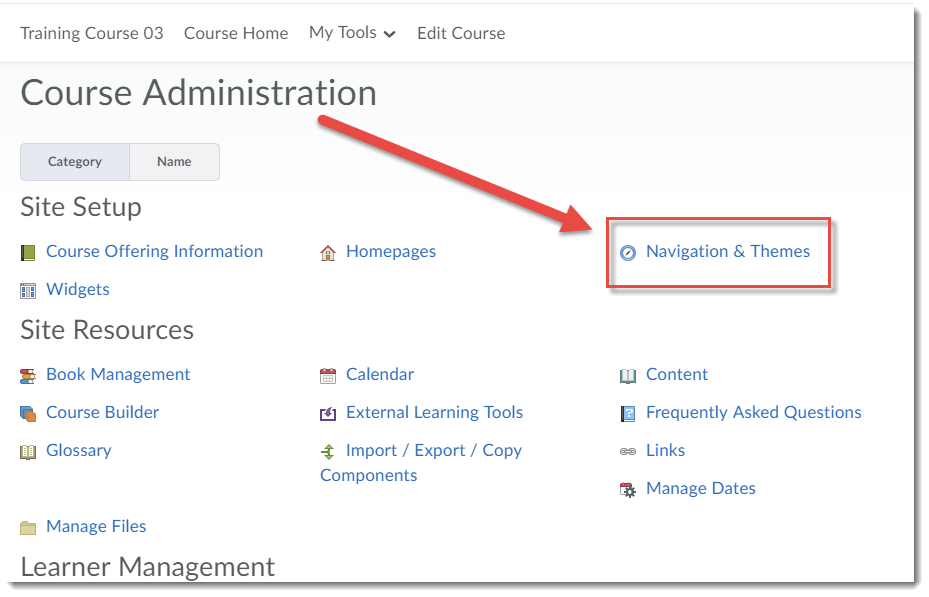
- Go to your course in D2L.
- Click Edit Course.
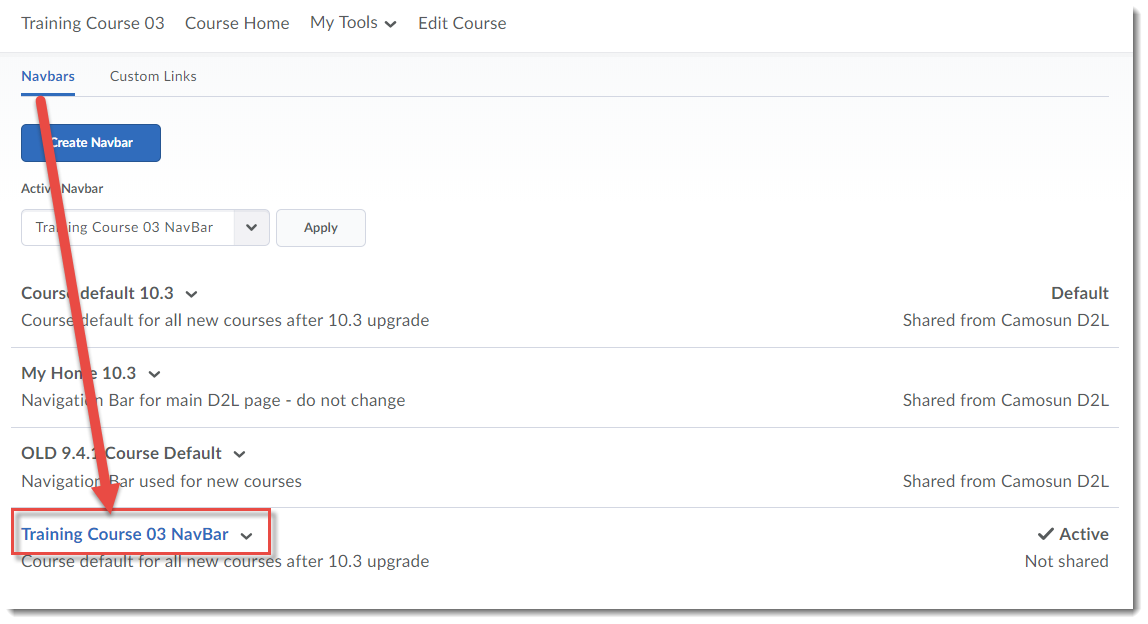
- Click Navigation and Themes.

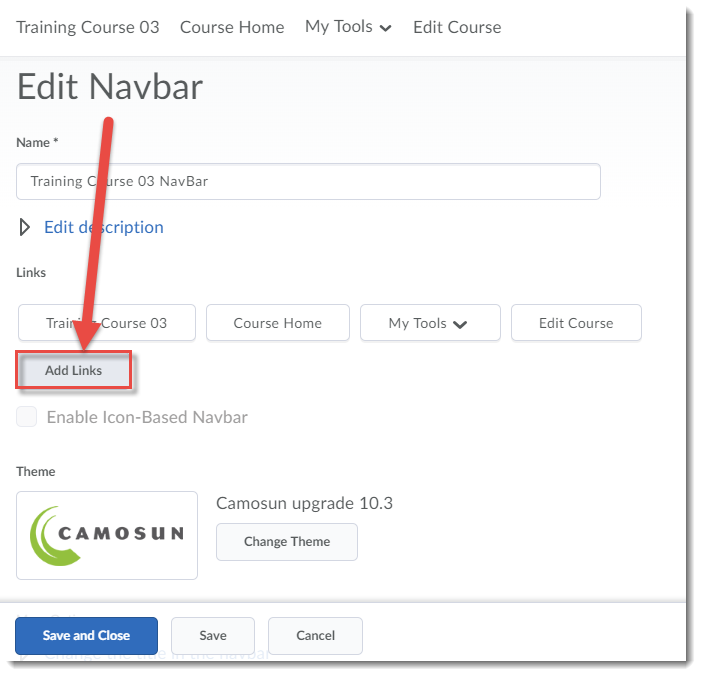
- Click the title of your course’s NavBar. (If you have not yet created your own NavBar, click the down arrow next to Course default 10.3 and click Copy – then click on the title of the Copy.)
- In the Links area, click Add Links.

- Scroll down until you find My Media, click the select box next to it, and click Add.
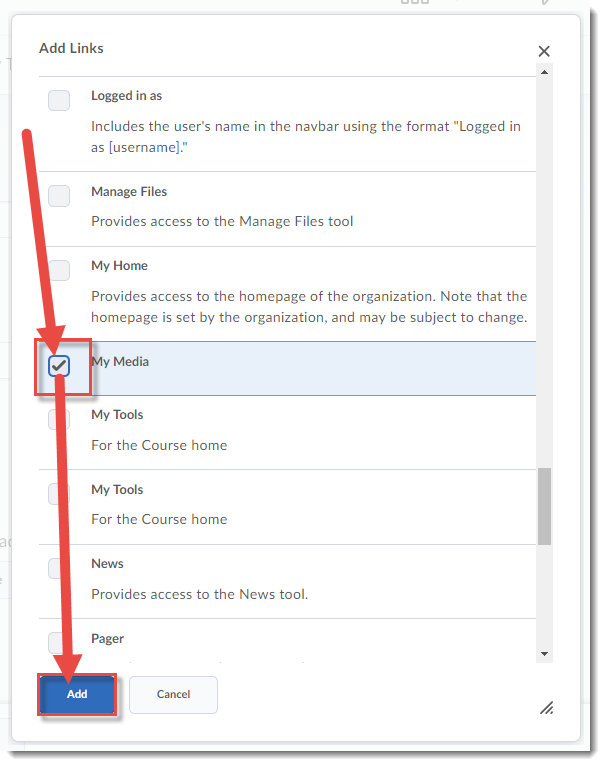
- Click Save and Close.
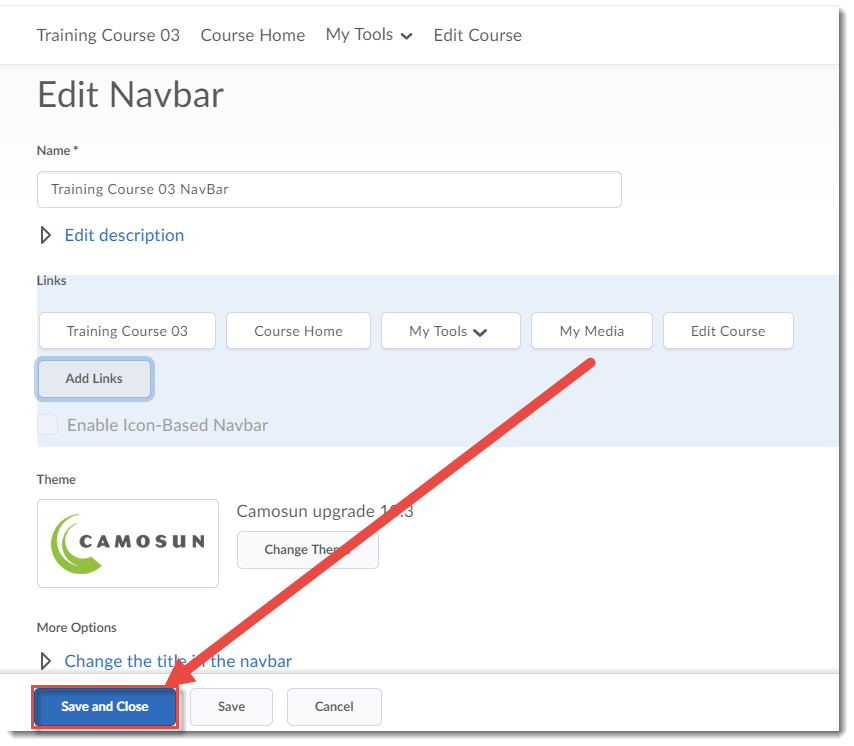
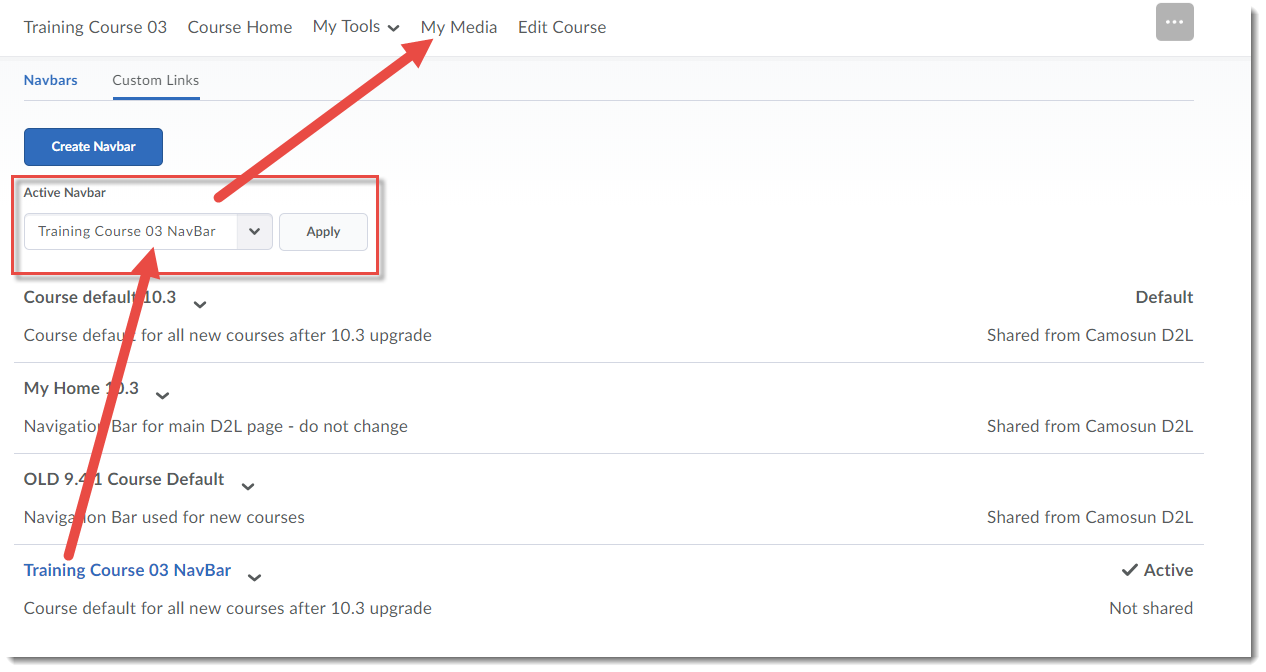
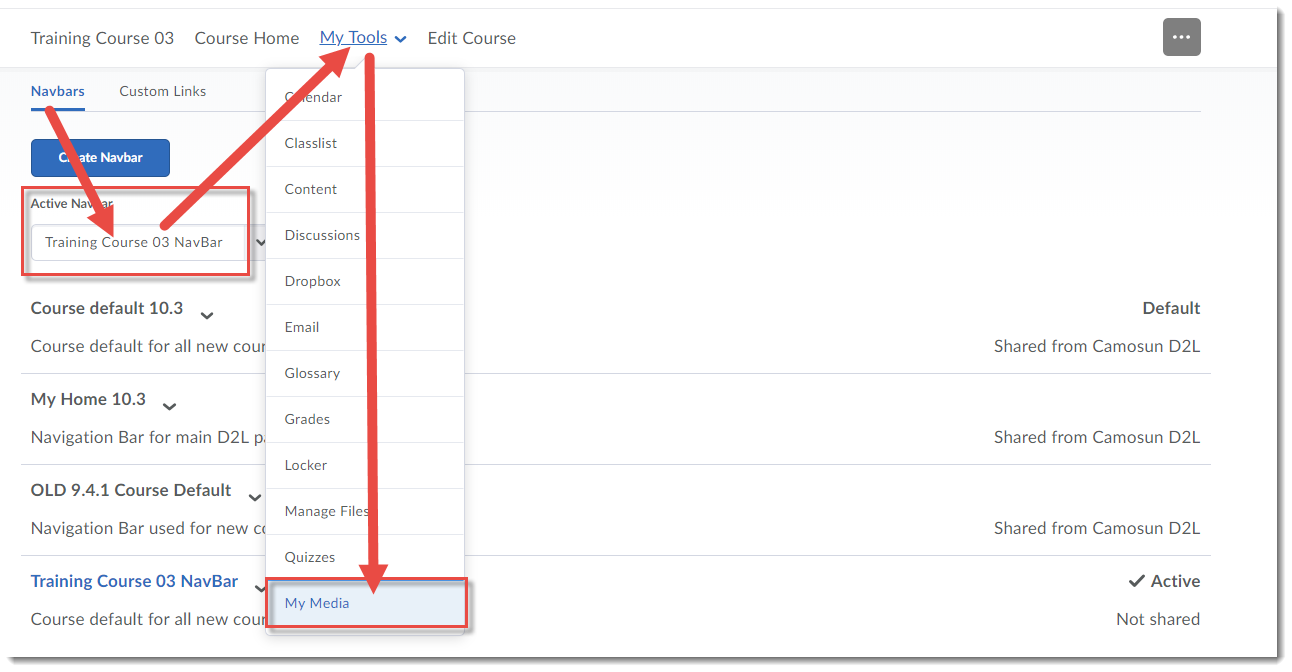
- Make sure your NavBar is selected as Active in the Active Navbar drop-down menu. You will then see the My Media link appear in your NavBar.


Scenario 2: Adding My Media to your My Tools drop-down menu
This tutorial will cover the steps involved when you wish to add the link to My Media to the My Tools drop-down menu on the NavBar in your D2L course. Note that if My Media is linked on your NavBar or My Tools drop-down menu, students will also have access to their own media space in Kaltura.
Steps
- Go to your course in D2L.
- Click Edit Course.
- Click Navigation and Themes.
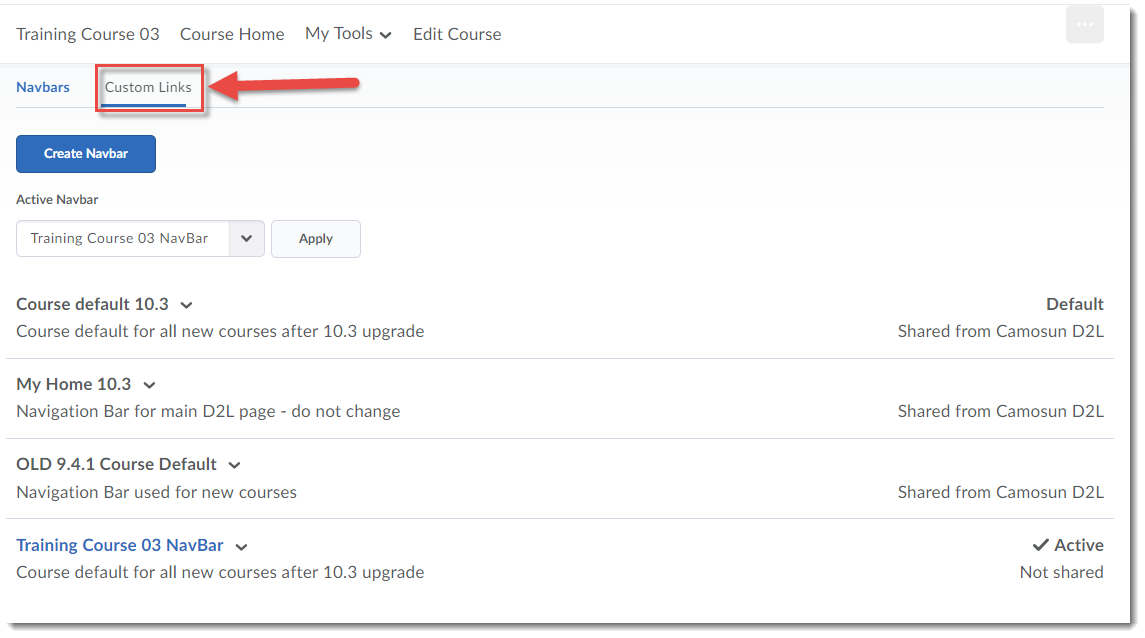
- Make sure you have already created custom NavBar for your course (see Customizing your Navigation Bar for more information). Then click Custom Links.
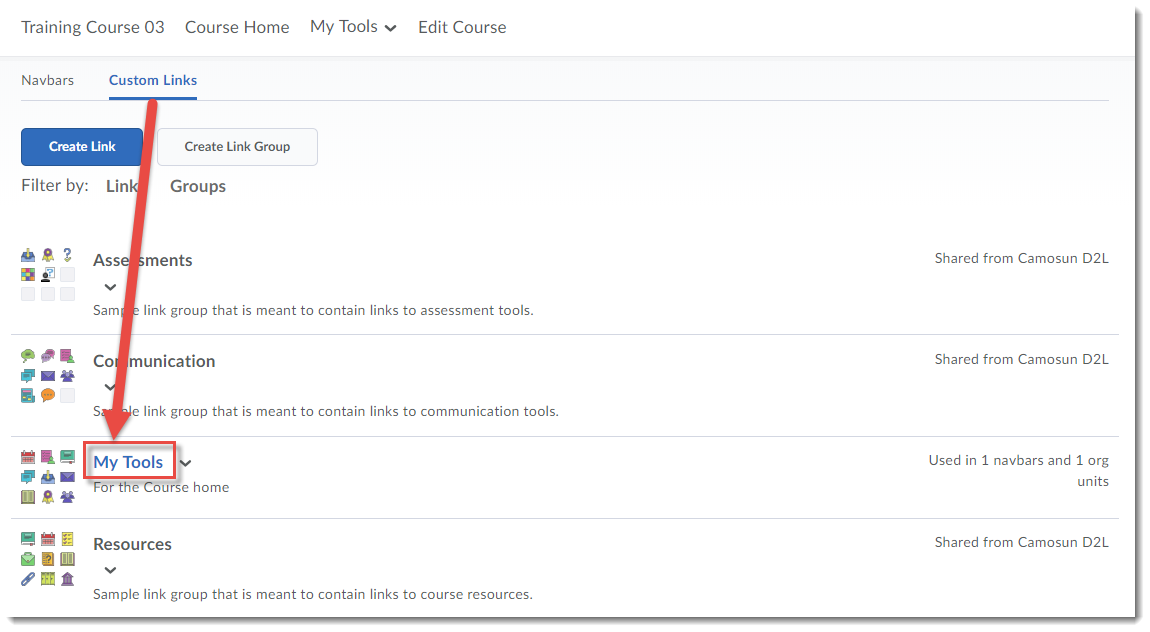
- Click My Tools.

- Scroll down to the Links area and click Add Existing Link.
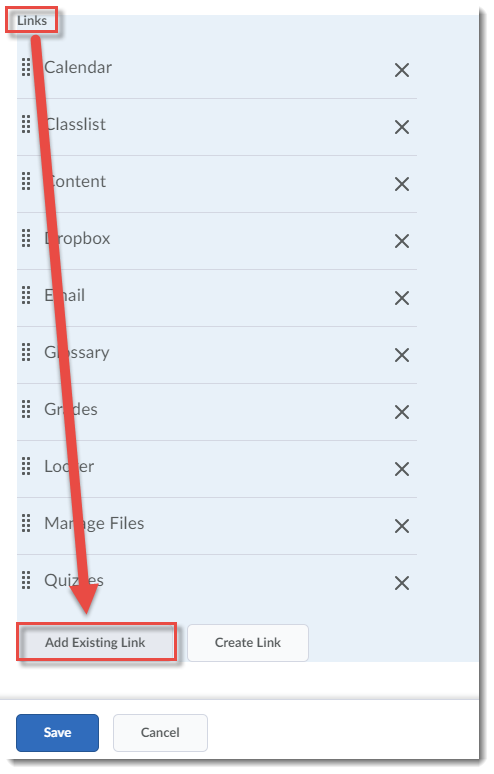
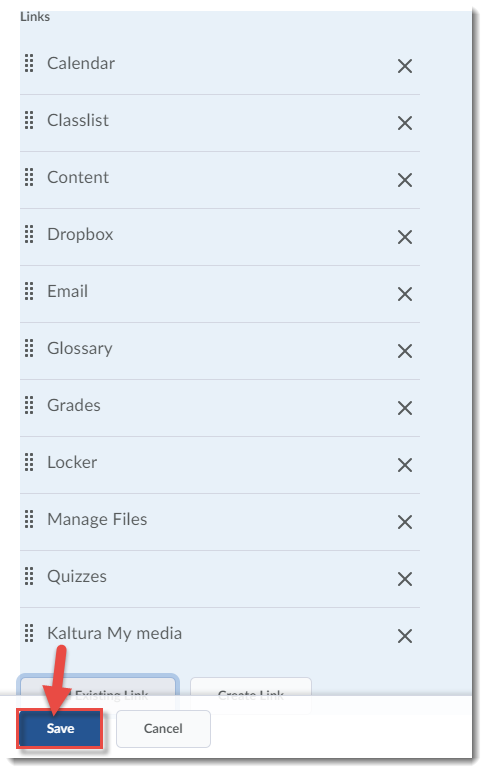
- Scroll down until you find My Media, click the select box next to it, and click Add.
- Click Save.
- Click Navbars and make sure your NavBar is selected as Active in the Active Navbar drop-down menu. You will then see the My Media link appear in your My Tools drop-down menu.

Scenario 3: Adding My Media in a draft Topic in Content
This tutorial will cover the steps involved when you wish to add the link to My Media to a draft Content Topic – this will mean that students will not have access to their own My Media space through your course site.
Steps
- Go to your course in D2L.
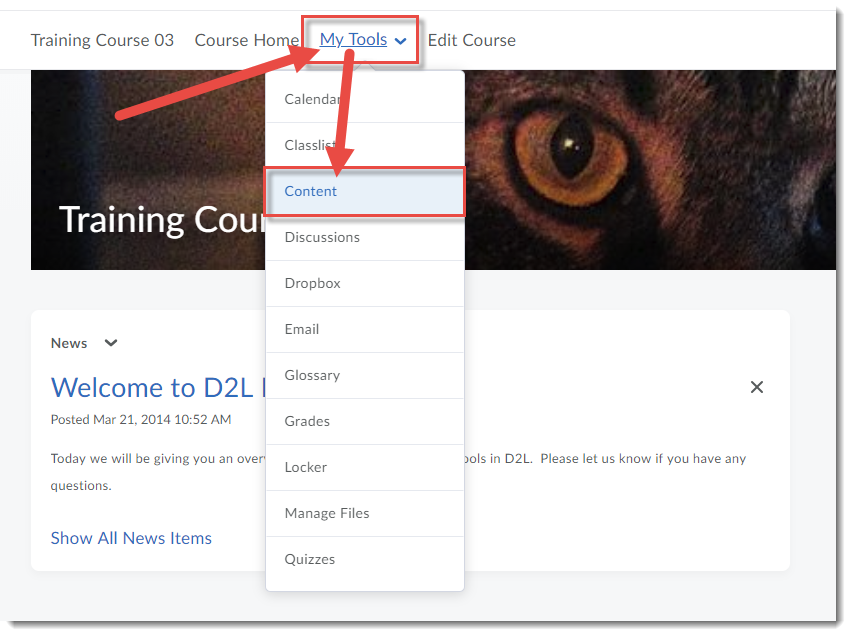
- Click My Tools and select Content.

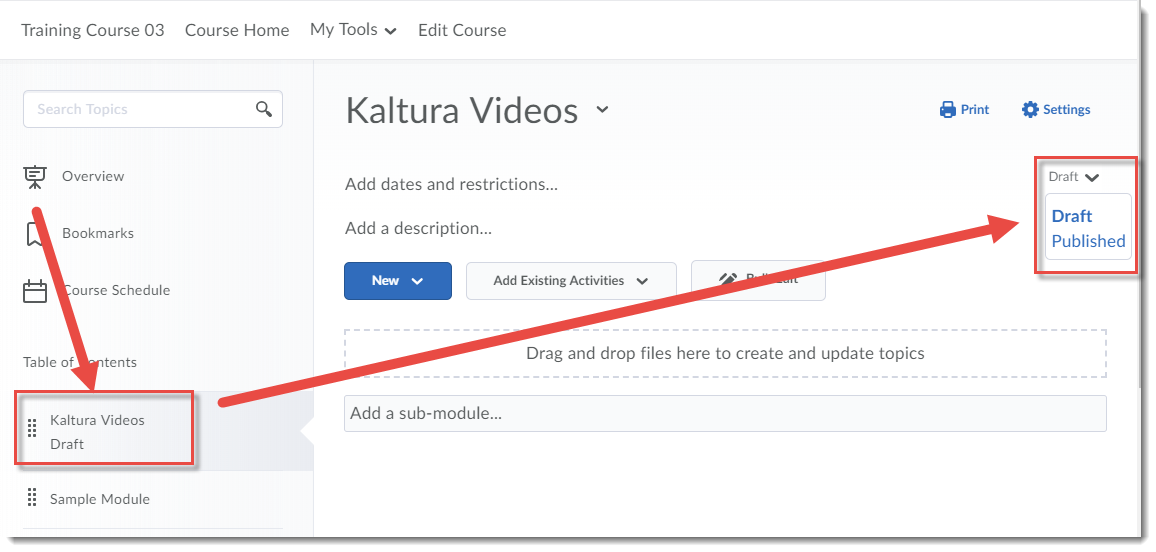
- Click the title of the Module you would like to add your draft Topic to. For the purposes of this tutorial, we have added a Module called Kaltura Videos, and set it to Draft.
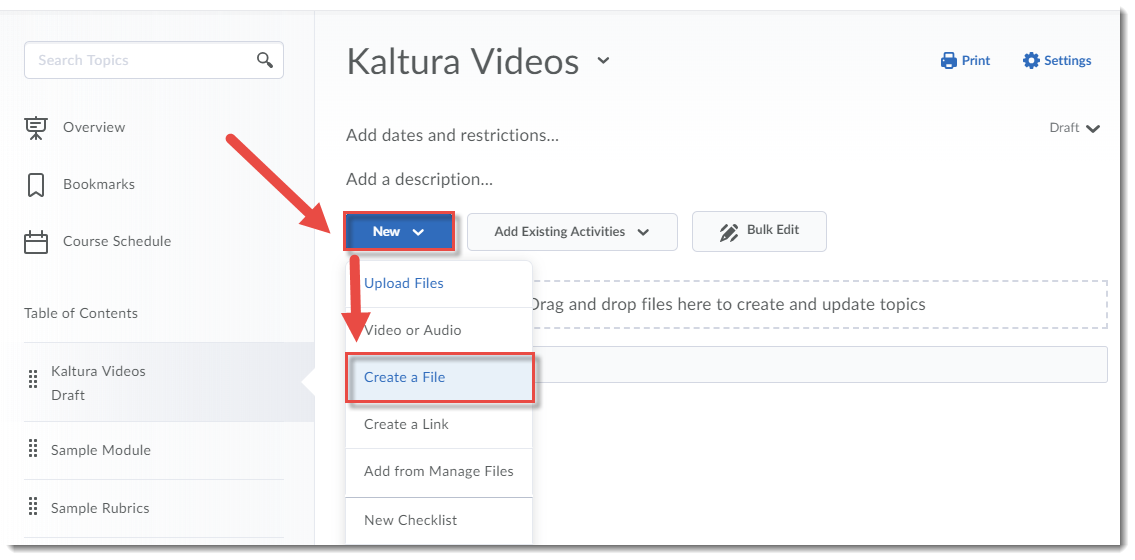
- Click New and select Create a File.
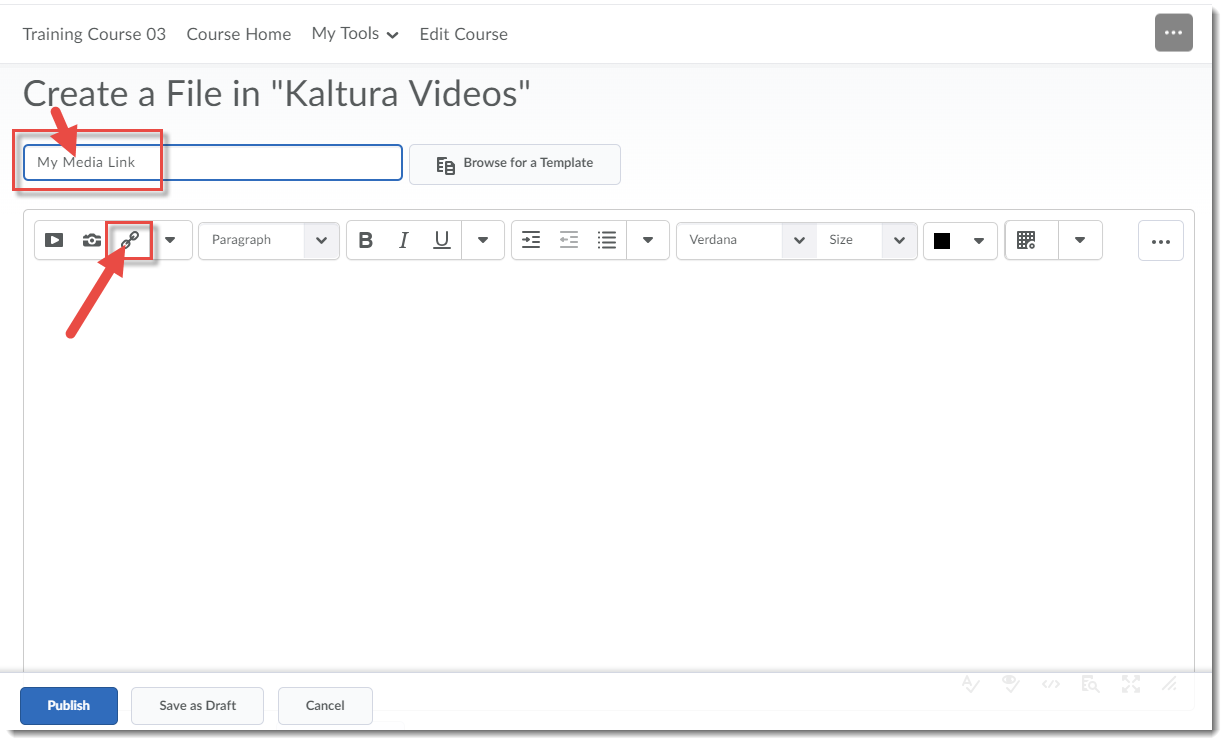
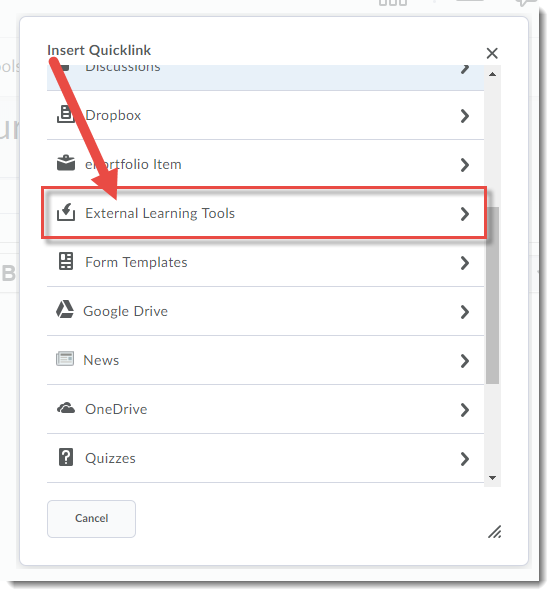
- Give your Topic a Title. Then, in the HTML editor box, click Insert Quicklink.
- Scroll down, and click External Learning Tools.
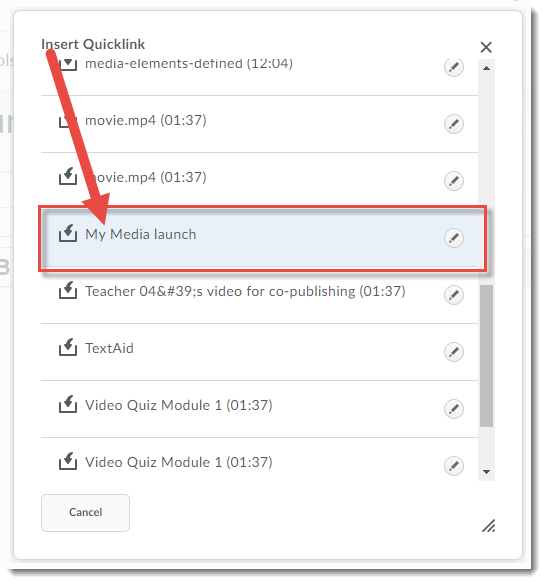
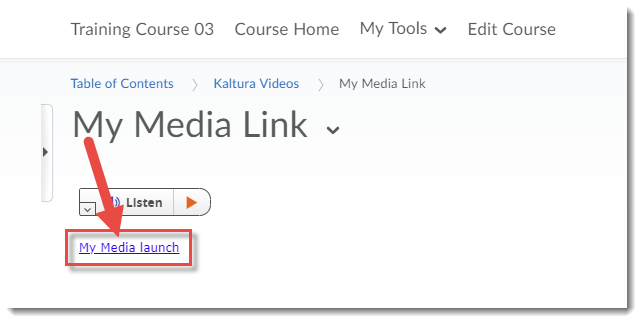
- Click My Media launch.
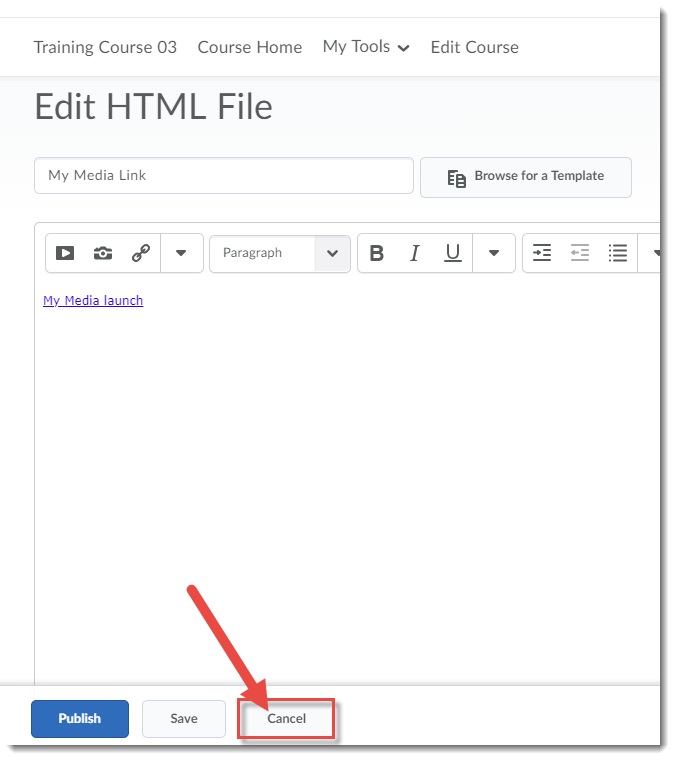
- Click Save as Draft.

- Click Cancel.
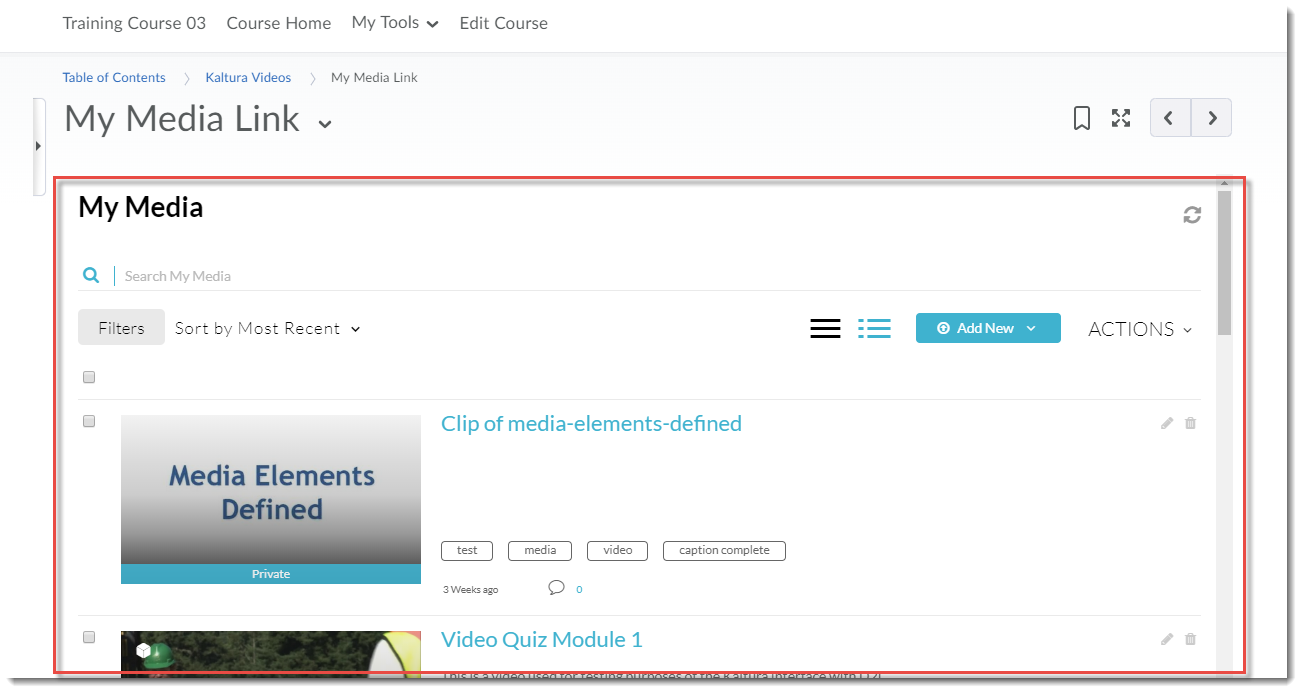
- Click the My Media launch link, and the My Media space will open in the Topic window.


Things to Remember
If you are not sure how to create a new NavBar or My Tools drop-down menu, see the tutorials Customizing your Navigation Bar and Customizing your My Tools Menu in the On-Demand Training course for more information.
If you need more help creating Topics in the Content tool, see the tutorial Creating Modules and Topics in the Content Tool for more information.
![]() This content is licensed under a Creative Commons Attribution 4.0 International Licence.Icons by the Noun Project.
This content is licensed under a Creative Commons Attribution 4.0 International Licence.Icons by the Noun Project.