This tutorial is designed for faculty who have previous experience using D2L and Blackboard Collaborate Ultra, will cover how to use the Whiteboard in your Blackboard Collaborate Ultra session. For further information, please contact desupport@camosun.ca for assistance.
Steps
- Go to the location in your D2L course site where you have linked to your Blackboard Collaborate Ultra room (for example, in the Content tool), click on your Blackboard Collaborate Ultra session and enter your session.
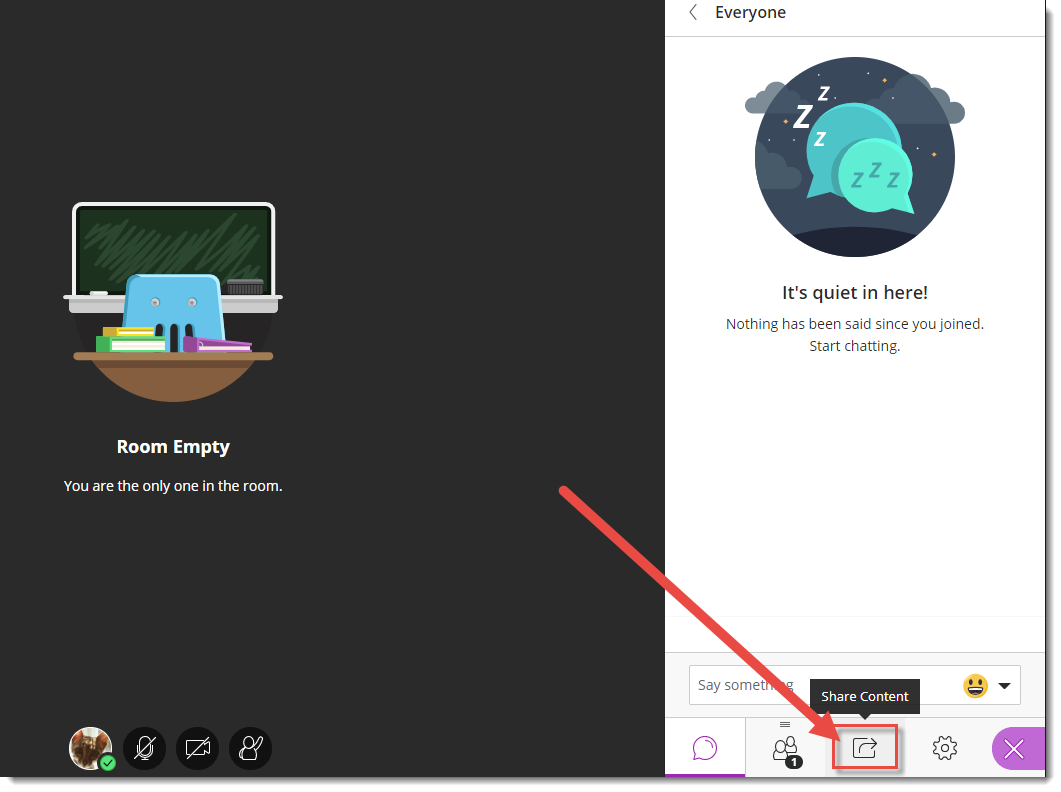
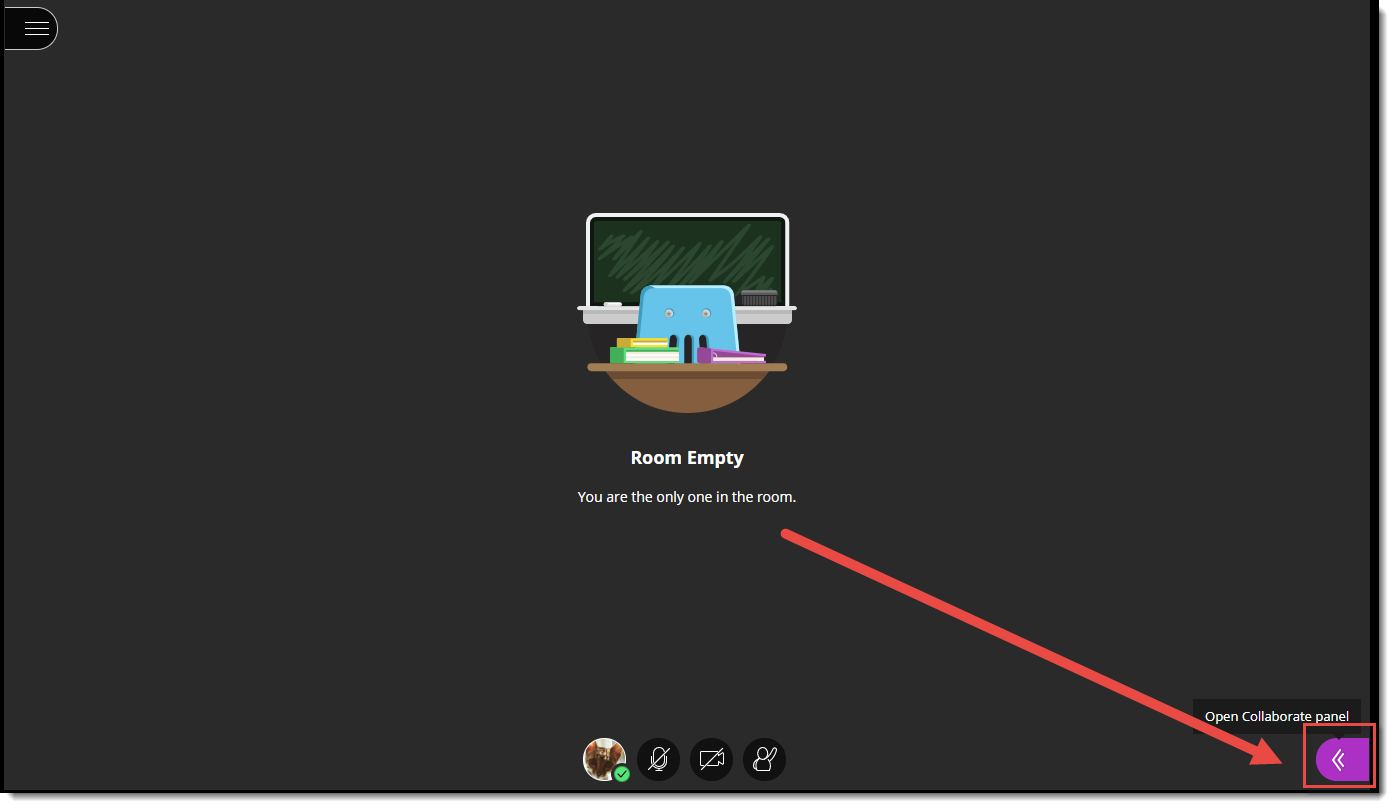
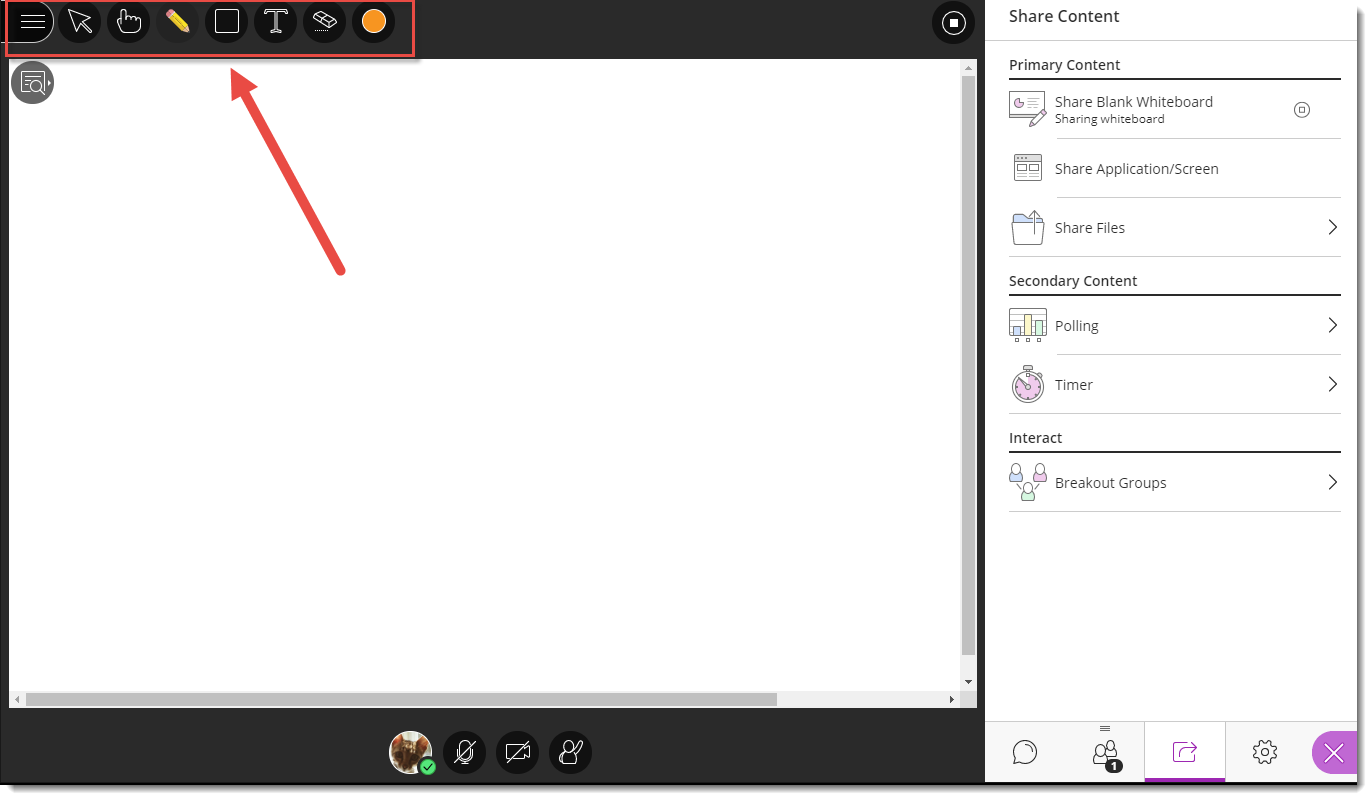
- Open the Collaborate panel (the bottom right icon).

- Click the Share Content icon.
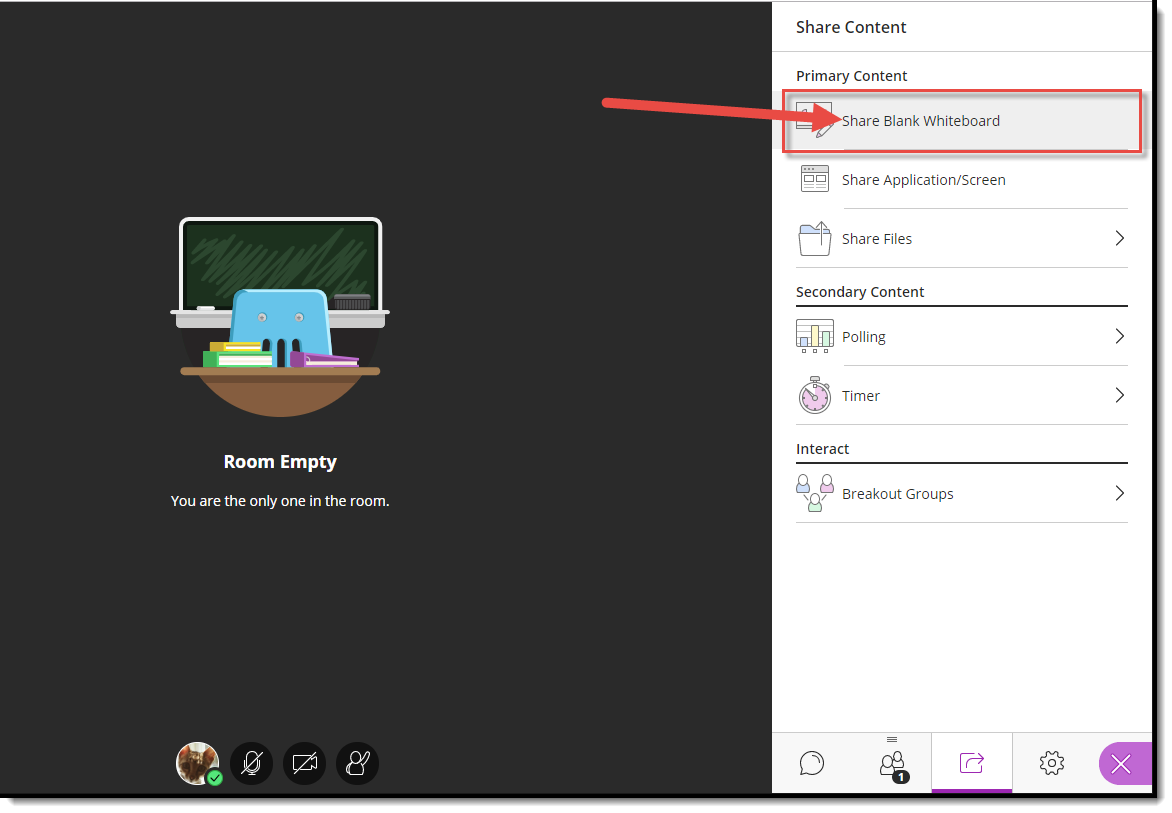
- Click Share Blank Whiteboard. The Whiteboard will open in the main session area.
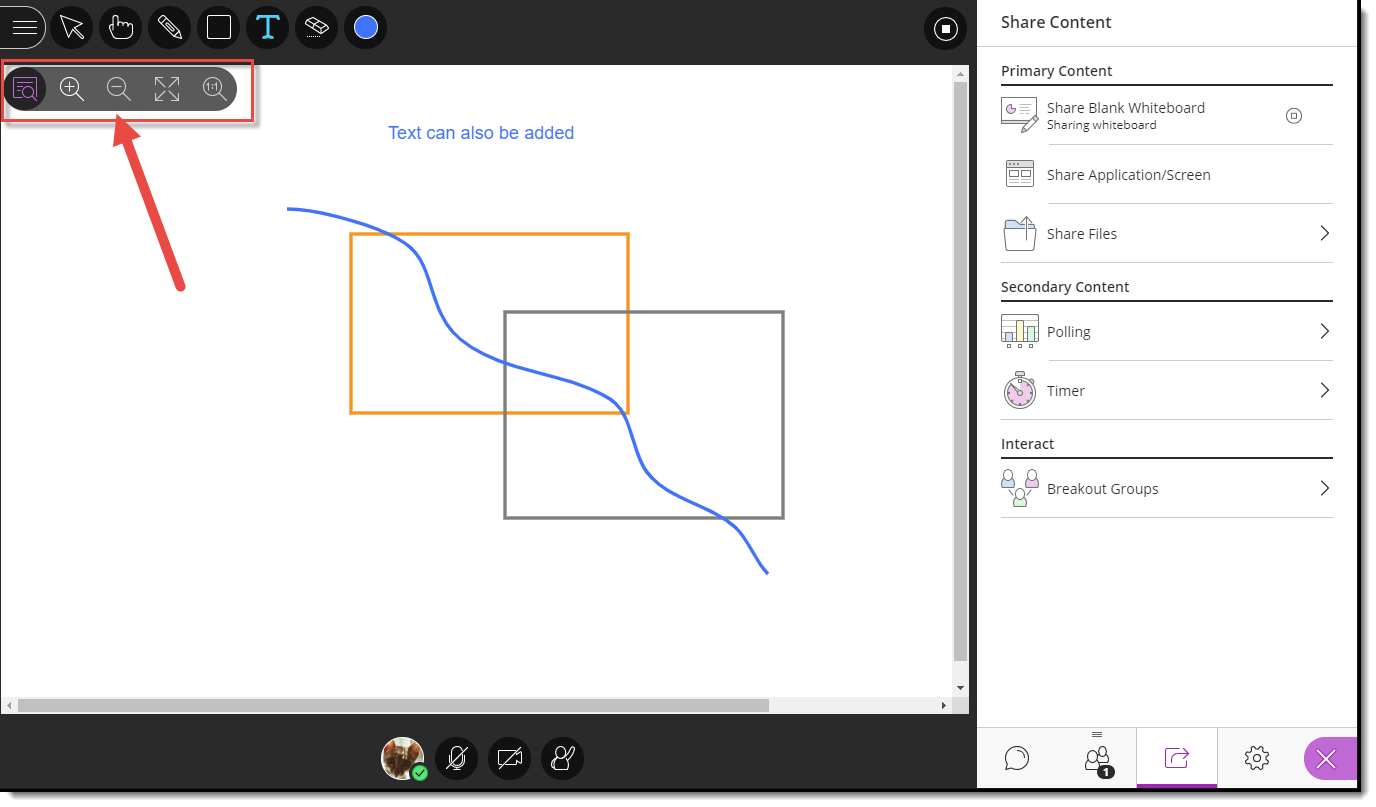
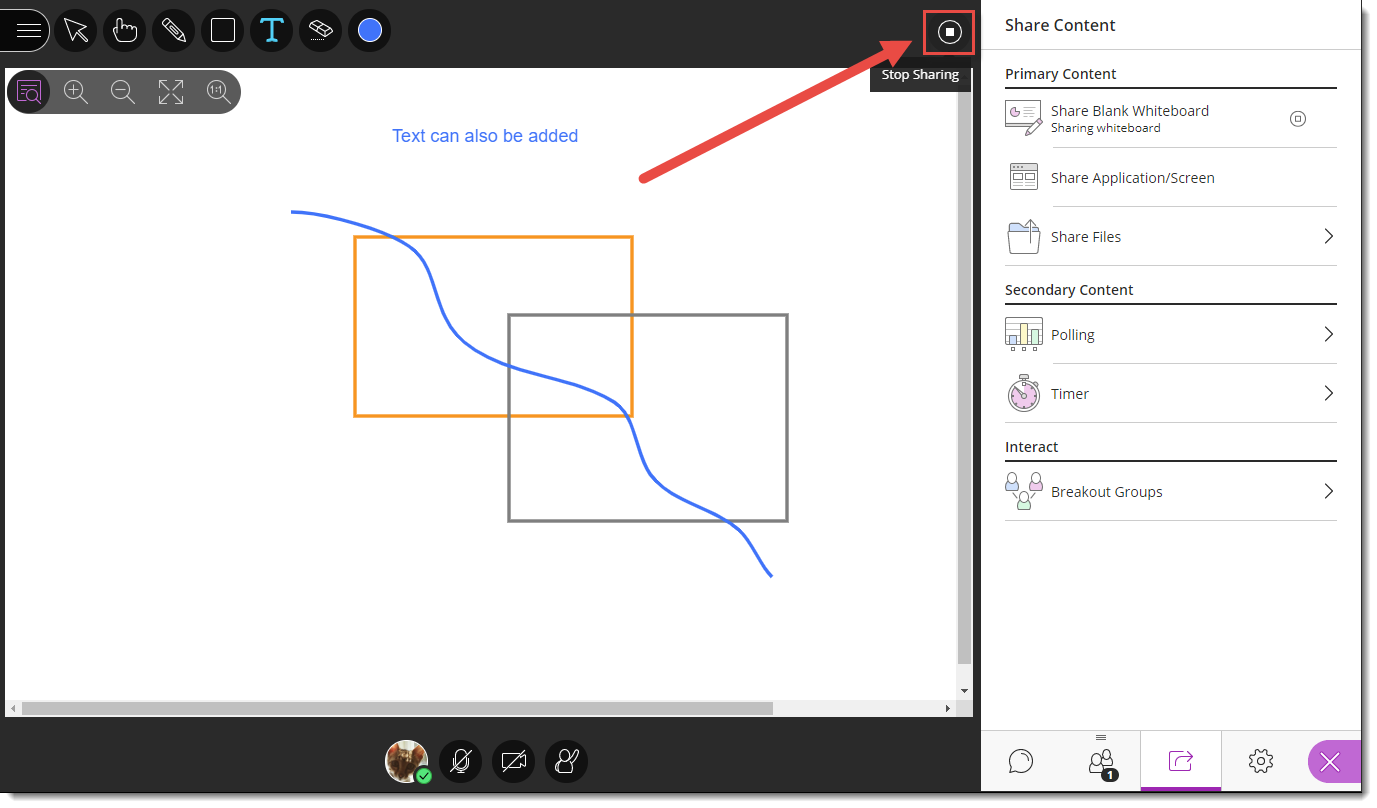
- Use the drawing tools at the top-left to Select items, Point to items, draw with the Pencil, add Shapes, write Text, and Clear everything (note that there is NO undo for this!). When you select Pencil, Shapes, or Text, the Colours selector will also appear.

- You can also use the View Controls to Zoom In, Zoom Out, see the Best Fit, and view the Actual Size.
- Click the Stop icon (top right of the slide in the main window) to stop sharing the Whiteboard.


Things to Remember
You can’t save a Whiteboard session, and once you have stopped sharing the Whiteboard, it will disappear. If you need to keep a copy of what happens in the Whiteboard, you can either use the screen printing option on your computer, or right-mouse click on the whiteboard, to save an image of the Whiteboard to your computer.
You can’t add an image (picture, graphic, etc.) to the Whiteboard. To present and work with an image in the main session area, you need to use Share Files.
![]() This content is licensed under a Creative Commons Attribution 4.0 International Licence.Icons by the Noun Project.
This content is licensed under a Creative Commons Attribution 4.0 International Licence.Icons by the Noun Project.