This tutorial will cover how to share your computer screen within your Blackboard Collaborate Ultra session, and is designed for faculty who have previous experience using D2L, and who have had some experience with Blackboard Collaborate Ultra. For further information, please contact desupport@camosun.ca for assistance.
Steps
- Go to the location in your D2L course site where you have linked to your Blackboard Collaborate Ultra room (for example, in the Content tool), click on your Blackboard Collaborate Ultra session and enter your session.
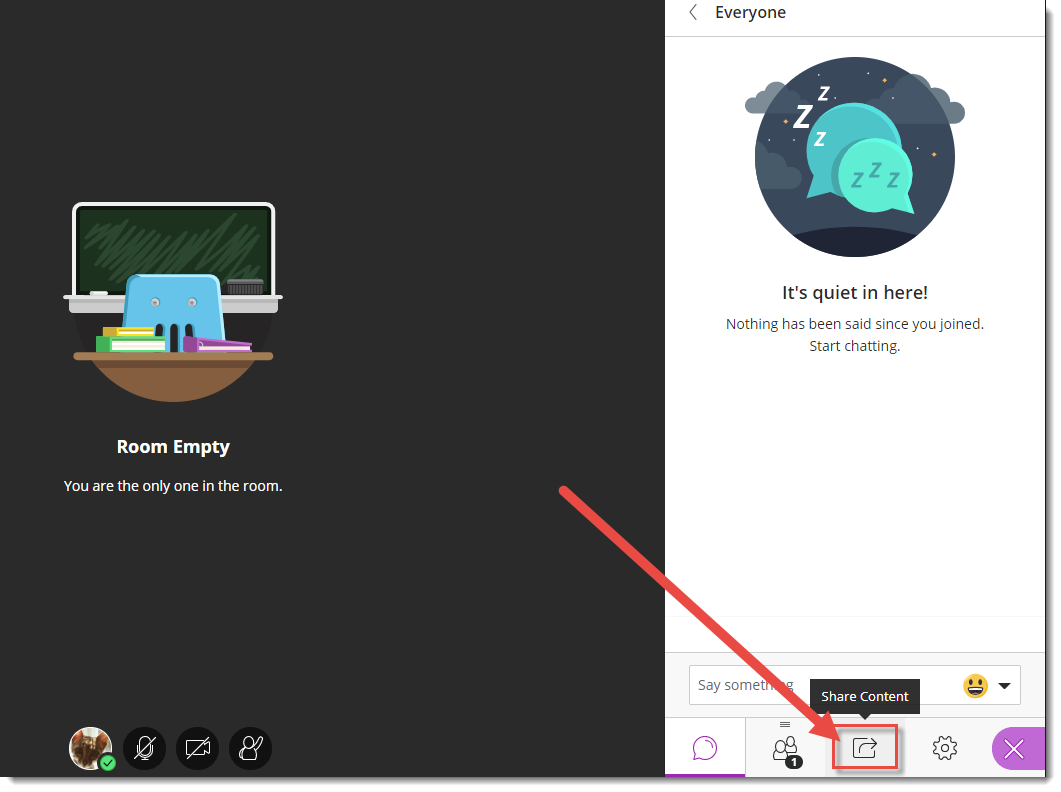
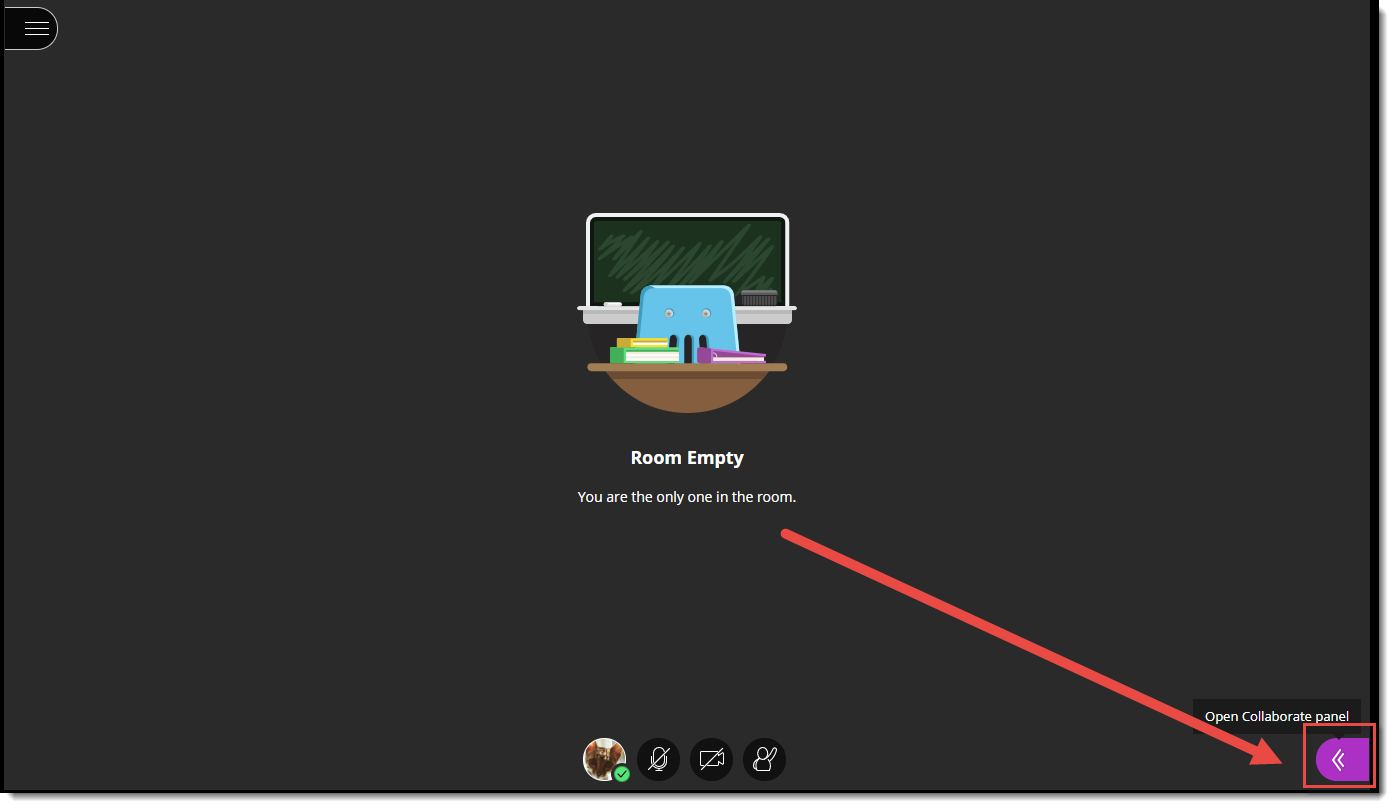
- Open the Collaborate panel (the bottom right icon).

- Click the Share Content icon.
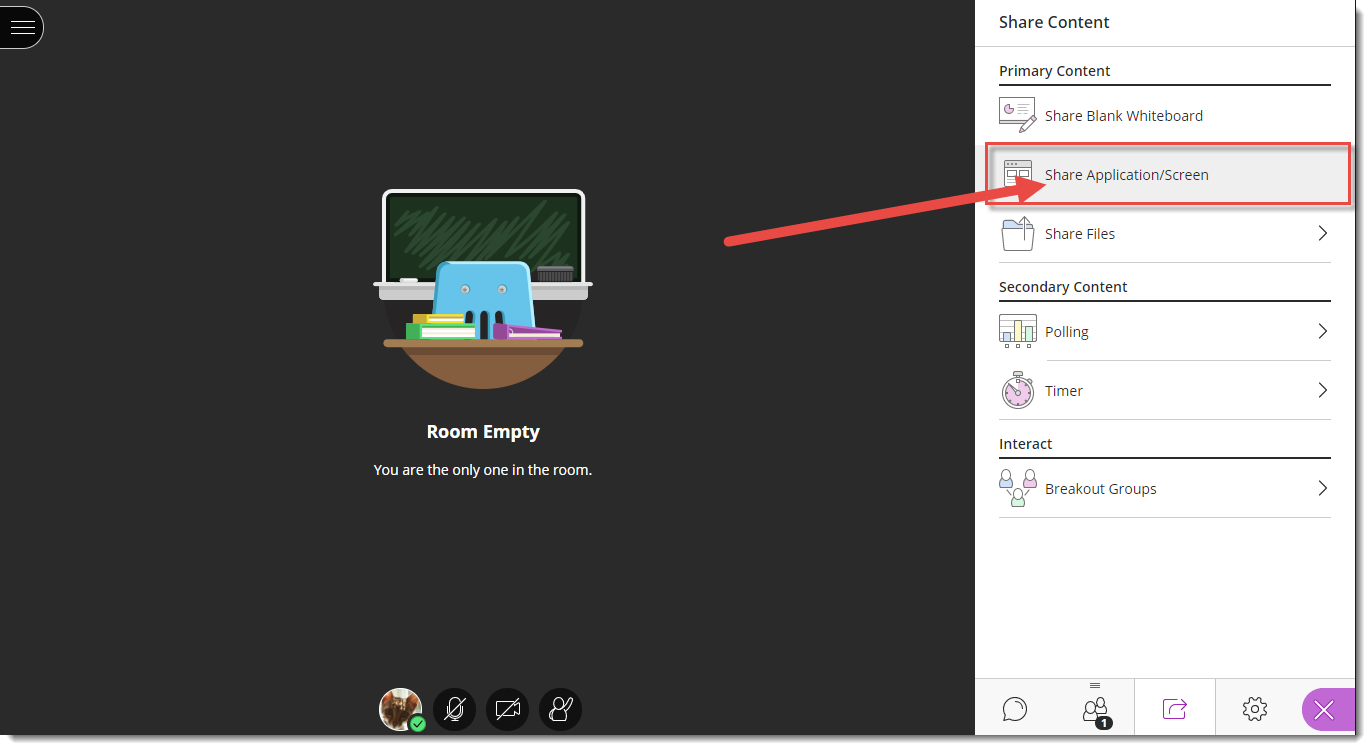
- Click Share Application/Screen.
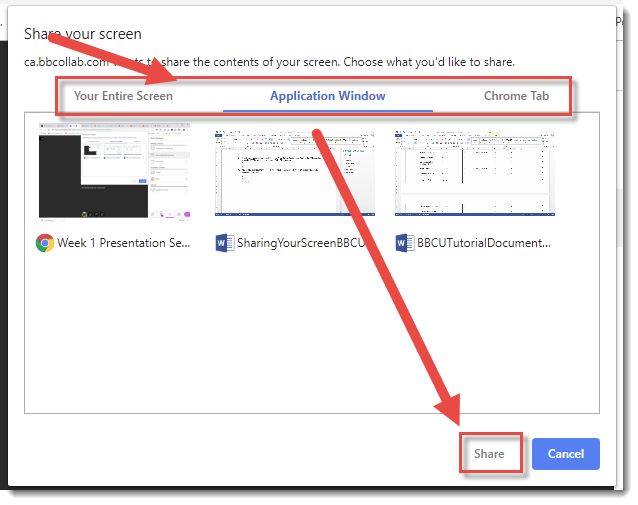
- Select which application you wish to share: Your Entire Screen, one Application Window (for example, WORD), or a specific browser Tab. Click Share.
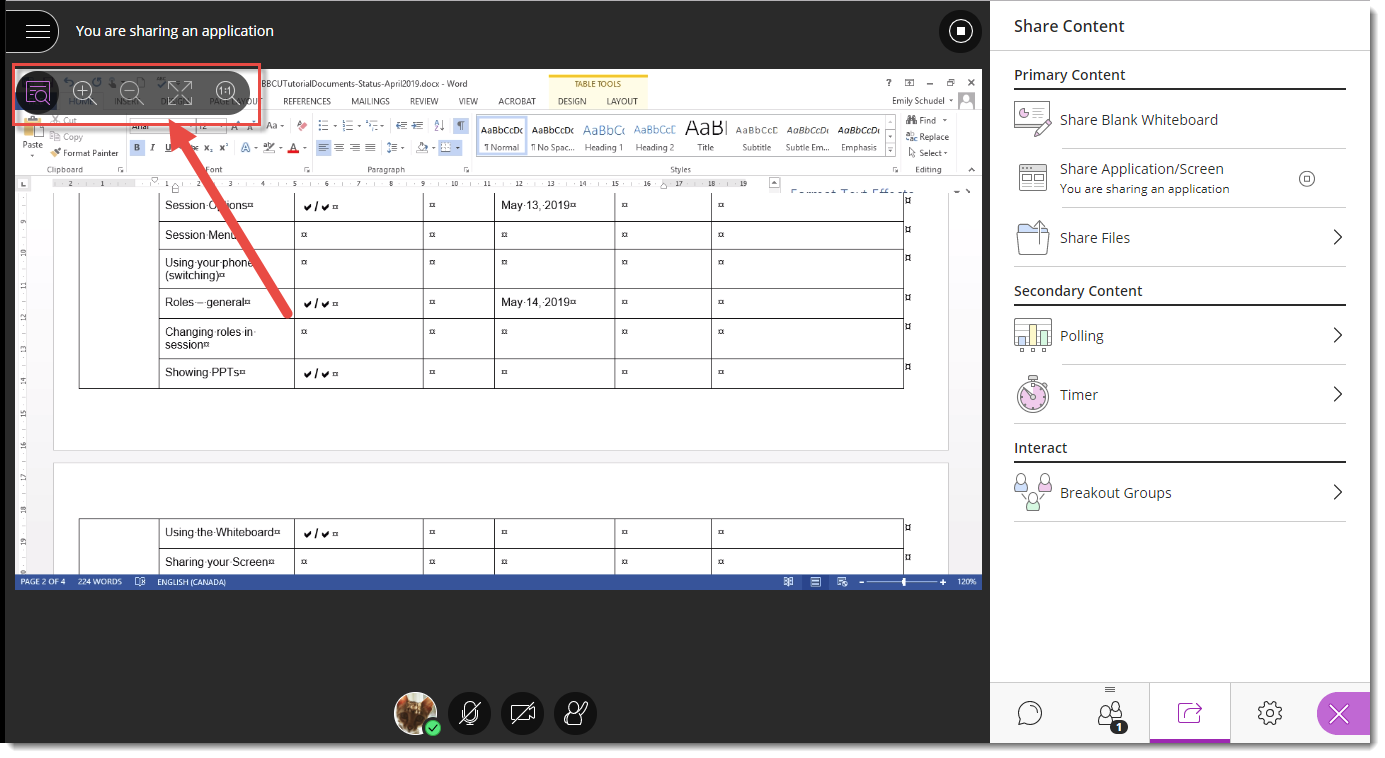
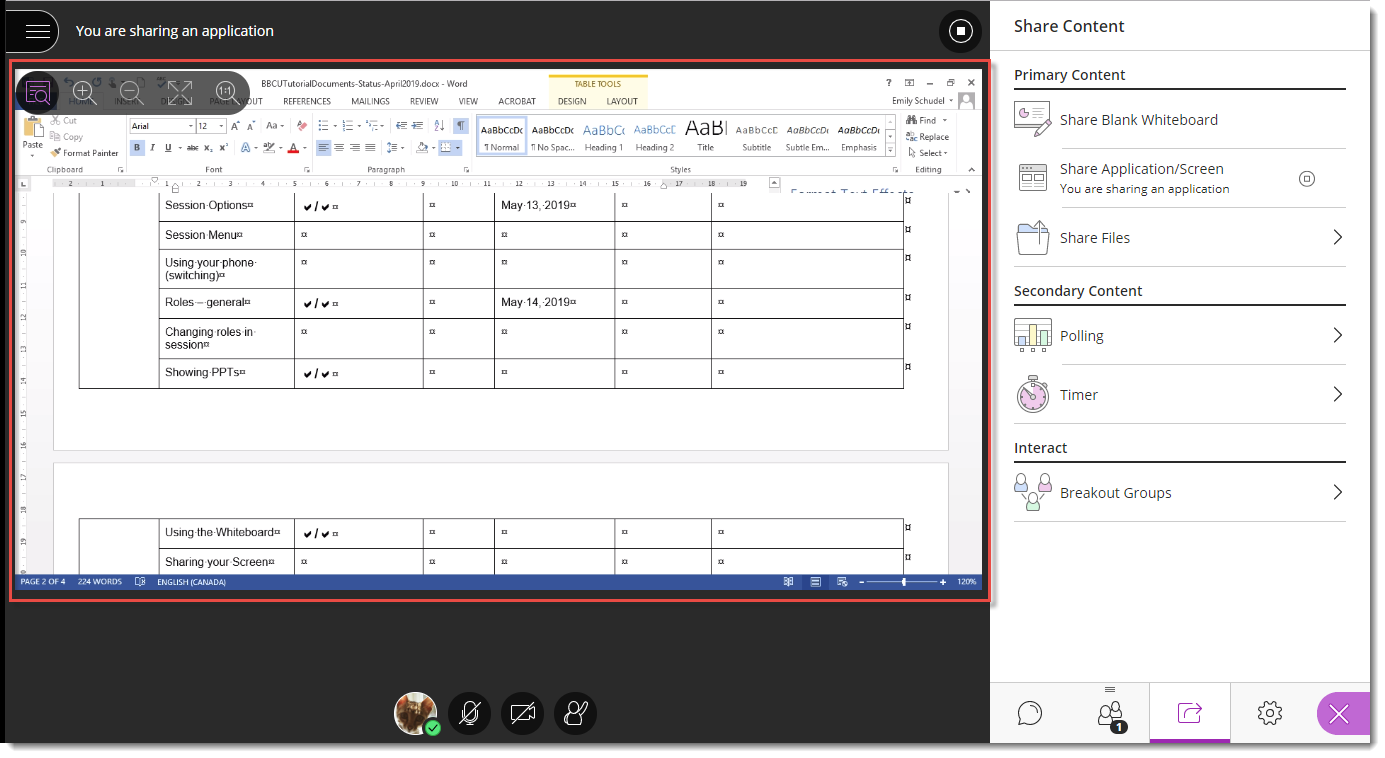
- You and the participants will see what you have shared, and what you are doing with it, in the main session window.

- Use the View Controls to Zoom In, Zoom Out, see the Best Fit, and view the Actual Size.
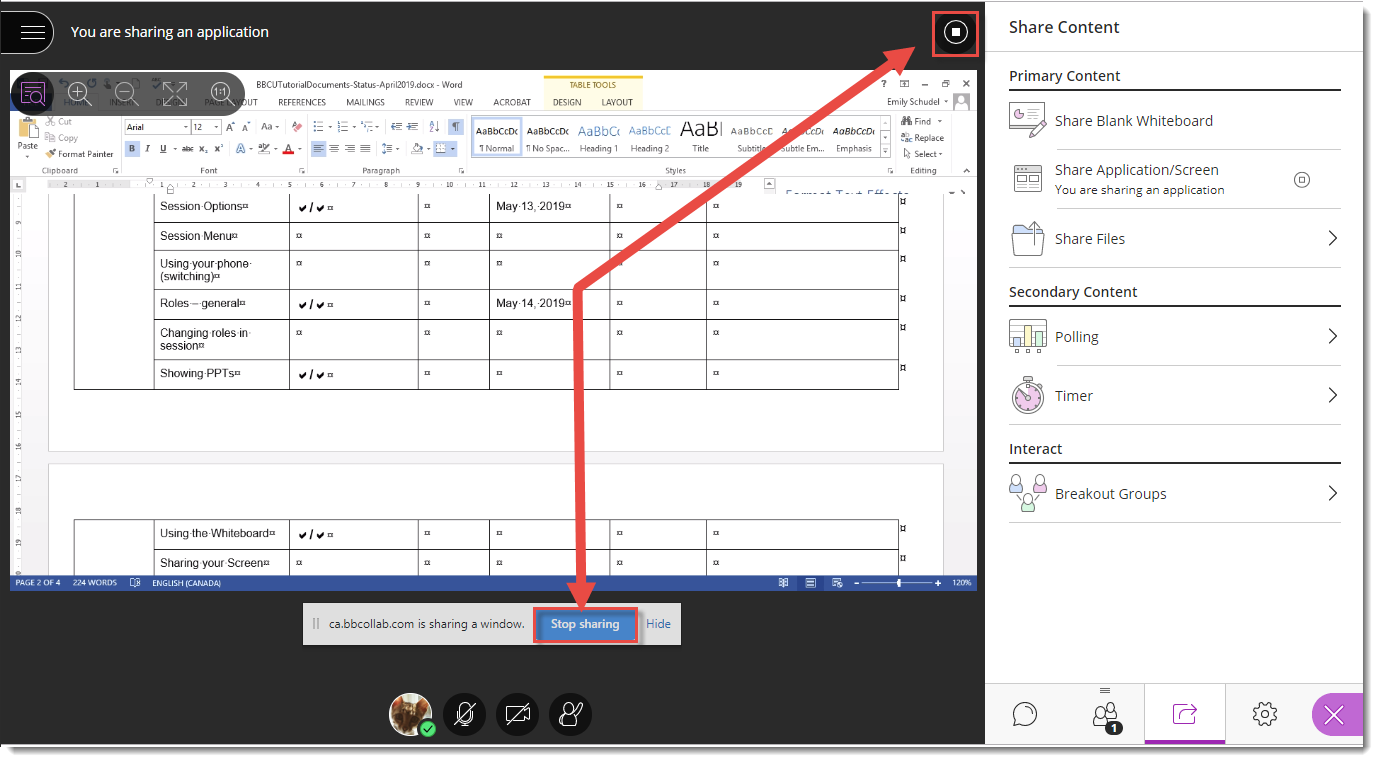
- Click Stop Sharing (in the pop-up box which appears when you begin sharing your Application/Screen) OR click the Stop icon (top right of the slide in the main window) to stop sharing your Application/Screen.


Things to Remember
You can’t save an Application/Screen sharing session. The only way to “save” the sharing session is to record the entire Blackboard Collaborate Ultra session, and then edit the recording later.
![]() This content is licensed under a Creative Commons Attribution 4.0 International Licence.Icons by the Noun Project.
This content is licensed under a Creative Commons Attribution 4.0 International Licence.Icons by the Noun Project.