This tutorial is designed for faculty who have previous experience using D2L, and Blackboard Collaborate Ultra (BBCU), and will cover how to record your (BBCU) session, and what you can do with the recording later. For further information, please contact desupport@camosun.ca for assistance.
Steps
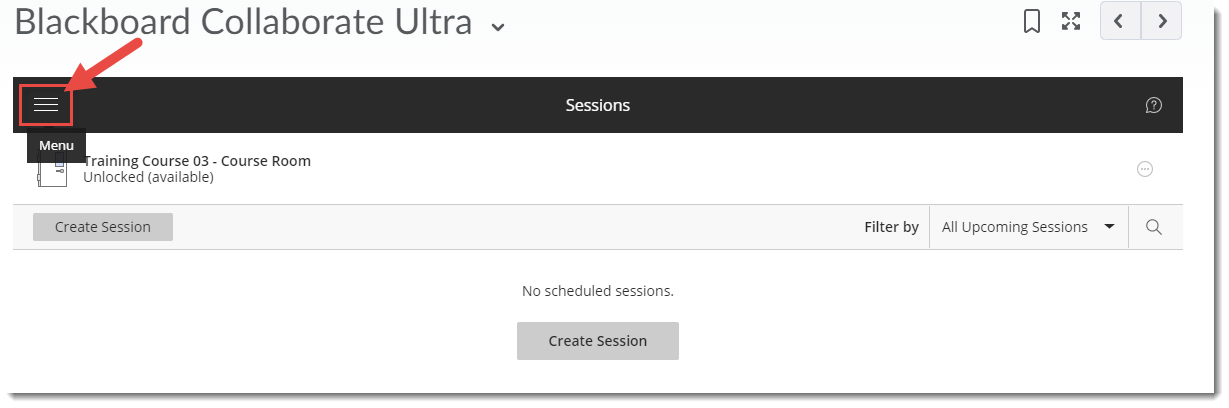
- Go to the location in your D2L course site where you have linked to your Blackboard Collaborate Ultra room (for example, in the Content tool), click on your Blackboard Collaborate Ultra session and enter your session.
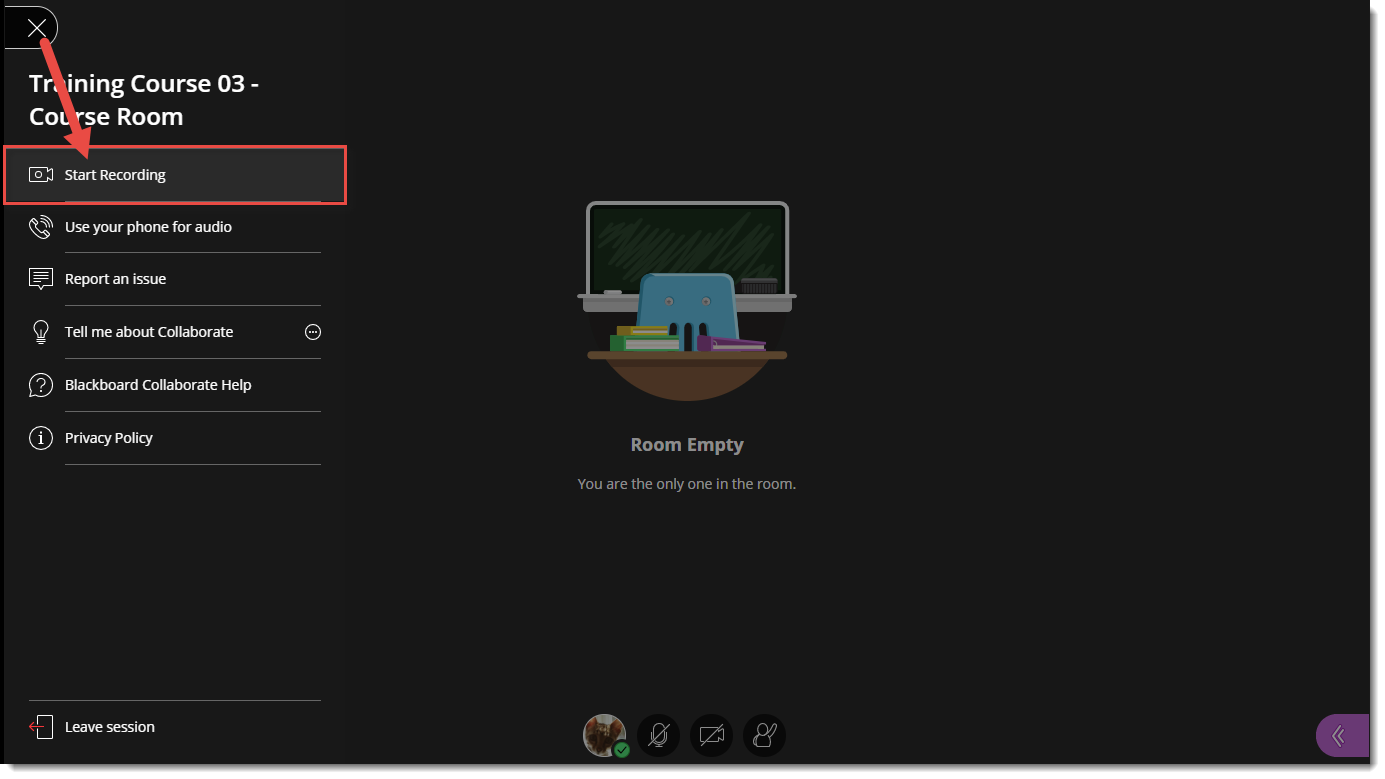
- Open the Session menu (the top left icon).

- Click Start Recording.
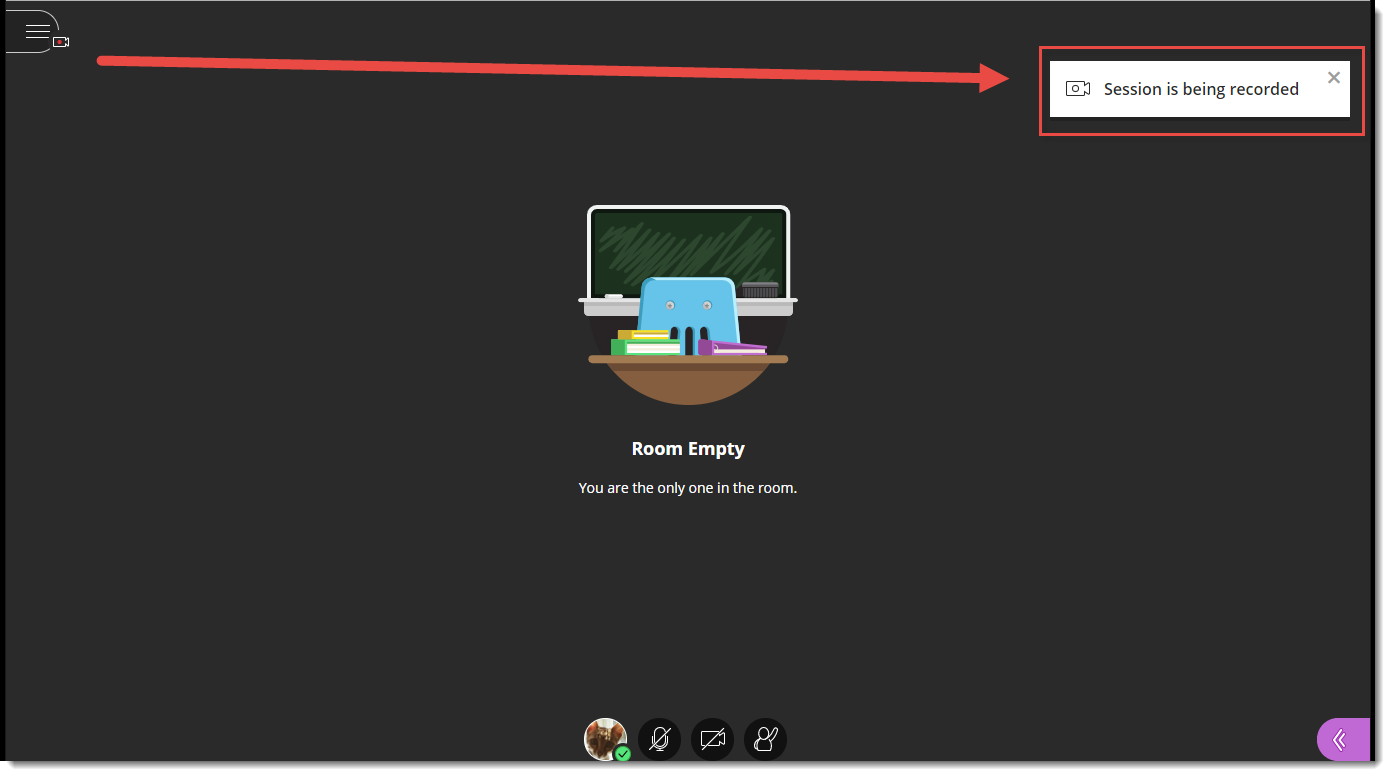
A Session is being recorded message will pop up.
- To stop the recording, click the Session menu, and select Stop Recording.

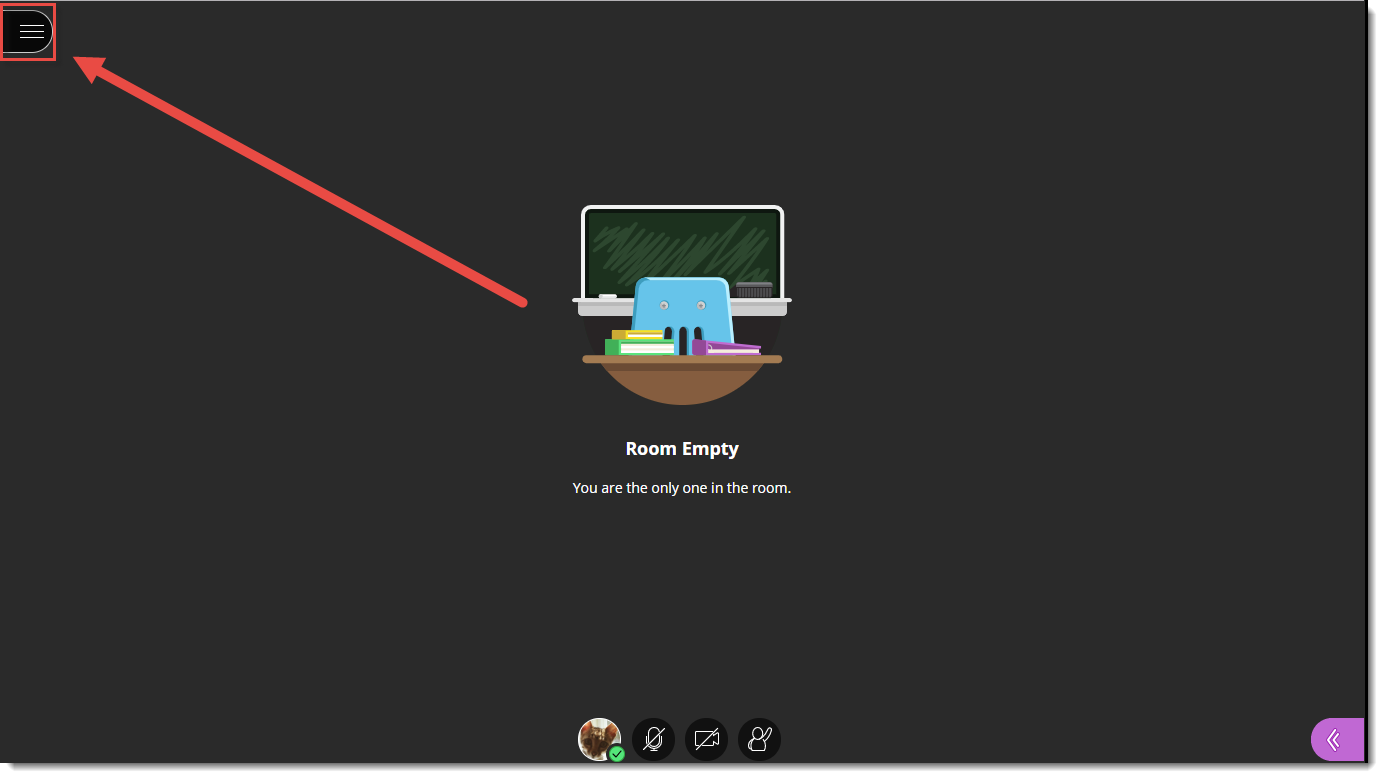
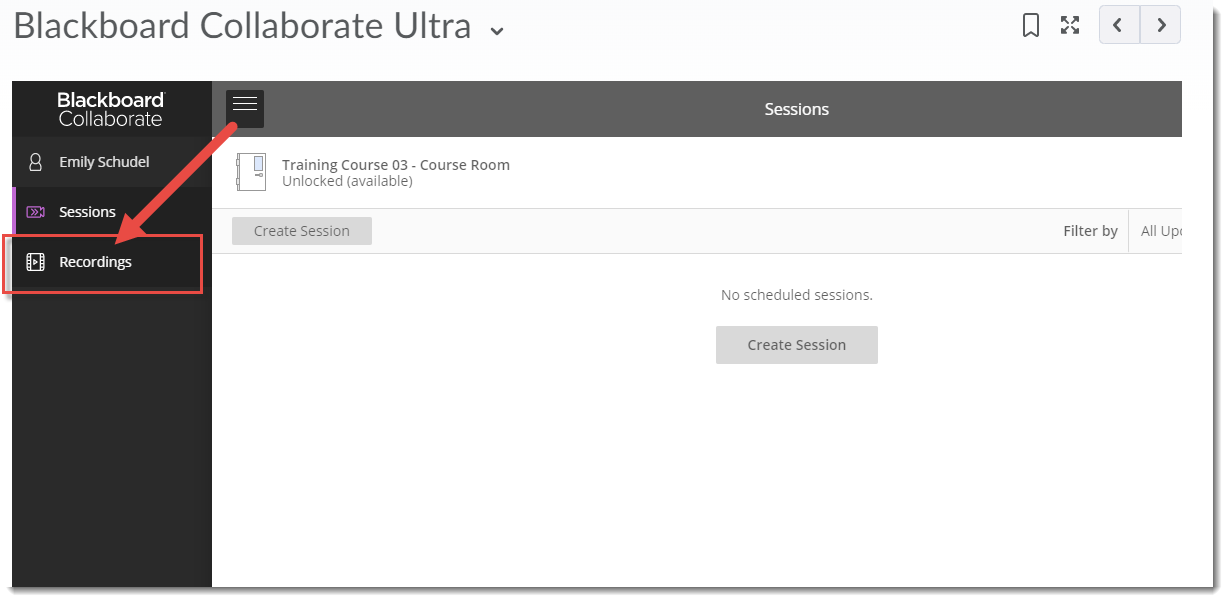
- To access your recording(s), go back to the location in your D2L course site where you have linked to your Blackboard Collaborate Ultra room (for example, in the Content tool), and click the Menu at the top left above the Course Room link.

- Select Recordings (note that it may take a bit of time before the recording(s) appear – and you may need to log off of D2L and log back in again before you see them).

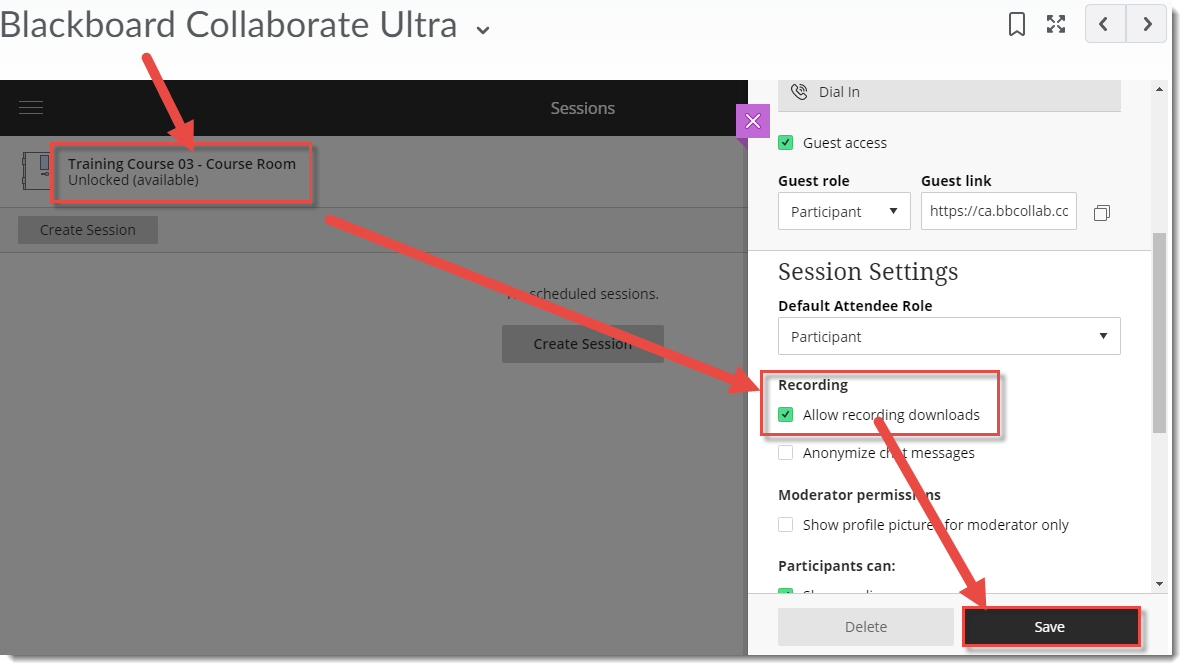
- Make sure Recording downloads are enabled by clicking on the Room (or Session) link and under Recording, selecting Allow recording downloads, and click Save.

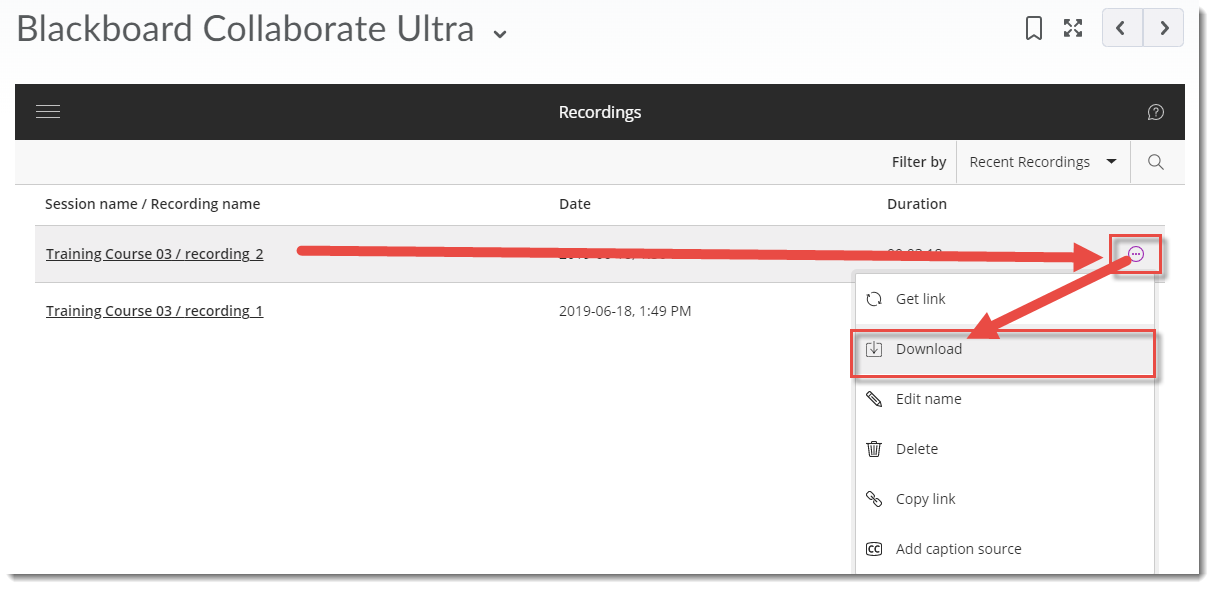
- Go back to the Recording area (see steps 5 and 6), and then click the three dots to the right of the recording you want to download, and select Download (from here you can also Watch the recording, Edit its name, Delete it, Copy its link for emailing to people, or Add a caption source, if you have a caption file saved on your computer. Note, if you would like the recording closed captioned, download it, upload it to Kaltura, and Kaltura will add auto closed-captions to it).
- Save the recording video to your device. You can then edit it using a video editing program, or upload it directly into Kaltura for sharing with your students.


Things to Remember
Recorded BBCU sessions are saved as MP4s, and only Moderators can turn recording on in sessions.
Recordings include the following activities from in the live session: Audio, shared content, active speaker video (if shared during the session), captions added during the live session, chat messages in the Everyone chat channel (NOT chat messages in breakout rooms).
Recordings can be viewed from any device, and can be viewed as often as needed – there are no view limits.
![]() This content is licensed under a Creative Commons Attribution 4.0 International Licence.Icons by the Noun Project.
This content is licensed under a Creative Commons Attribution 4.0 International Licence.Icons by the Noun Project.