This tutorial is designed for faculty who have previous experience using D2L and who have uploaded media to My Media in D2L. It will cover the steps involved when you wish to allow students to download a video. There are two parts to this tutorial: setting a video to allow downloading, and adding it to the Course Media gallery so students can download it. For further information, please contact desupport@camosun.ca for assistance.
Steps
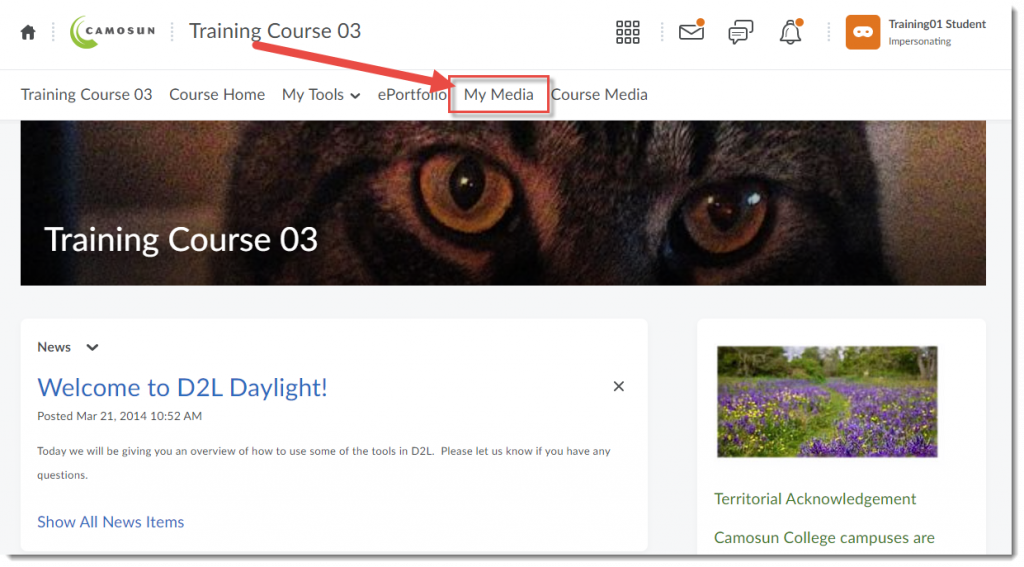
- Go to your course in D2L.
- Go to My Media.
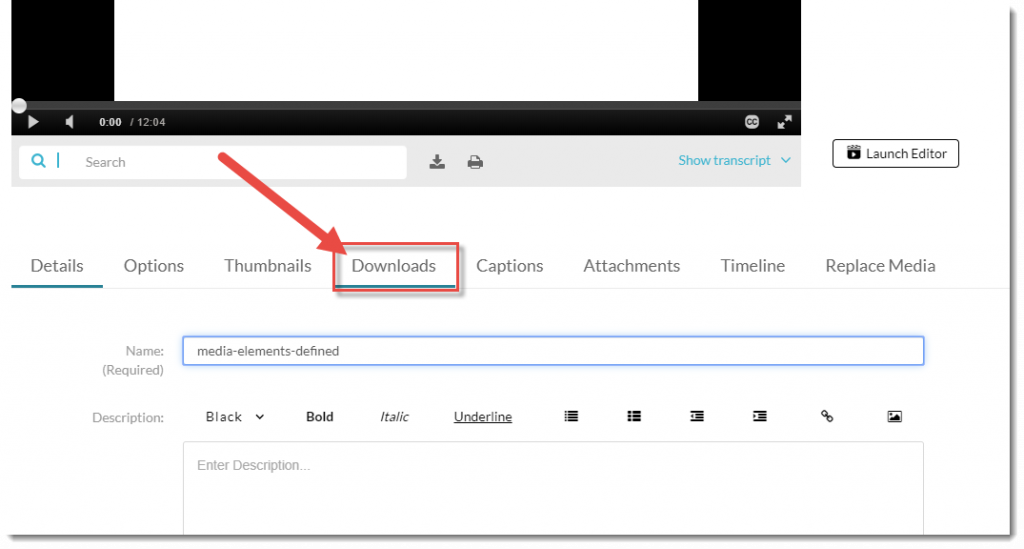
- Click the Edit icon (the pencil) to the right of the video you wish to allow downloads for.

- Click Downloads.
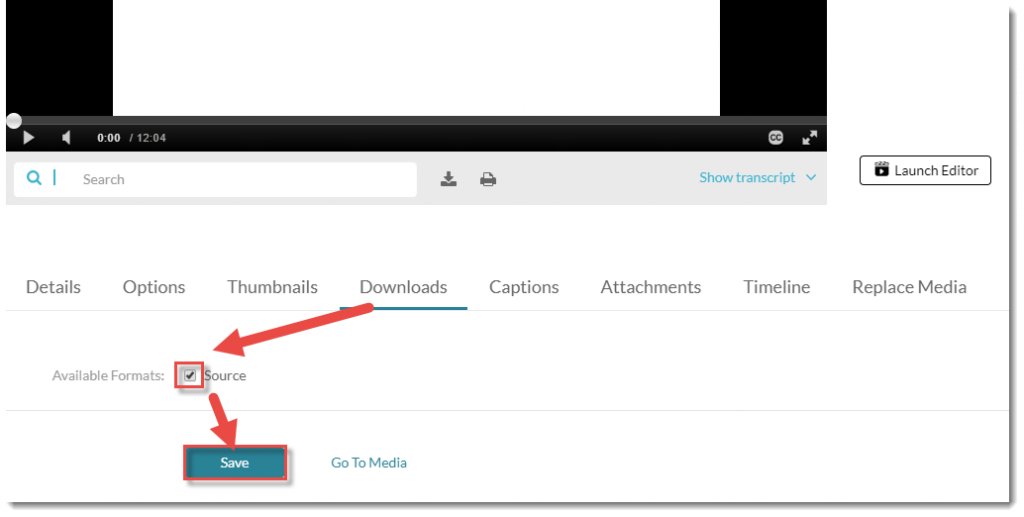
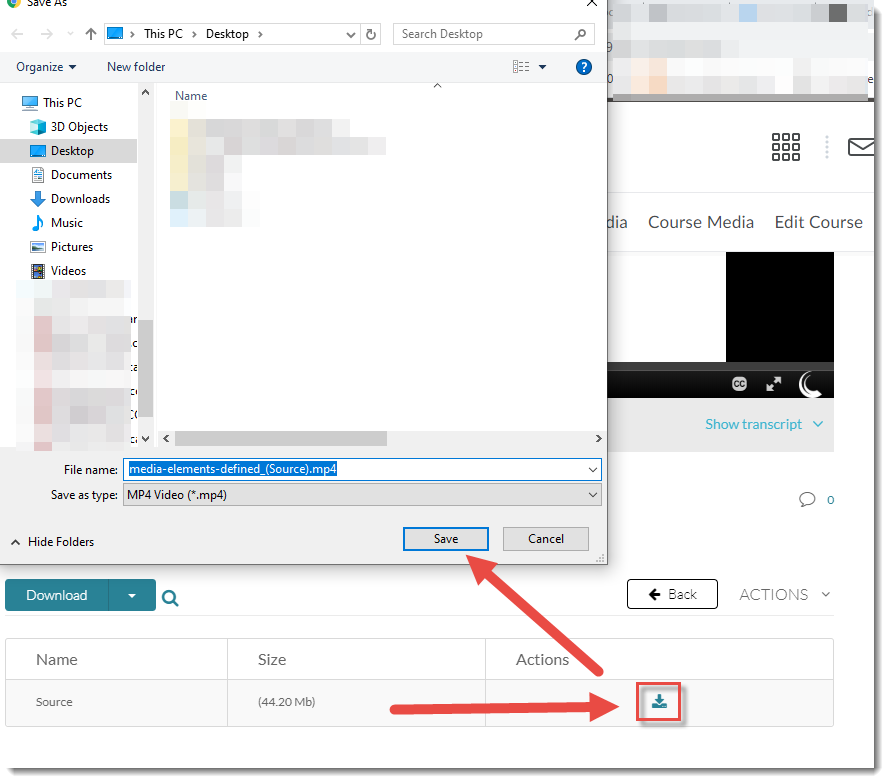
- Click the Source select box, and click Save.
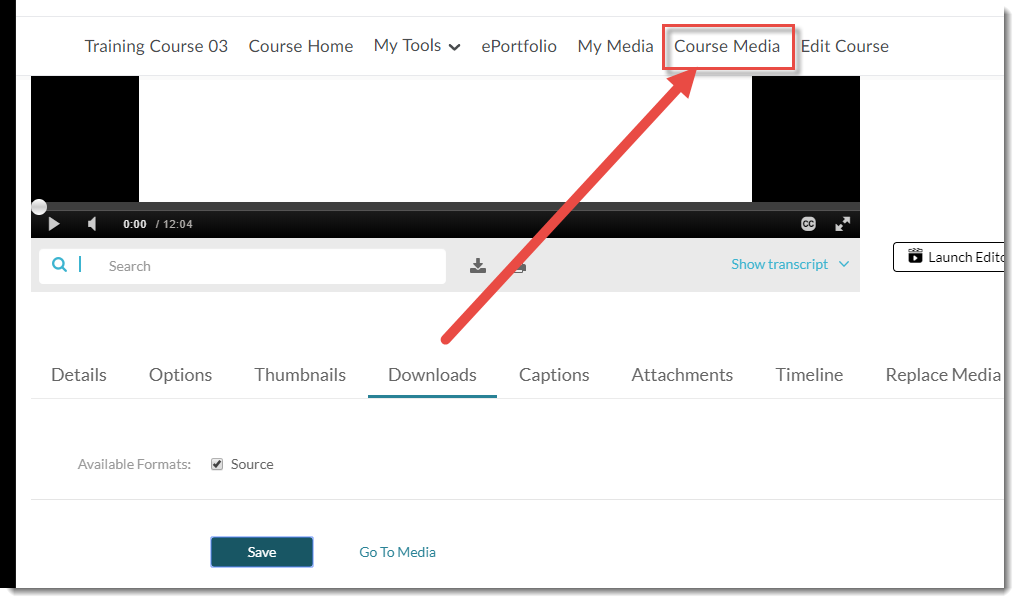
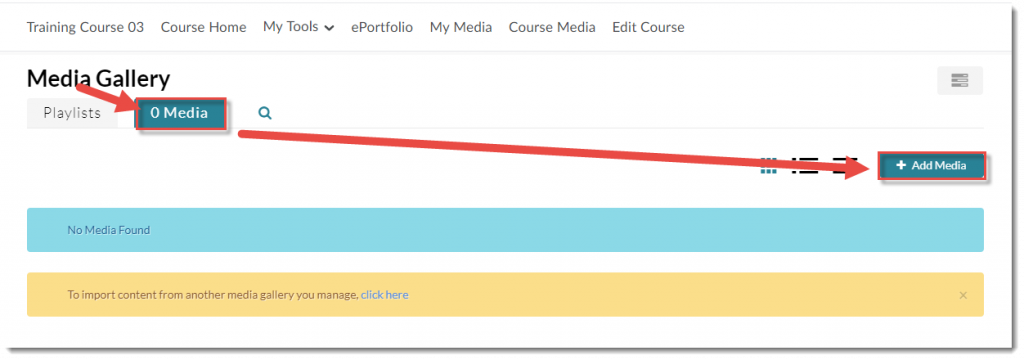
- Click the Course Media link on your Navbar (if it is not there, you will need to add it).
- In the Course Media area, click the Media tab, then click +Add Media.
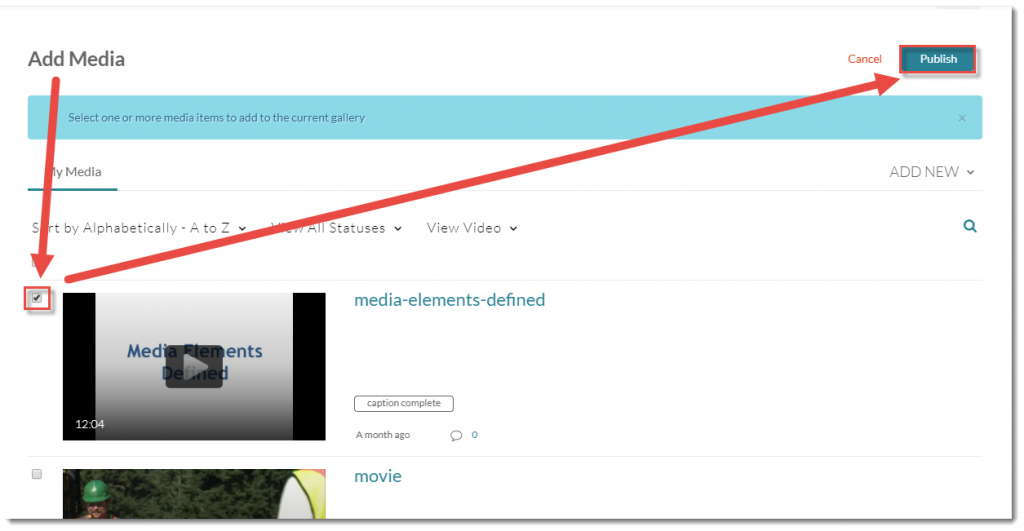
- Select the video you wish students to download, and click Publish. This will add the video into the Course Media gallery.
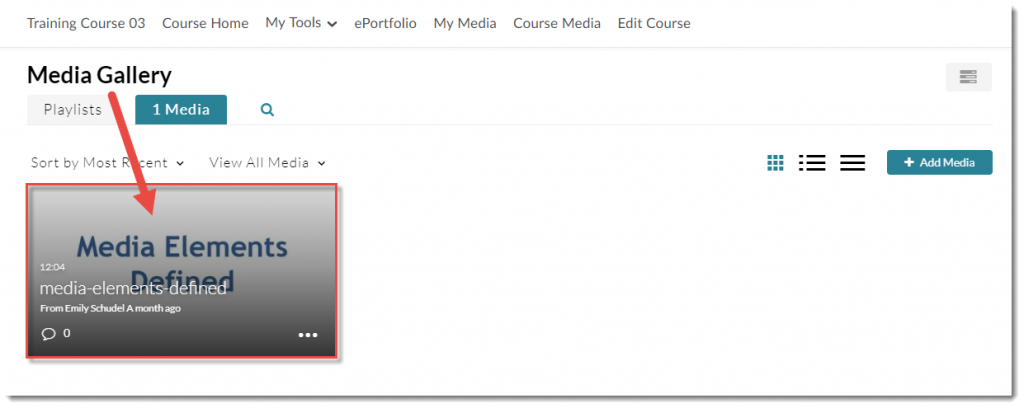
- You and your students can then click on the video to open it up in the Course Media viewing area.
- And then click the down arrow next to Details and select Download.
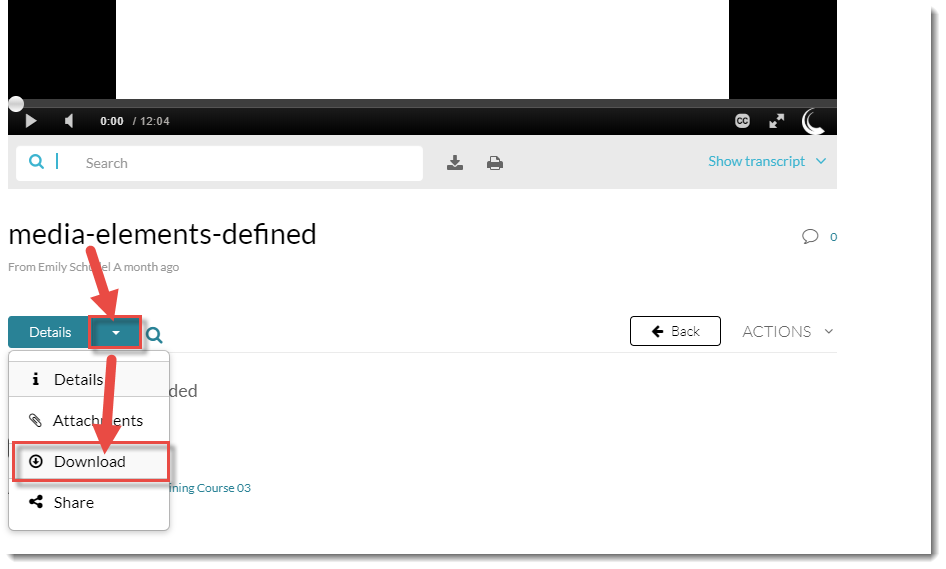
- Finally, click the download icon to save the video to your device.
Things to Remember
Students will NOT be able to download your video if you have only embedded it in an HTML editor page (for example, a Content page). They can only download videos from the Course Media gallery.
![]() This content is licensed under a Creative Commons Attribution 4.0 International Licence.Icons by the Noun Project.
This content is licensed under a Creative Commons Attribution 4.0 International Licence.Icons by the Noun Project.