D2L Student Guide – What’s this all about?

I just wanted to take a moment to remind everyone about the D2L Student Guide that is linked from the main Camosun D2L Homepage.

D2L Student Guide link

This guide is for students needing reminders and support (PDF tutorials) around using not only the various tools in D2L, but also for using Kaltura, and Collaborate Ultra.   In addition, the guide also contains links to many of the common student services at Camosun, for example, the Library, Learning Skills and the Writing Centre, Counselling Services, etc.

Student Guide contents

Take a look to see what’s there, and make sure to remind your students about this site.

And remember, if your students need technical help with D2L, Kaltura, or Collaborate, they can also contact eLearning Support at desupport@camosun.ca.


Kaltura Tip: Adding YouTube Videos to My Media with Workaround for Chrome issue

Did you know you can add YouTube videos to your My Media area in Kaltura? This doesn’t mean you are copying the actual video, but you can add links to YouTube videos so that those videos appear as part of your My Media area, meaning you can then embed them in a Content page (through Insert Stuff in the HTML editor). Why pull them in to My Media when you can embed YouTube videos directly through Insert Stuff? Well, if you add them to My Media, you can add them to Playlists in the Course Media gallery area, but most importantly, if you add YouTube videos to My Media, when you embed them in the HTML editor, Kaltura will strip out that annoying final screen in YouTube videos which tempt students to click on another video.

How do you do this? This tutorial will show you how, and in addition, will show you how to embed the videos to avoid the current issue with viewing embedded YouTube videos in Chrome. There are several steps, so please contact desupport@camosun.ca if you encounter difficulties.

This tutorial is designed for faculty who have previous experience using D2L and My Media in D2L and will cover the steps involved when you wish to add a YouTube video to your My Media space in D2L and embedding it in the HTML editor (for example, in a Content page). Note that this is a workaround as viewing a Kaltura YouTube video is not currently working in Chrome (Jan. 2020).

Steps

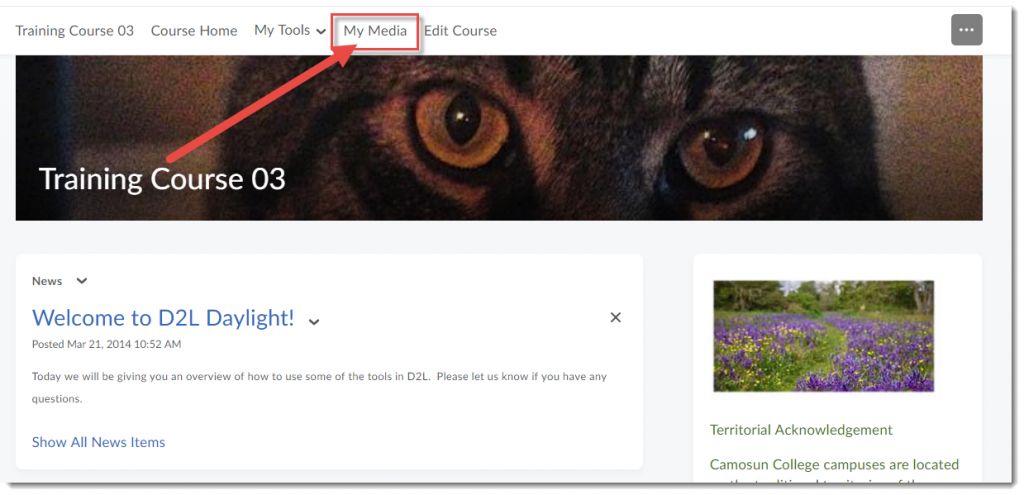
  1. Go to your course in D2L.
  2. Go to My media (through the link on your Navbar, or in your My Tools drop-down menu, or in a draft Topic in the Content tool).Go to My Media
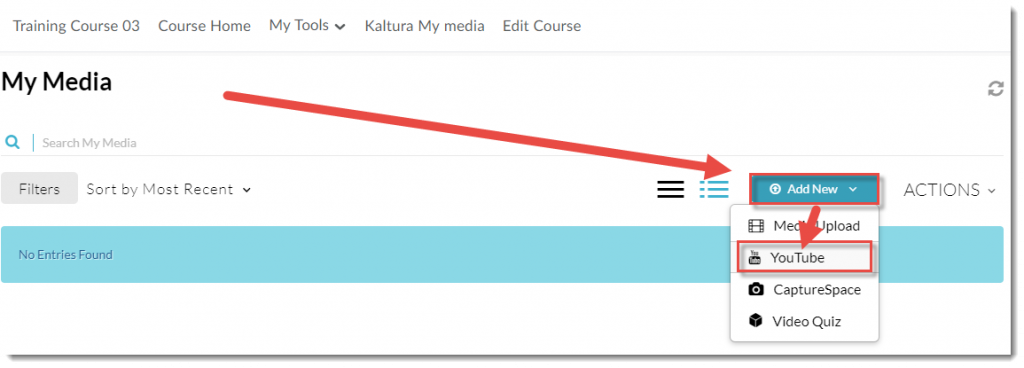
  3. Click Add New and select YouTube.

    Click Add New and select YouTube

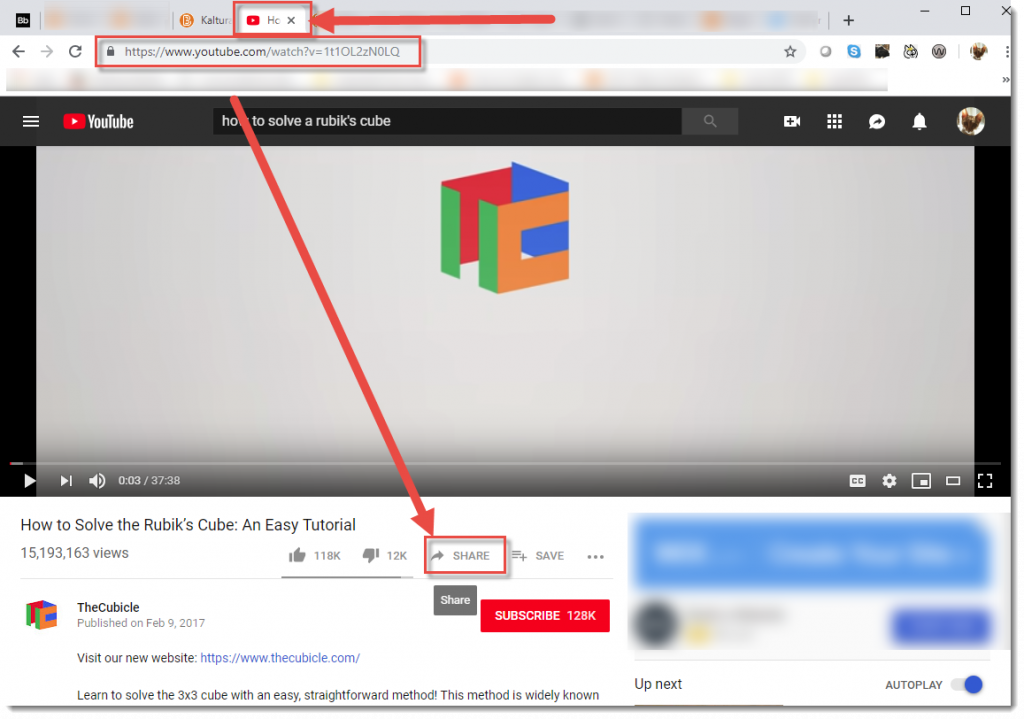
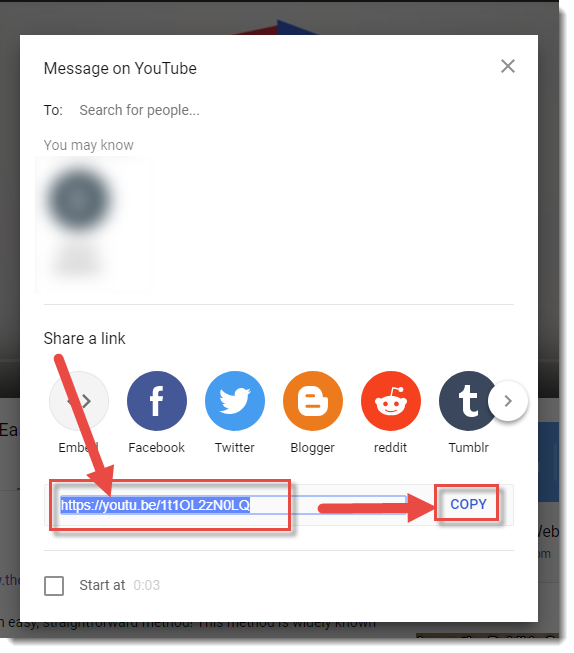
  4. Open another tab in your Browser and go to YouTube. Find the YouTube video you want to add and click Share. Then select the video’s URL and click Copy.

    Find the YouTube video and click ShareSelect the link and click Copy

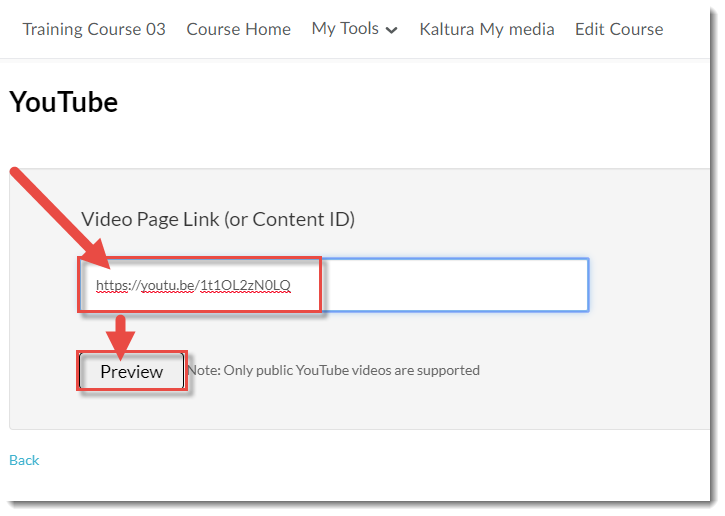
  5. Go back to your D2L course, and paste the copied URL into the Video Page Link box. Click Preview.

    Paste the URL and click Preview

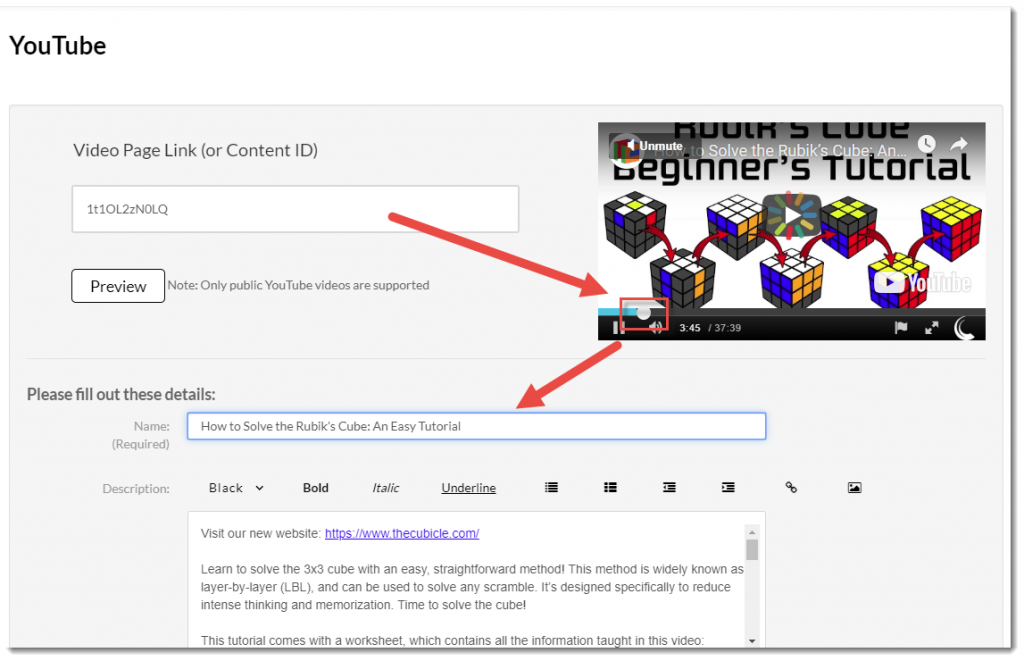
  6. It will take a few minutes for the YouTube video to completely be pulled into My Media – the longer the video, the longer it will take. If the video appears to be taking a longer time to load than you think it should, pull the play bar across for a little bit and the video information editing area will appear in the main window. If this does not work, wait a little longer (it may take upwards of 20 minutes) and try again.

    YouTube video appears in your Kaltura My Media space

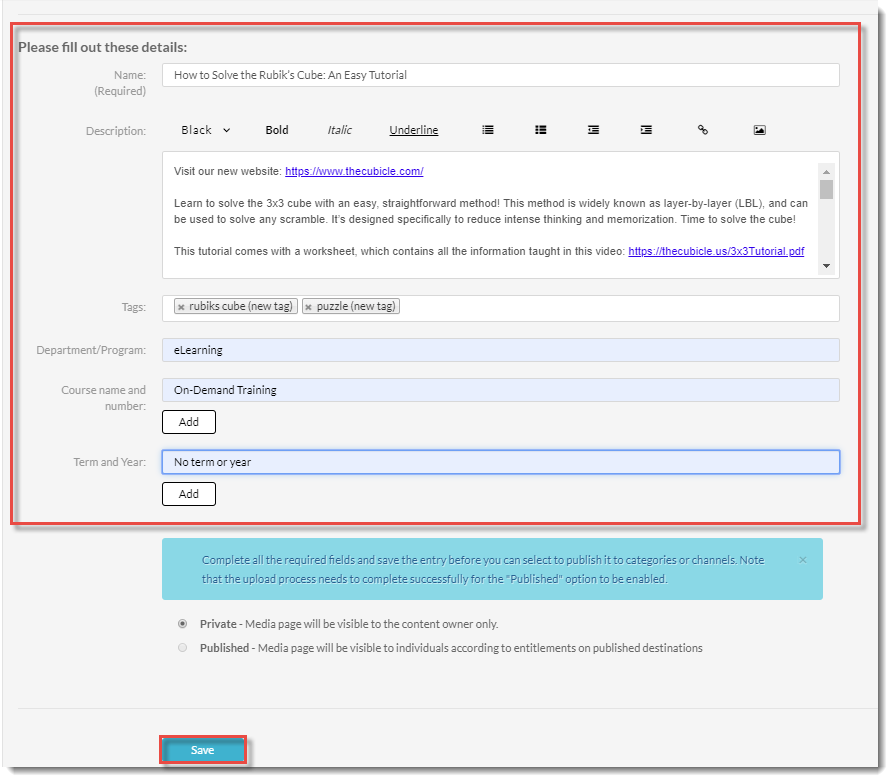
  7. Edit and add details as needed. We highly recommend adding information to all the listed fields to help you filter/sort media files as you build your collection, and to help your students search for specific media files. Note that you do NOT need to Publish the video for it to be available for use in your course. Click Save. The YouTube video will now appear in your My Media space.

    Fill in the details and click Save

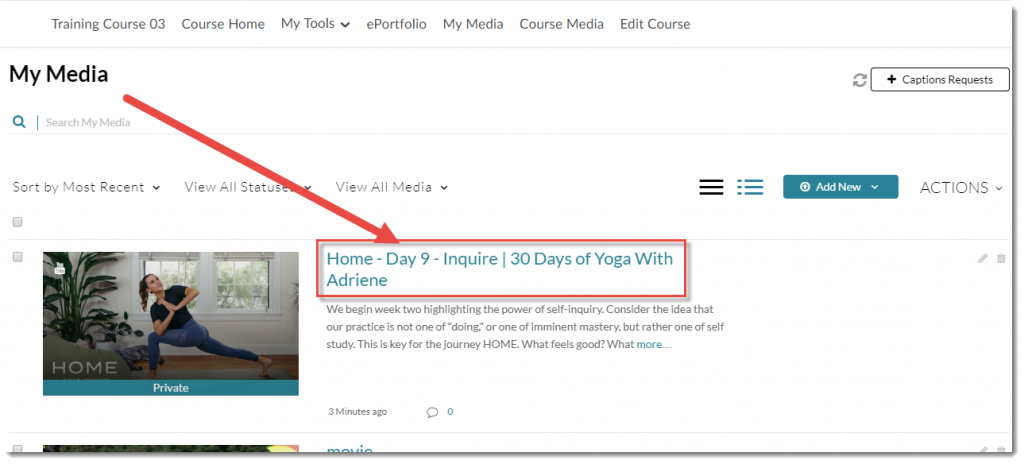
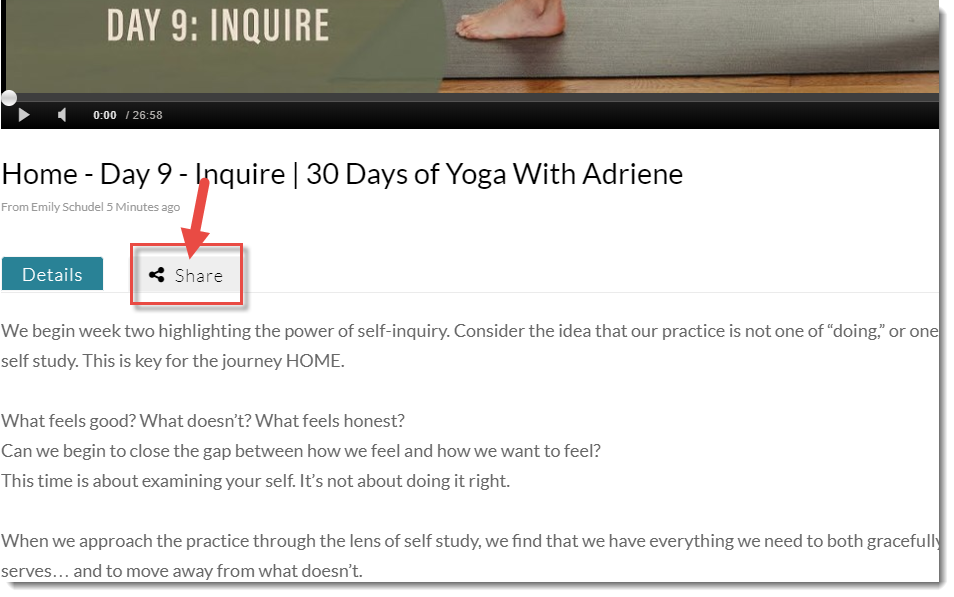
  8. To allow students to see the YouTube video you just set up in My Media, you will now need to embed it in the HTML editor, in whichever tool you are using. In this scenario, we will embed it into a Content page. So, first go back to My Media and click the title of the YouTube video you want to embed.

    Click video title.

  9. Scroll down below the video, and click the Share tab.

    Click Share

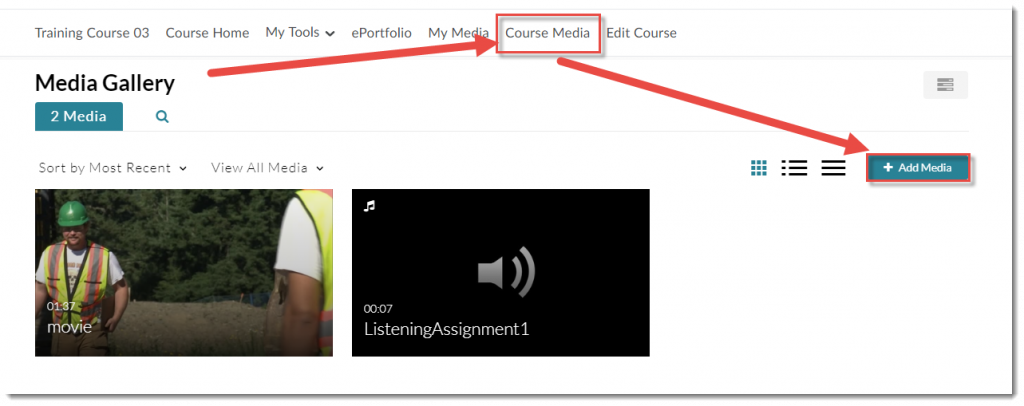
  10. This next step is the first part of the workaround for embedding YouTube videos in your Content pages. This will require that you have added the Course Media link to your NavBar. Once you have done that, click Course Media, then click Add Media.

    Click Course Media then Add Media.

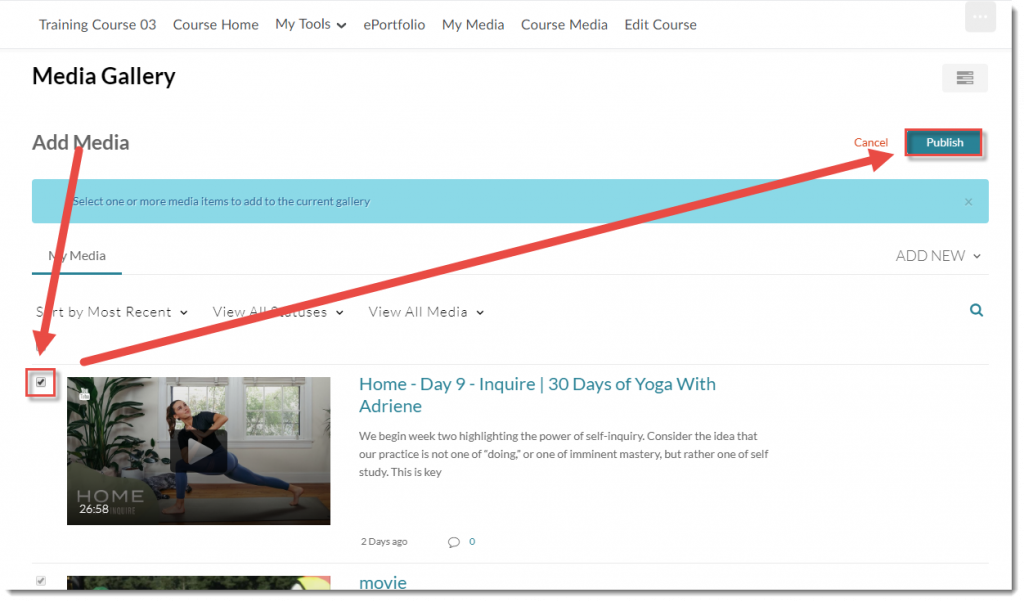
  11. Click the select box next to your YouTube video ad click Publish.

    Select the video then click Publish

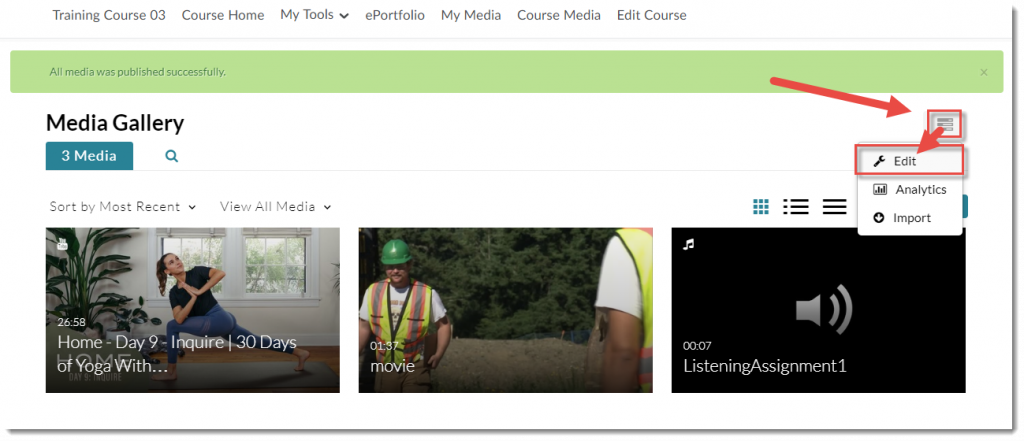
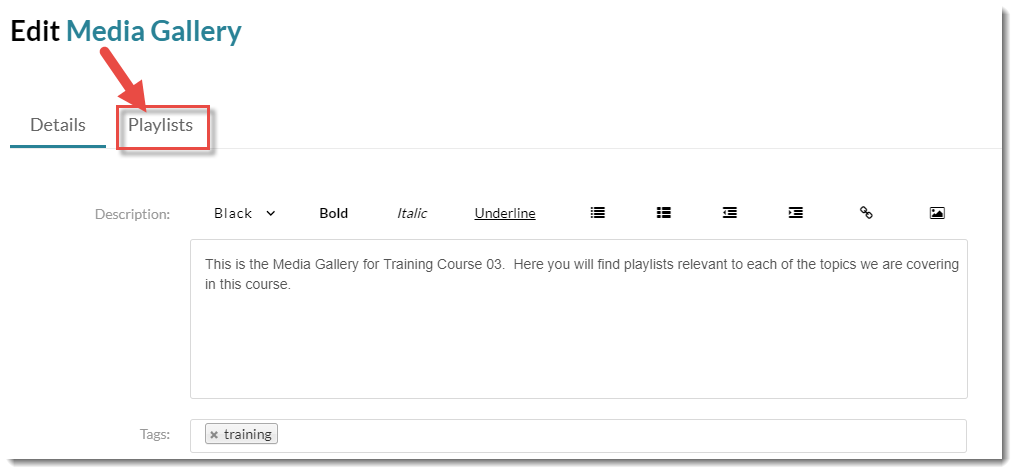
  12. Click the Channel Actions menu (top right) and select Edit.

    Click Channel Actions and select Edit

  13. Click Playlists.

    Click Playlists

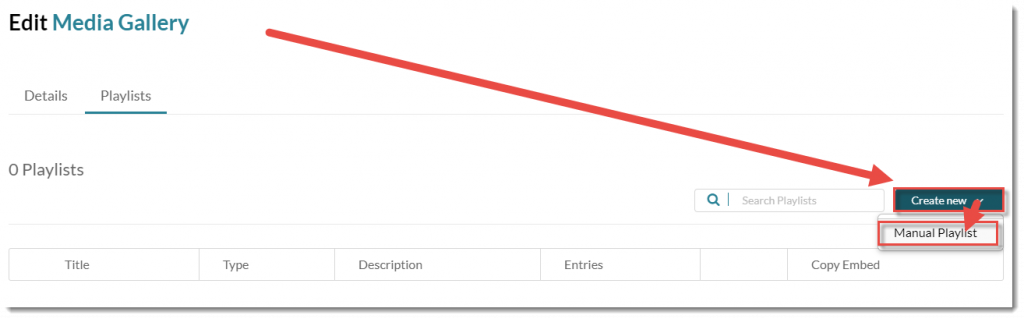
  14. Click Create New and select Manual Playlist.

    Click Create New and select Manual Playlist

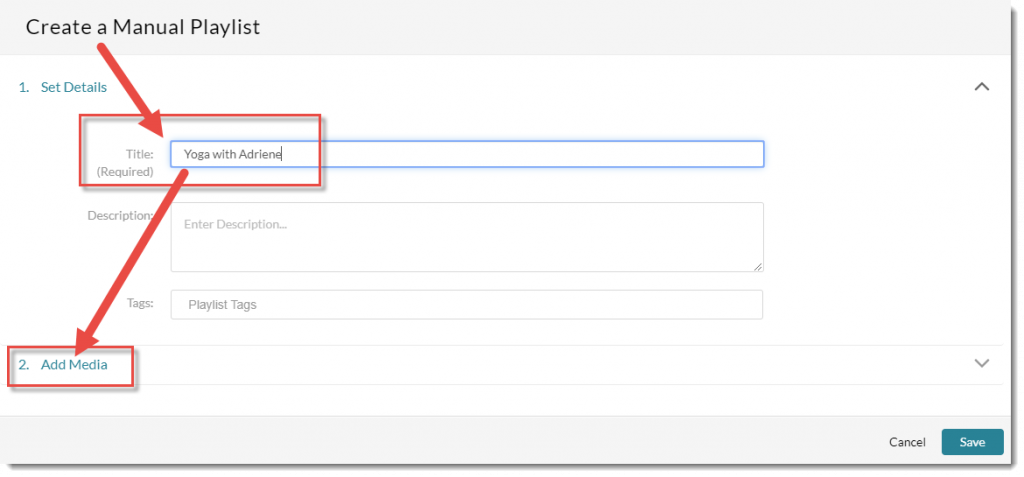
  15. Give your Playlist a Title – for this scenarios, we will use the title of the YouTube video we are going to embed. Then click Add Media.

    Add Title and click Add Media

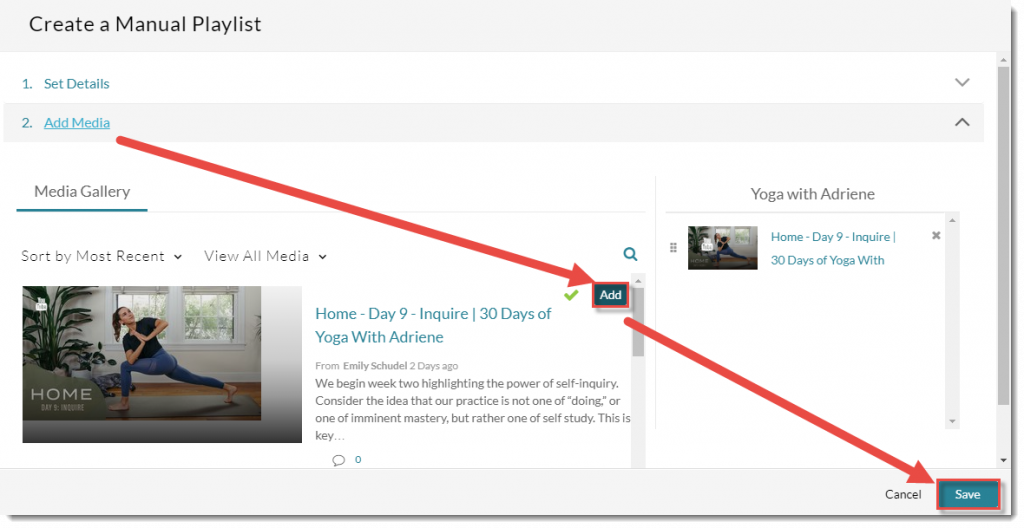
  16. Click Add next to your YouTube video. Then click Save.
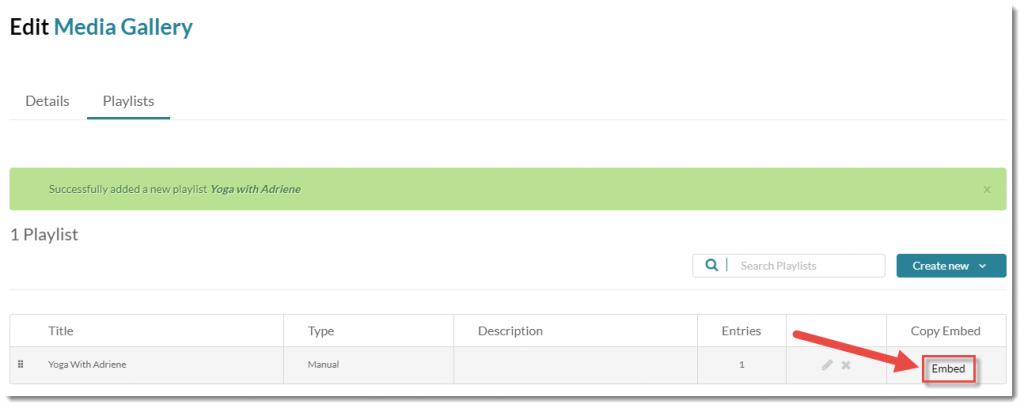
    Click Add then Save

  17. Click Embed.

    Click Embed

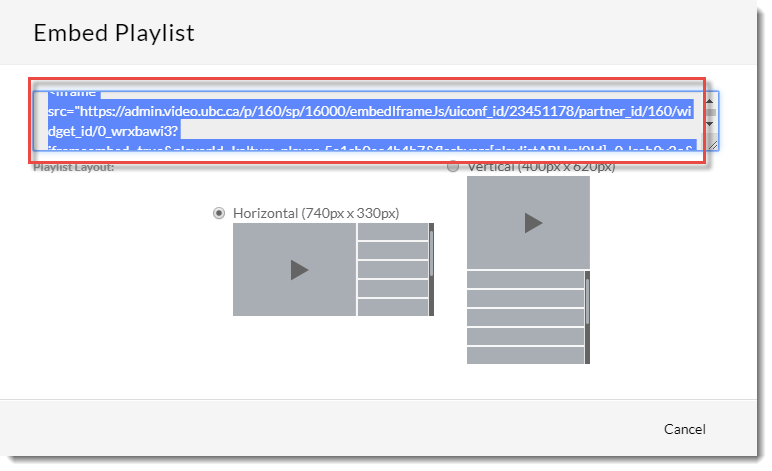
  18. Copy the Embed code in the Embed Playlist pop-up box (you will paste it into the HTML editor later in the following steps).

    Copy the embed code

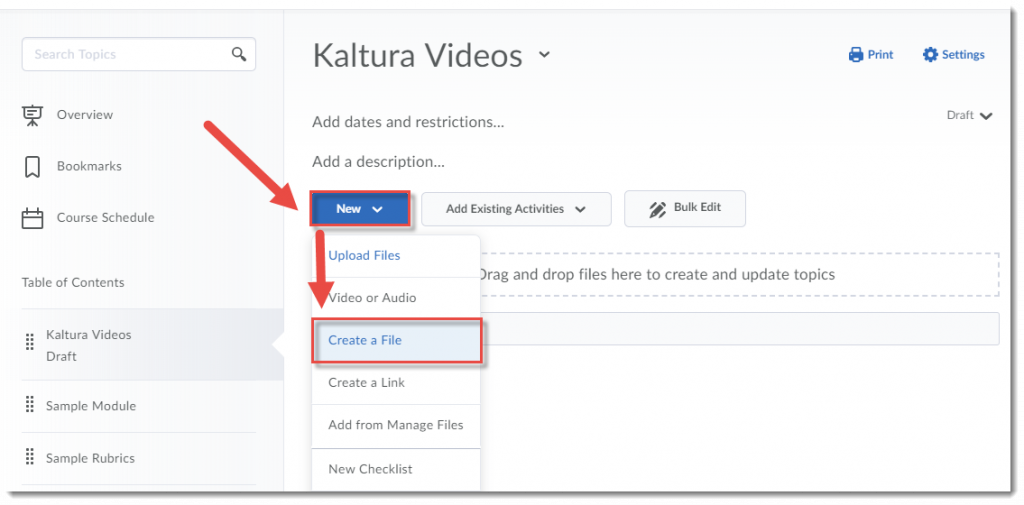
  19. Now, go to the Content tool in your course and click on the title of the Module you want to add your video to. Click New and select Create a File.

    Click New and Create a File.

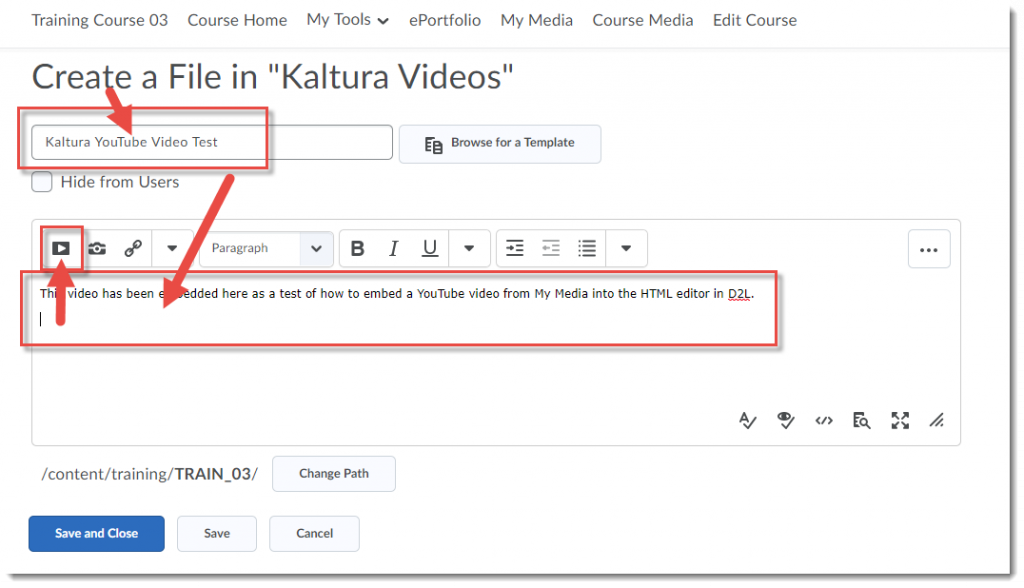
  20. Give your Topic a Title. Then click in the HTML editor box and add some text to provide a context for the video you will be embedding. For example, explain to your students what the video is about and what they should be watching/listening for. Make sure to hit your Enter key so your cursor appears below the text you just typed in, otherwise your video may not appear where you want it to! Click on the Insert Stuff icon at the top left of the HTML editor.

    Add a title, text, and click Insert Stuff

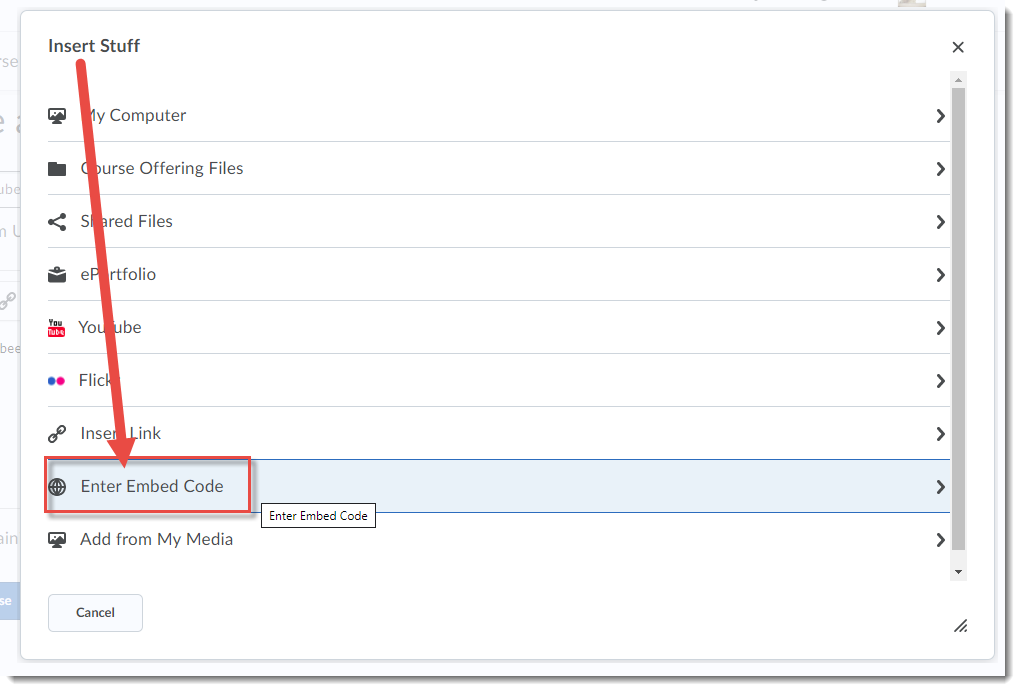
  21. In the Insert Stuff pop-up, click Enter Embed Code.

    Click Enter Embed Code

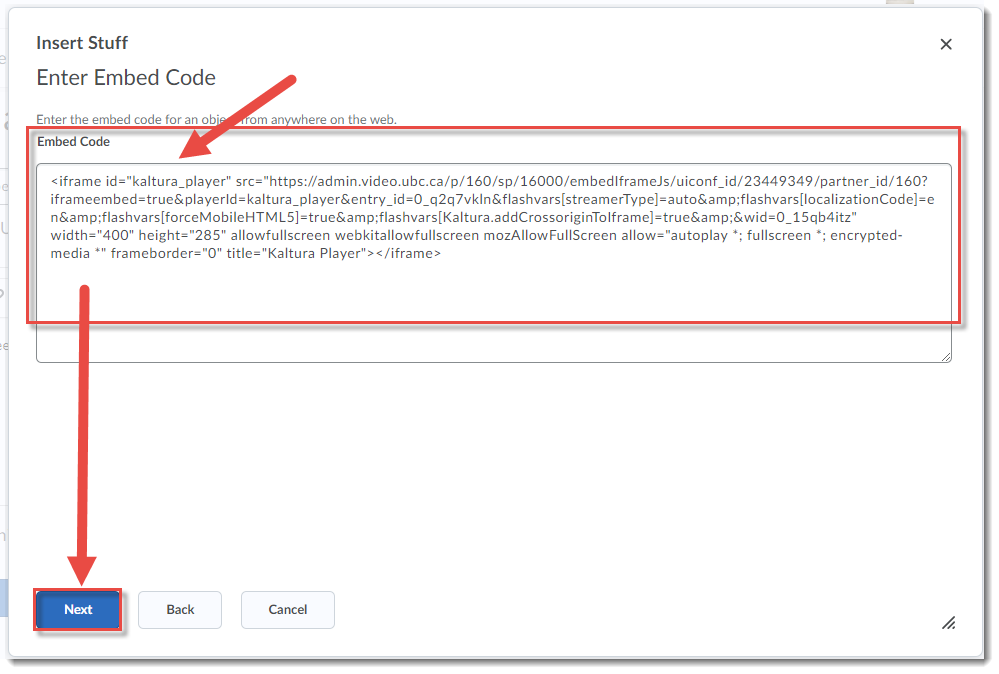
  22. Paste the Embed code you copied from the My Media area into the Embed Code box, and click Next.

    Paste the embed code and click Next

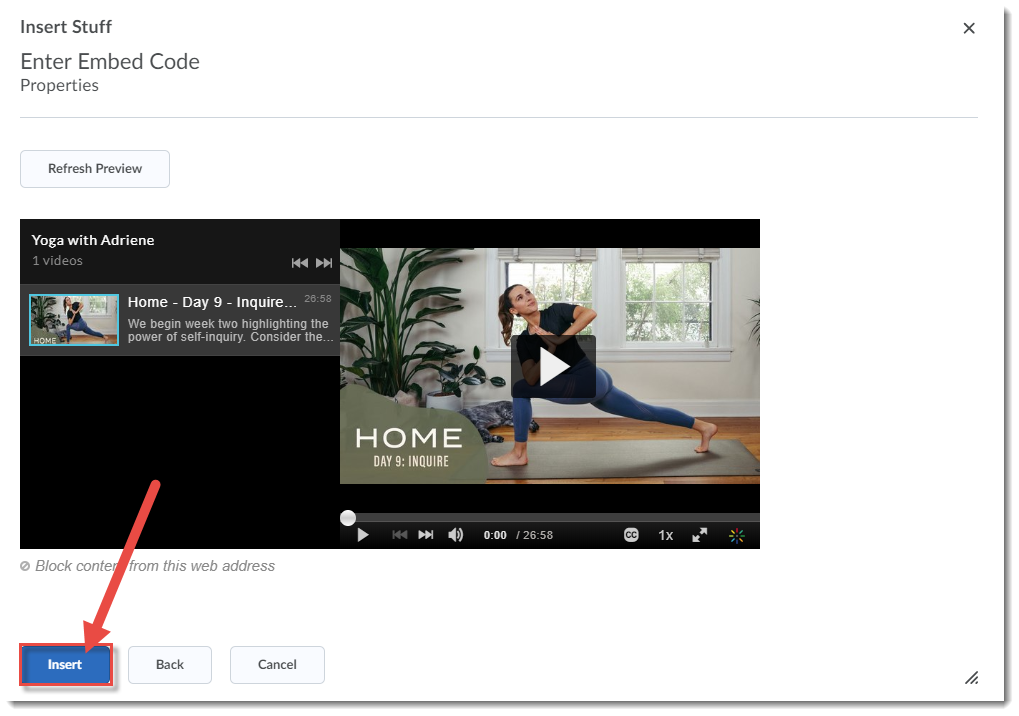
  23. Once the video appears in the Preview area, click Insert.

    Click Insert

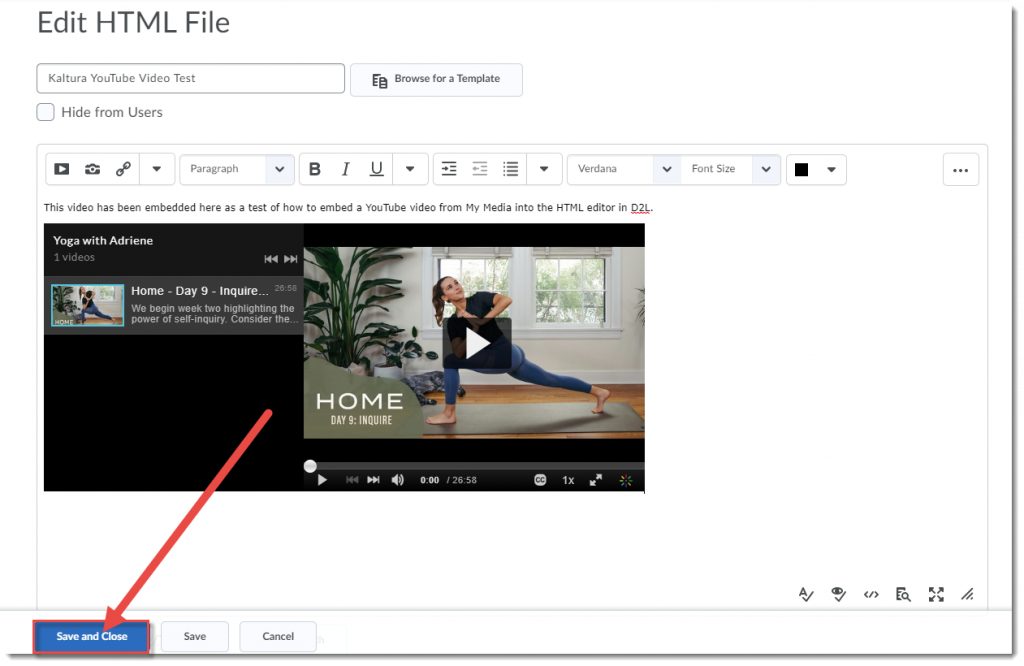
  24. Your video will now appear in your Content Topic page, and you can click Save and Close to publish your Topic page. Your Topic will now appear with the embedded video in it.

    Click Save and Close

Things to Remember

When you embed a YouTube video you have added to your My Media space into a D2L page, the video will not show advertising or additional videos as it does when embedding it from YouTube directly.

CC-BY SAThis content is licensed under a Creative Commons Attribution 4.0 International Licence.Icons by the Noun Project.

Hiding Modules and Topics from Students – New Interface in Content

This tutorial is designed for faculty who have previous experience using the Content tool in D2L and will cover the steps involved when you wish to hide modules and topics from students using the Hidden/Visible function.. For further information, please contact desupport@camosun.ca for assistance.

Steps

  1. Go to the Content tool in your course. Then, in the Table of Contents box, click on the title of the Module you want to work with.
  2. If you want to hide the entire Module, first, click the open eye icon (at the top-right of the Module page).

    Click the open eye icon

  3. Then, click the checkmark to change the status of the Module from Visible to Hidden. This will hide all Topics in the Module until you make the Module Visible again.

    Click the checkmark
    Hidden status

  4. If you would like to hide only one Topic, click on the down arrow next to the Topic title and select Edit Properties in Place.

    Select Edit Properties in Place

  5. Click the open eye icon (at the top-right of the Topic title) and, as for hiding a Module, click the checkmark to change the status of the Topic to Hidden. This will hide this one Topic from students until you make the Topic Visible again.

    Click the open eye icon

  6. Click the checkmark
  7. If you want to hide multiple Topics in a Module (but not all of them), click Bulk Edit on your Module page.

    Click Bulk Edit

  8. Click the open eye icon (at the top-right of the Topic title) and click the checkmark to change the status of all the Topics you want to hide to Hidden, then click Done Editing.

    Click the open eye icons, then the checkmarks.

Things to Remember

If you set Topics or Modules to Hidden, you will need to remember to go back and make them Visible them for your students to see them. You can also keep a Module or Topic Visible and use the Add dates and restrictions function to automate their release to students.

CC-BY SAThis content is licensed under a Creative Commons Attribution 4.0 International Licence.Icons by the Noun Project.

BCcampus Accessibility Workshop Resources

Awhile back, I posted about the BCcampus BCcampus Inclusive Design Webinar Series.  But I since realized that I hadn’t followed up with a link to the resources which were posted later at BCcampus.

So, without further ado, here are the Accessibility Workshop Resources which include the presentation slips, and information on how to create accessible webpages, Word documents, PDFs, PowerPoints, etc.

If ever you have questions about how to create accessible documents for your WordPress sites, D2L course sites, or Open resources, or about how to create and edit closed captioning for videos you create in Kaltura, contact desupport@camosun.ca to arrange to meet with an instructional designer.


Open Education Grants Expressions of Interest for Camosun Instructors

Recently, Camosun College was awarded a BCcampus Open Education Sustainability Grant from BCcampus. This grant has been allocated to provide teaching release and professional support to Camosun instructors interested in redesigning their courses over the next year through creating, adapting, and/or adopting Open Educational Resources (OER) or engaging in other forms of open educational practices with the aim of enhancing the learning experience for students.

This would be an ideal project for May/June 2020 Scheduled Development. Accepted applicants will begin their projects with an intensive workshop (3 full days face to face with days between for reflection and homework) from May 19 to May 25, 2020. Project participants will learn from each other and will be supported by the Camosun open project team based in CETL and the Library.

To be considered for this project, interested faculty must submit a 250 word proposal by January 20, 2020.

Definitions of Terms from BCcampus

Application Guidelines

  • Applicants must be CCFA or BCGEU faculty members (term or continuing) at Camosun College.
  • Created/adopted/adapted OER must become a required resource for a course or courses, replacing a commercial textbook or resource.
  • The creation/adoption/adaptation of the OER must reduce the cost to students (preferably to no-cost) and increase their use of a learning resource.

Proposal requirements

Submit your project proposal online by Jan. 20, 2020.

Proposal descriptions should be a maximum of 250 words, and include the following:

  • What kind of project you would like to pursue – rationale, objectives
  • How the project outcomes will reduce costs to students and enhance their learning experience
  • If your project intends to create new OER, provide a rationale for why you are creating new resources rather than modifying or adapting existing resources
  • Indicate when you plan on using your OER in your course(s). (Your OER should be ready to be integrated into your course(s) sometime between May 2020 and September 2021.)
  • Letters of support from your Chair and Dean

Examples of possible projects

  • Your project could be an Open Textbook, a multimedia resource, course modules, quiz questions/testbank, web resources, video, etc.
  • Your project could support you moving away from traditional textbooks to adapting/adopting an existing open textbook, or moving to no textbook using a variety of open resources, etc.
  • Your project could involve integrating open activities into your course activities, or creating non-disposable assignment options for students.

Evaluation Criteria

  • Potential impact on student experience in the form of high-quality materials, maximum access, open and innovative pedagogy, and cost savings to students.
  • Extent to which project includes curation and customization of OER that will be freely and openly shared throughout and beyond Camosun College.
  • Distribution of “grants” across a range of disciplines.

If you have questions, please contact Emily Schudel, schudele@camosun.ca.

The Open EdTech Collaborative

The Open EdTech Collaborative is “a community of educators, technologists, and designers sharing their expertise to foster and support open infrastructure for the BC post-secondary sector. No contracts or agreements are required to join us, just a willingness and ability to actively participate in our collective endeavor to:

  • encourage technological autonomy and provide ways for students, faculty and institutions to own and control their own data.
  • lower the barrier to participation on the open web for BC faculty and students.
  • provide a more sustainable ed tech infrastructure to BC higher education that gives institutions more control over their tools.  Institutions are currently at the mercy of vendor pricing, upgrade cycles, and exit strategies.  This puts institutions at a certain degree of risk when there are changes to any of the variables beyond their control.  Open-source approaches reduce the risk to institutions in this regard.
  • assist BC faculty in evaluating and making informed pedagogical decisions around open-source teaching and learning applications.”

If you are a student or educator in BC, you can sign up for an Open ETC account , and try out the tools they support, like WordPress, Sandstorm (a collection of open source applications) or Mattermost (an open-source messaging platform) – and since Open ETC is hosted by Thompson Rivers University, these platforms are available to you on BC servers, and are thus FIPPA compliant.

Take a look and try out some of their tools. And just so you know, this blog is now on the Open ETC WordPress instance!

Reminders for Winter – Where to get Help

As we gear up for the new school year, I wanted to remind you of some important information related to D2L, both for faculty and students.

Wondering where to get help?  We have offices at Lansdowne in the Library (LLC158) and at Interurban in the Campus Centre (LACC236) .  Check out our website for information on drop-ins at interurban.

For help at Lansdowne, contact eLearning Support at desupport@camosun.ca to book a consult with an instructional designer.