This tutorial will cover the steps involved when you wish to create and configure a new Session in your Blackboard Collaborate Ultra room that you’ve set up access for in your D2L course. For further information, please contact desupport@camosun.ca for assistance.
Steps
- Go to the location in your course site where you have linked to your Blackboard Collaborate Ultra room (for example, in the Content tool). For information on how to set up this link, see the tutorial Create a Blackboard Collaborate Ultra Room in D2L.
- Click on your Blackboard Collaborate Ultra link to open your Blackboard Collaborate Ultra room.
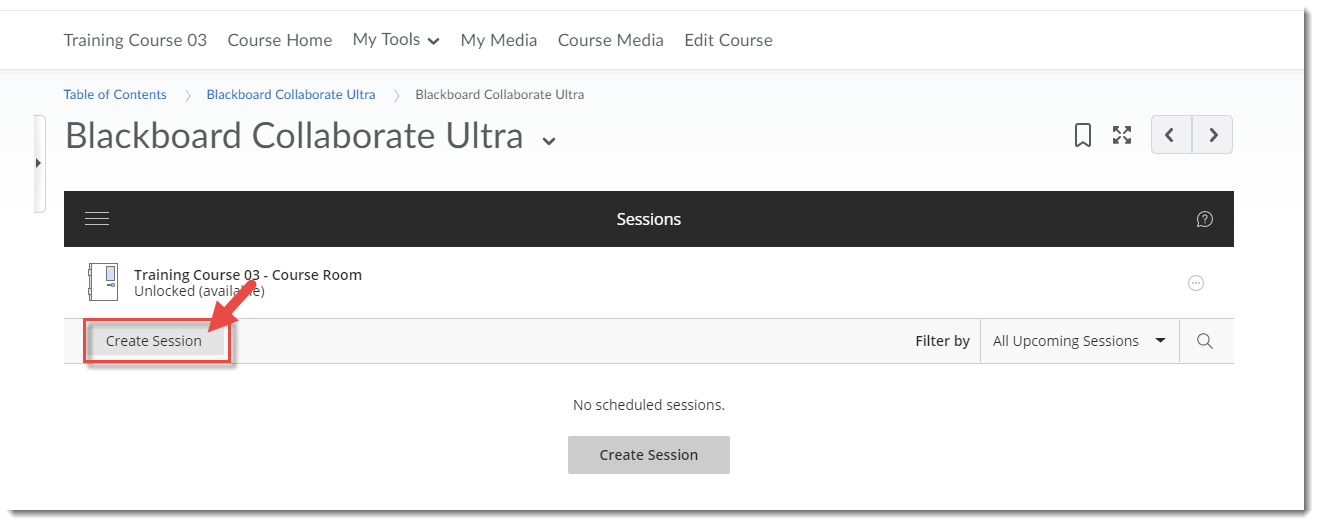
- Click Create Session.
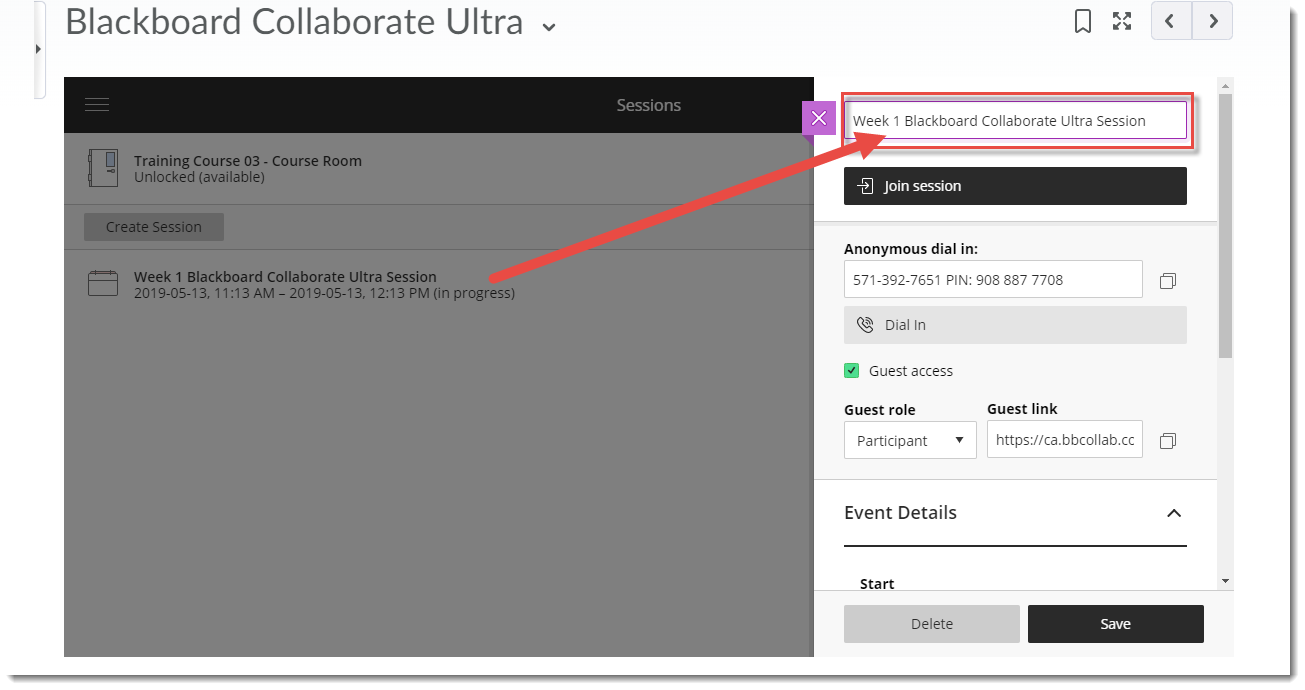
- Give the Session a Name (for example, Week 1 Blackboard Collaborate Ultra Session).
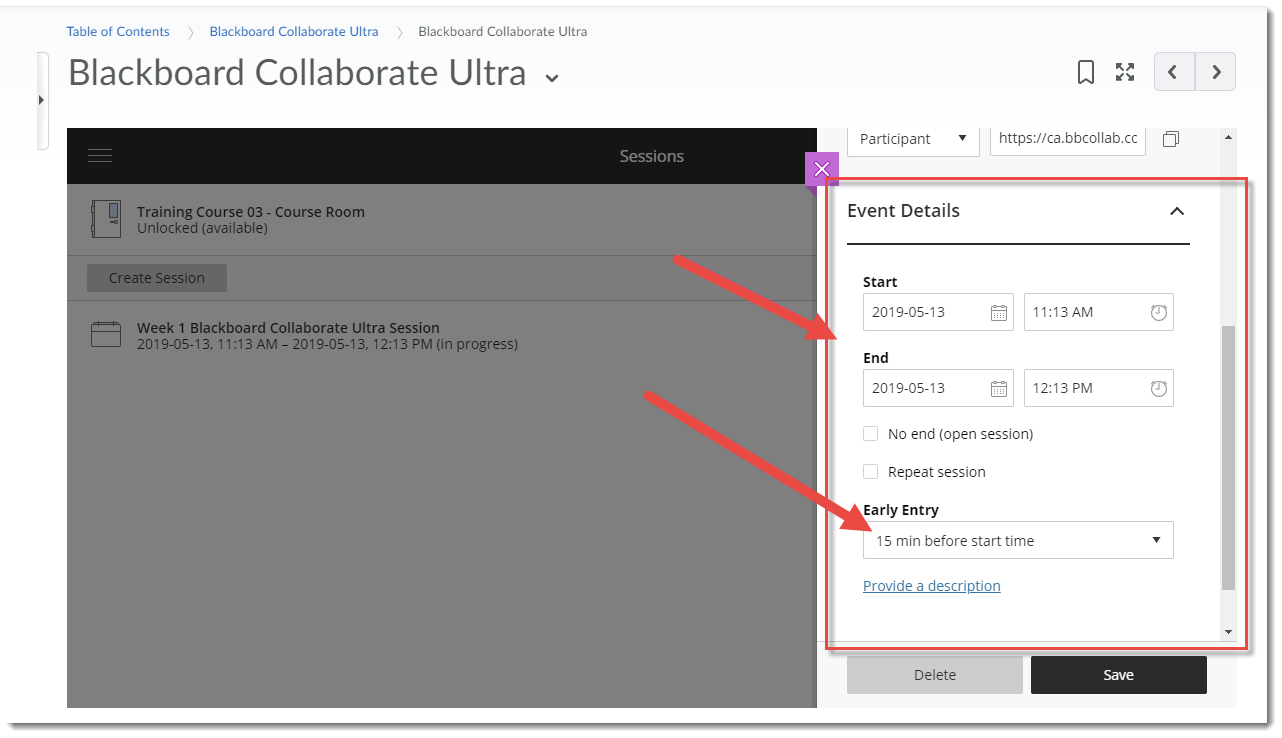
- Under Event Details, add Start and End dates for the Session. Select No end if you want an open session with no end, or Repeat session if you want to have a session repeat at selected intervals (for example, Daily, Weekly, Monthly). Select an Early Entry time so participants can come in early and configure their audio and video. You can also select No early entry, but we advise allowing participants a bit of time to ensure technical issues are dealt with before the session starts.
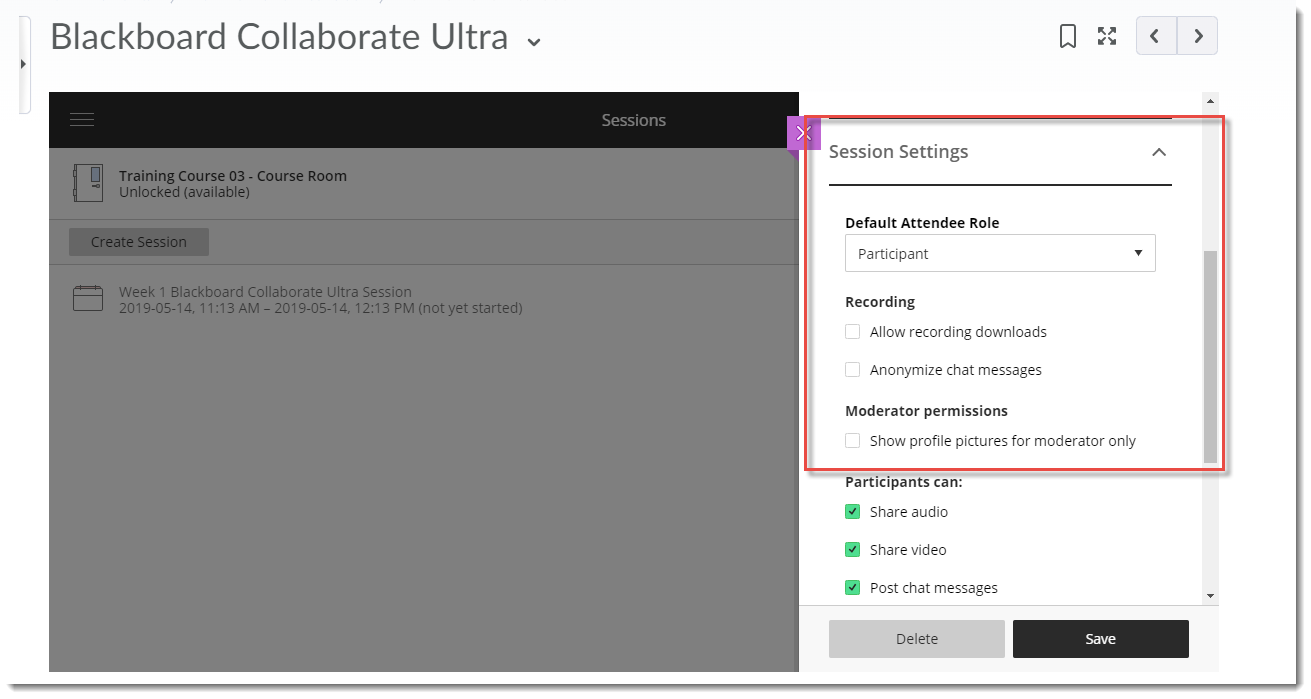
- Under Session Settings, select a Default Attendee Role (you can choose Participant, Presenter, or Moderator. See the tutorials Understanding Blackboard Collaborate Ultra Session Roles for more information about the three roles). Select Recording options and Moderator permissions if needed.
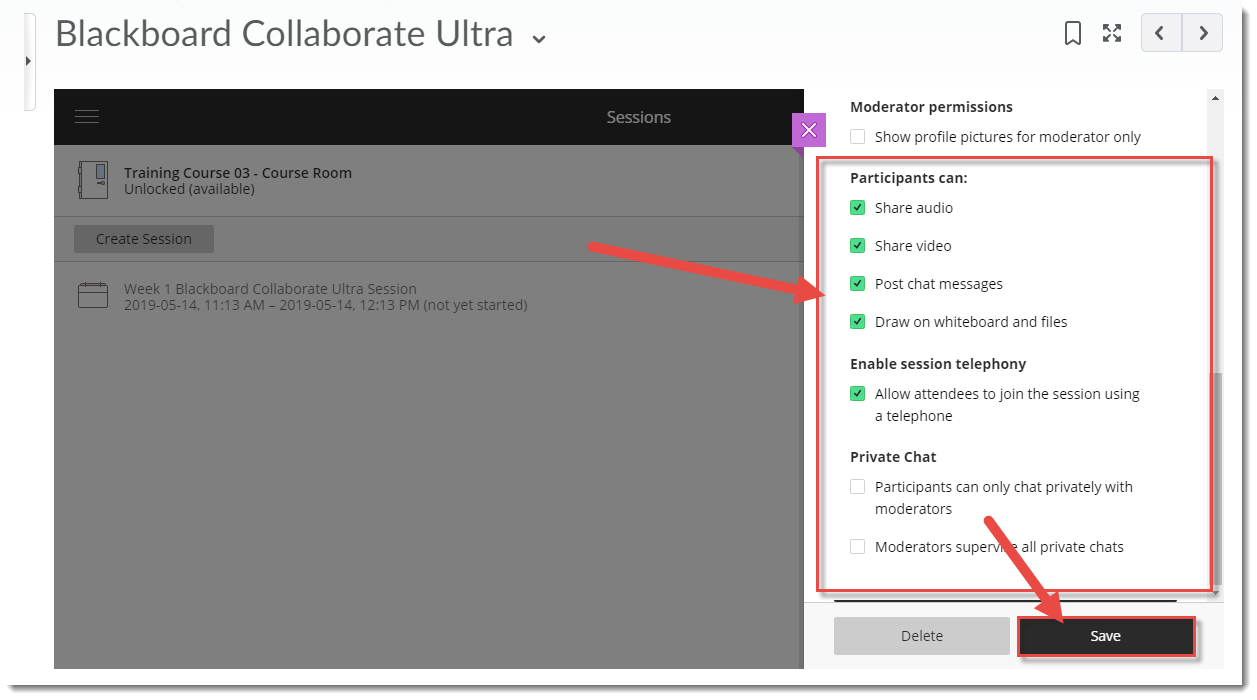
- Scroll down to select options for Participants can, select Enable session telephony (recommended), and select Private Chat options (to prevent completely private chatting between students). Click Save.
- You will be able to click on the session to edit the settings, but you and your students will NOT be able to enter the session until the start day/time.
Things to Remember
For information on how to manage and facilitate a Blackboard Collaborate Ultra session, see the relevant tutorials.

