I have some updates for you about our spring workshops – some new workshops, and a few cancellations. If you were registered in a workshop that has now been cancelled, you will have been sent a notification. Check out the workshop descriptions below, and register at https://www.surveymonkey.ca/r/B7KYD8P
If you have any questions, or don’t see what you are looking for, email Emily Schudel at schudele@camosun.ca.
Lansdowne Workshops
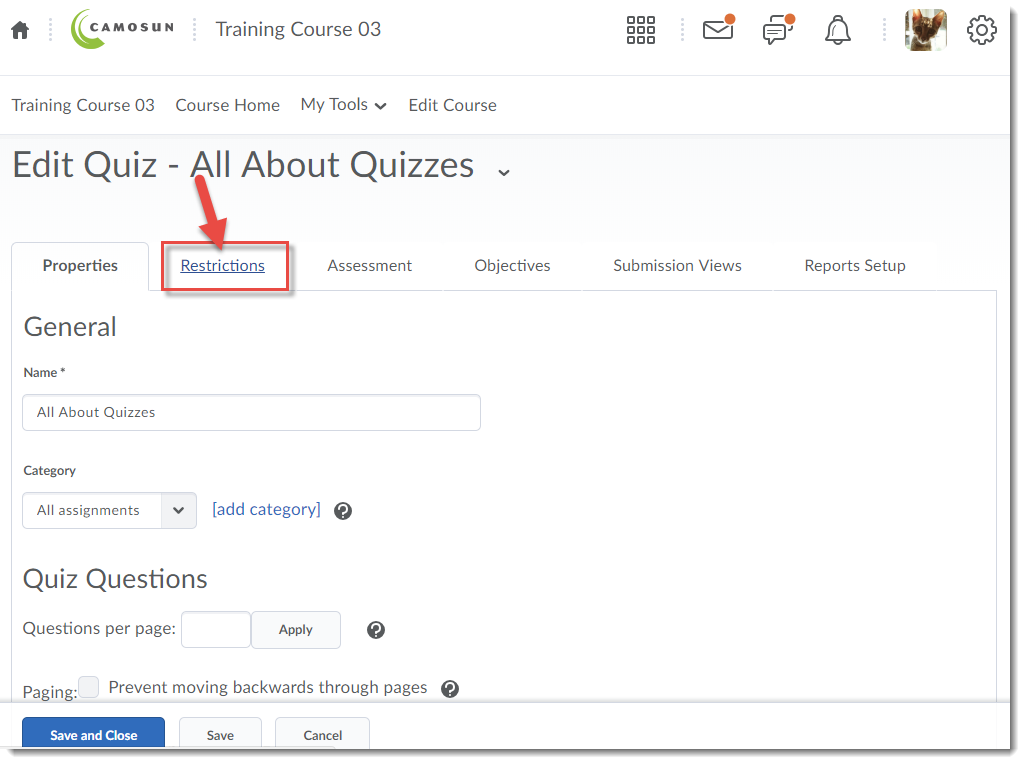
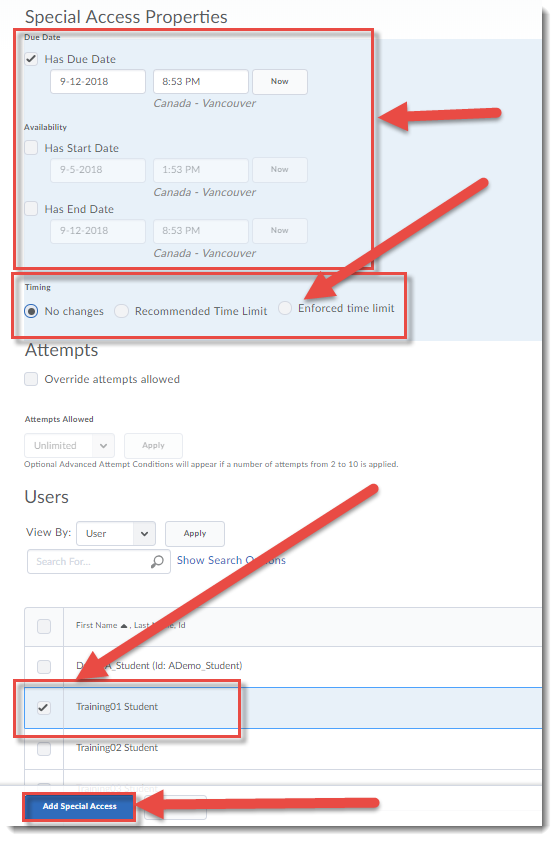
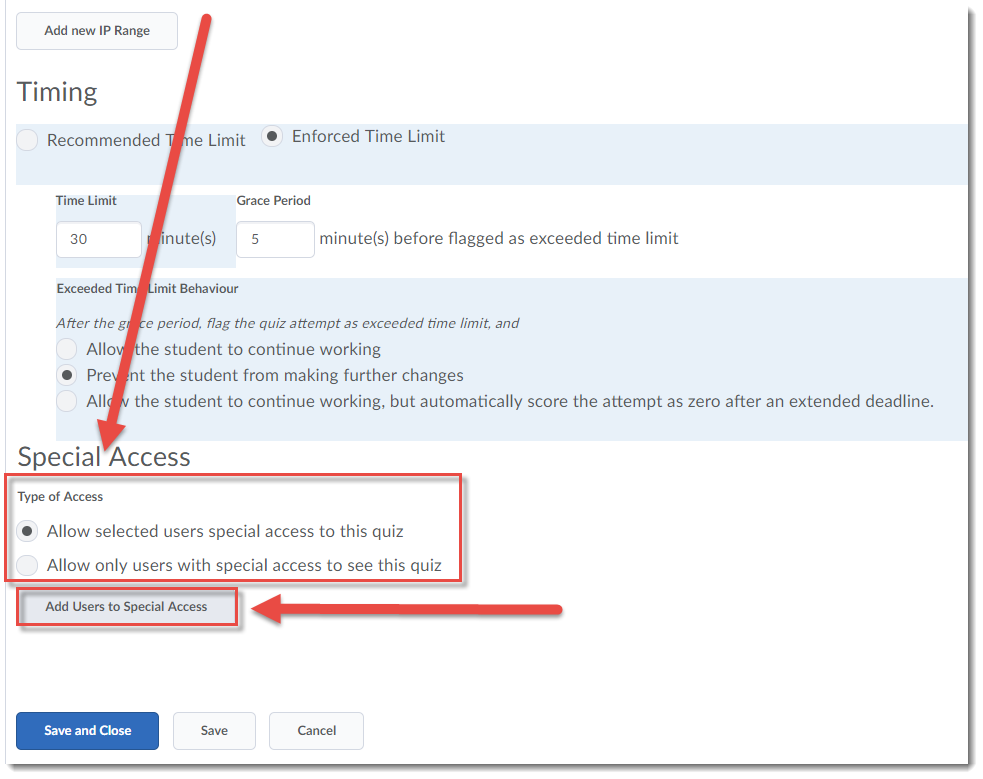
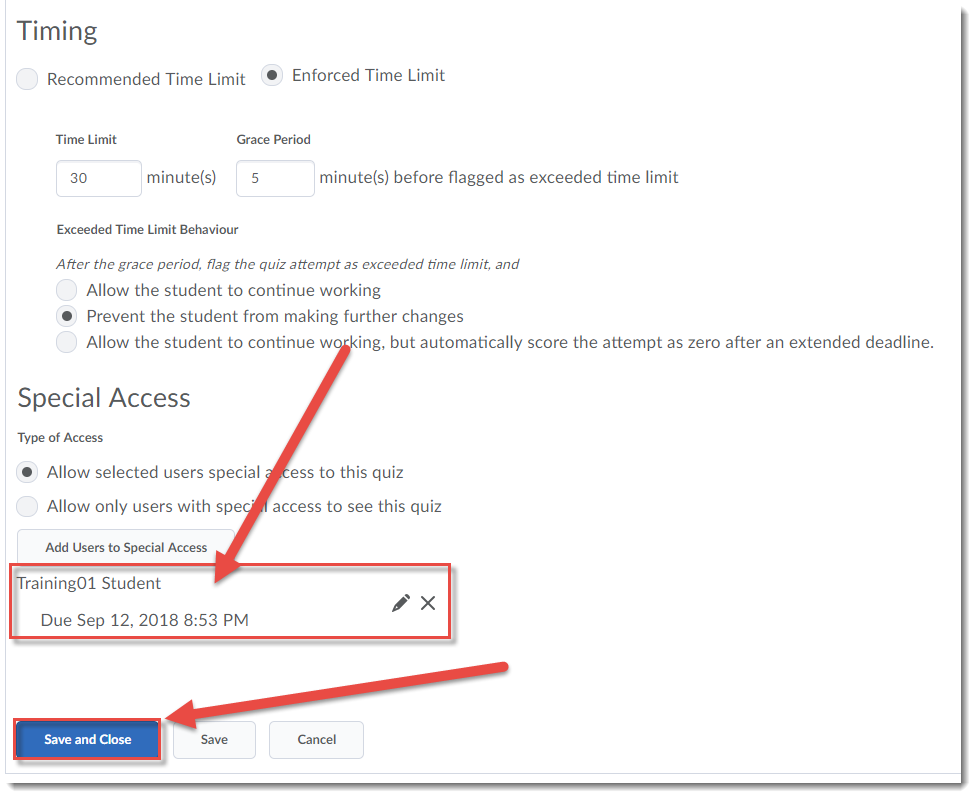
D2L Quizzes – How, Why, and the Daylight Experience: Monday, May 13, 2:00-4:00pm, Room Ewing 110
- This hands-on workshop will cover creating, managing, and grading quizzes and the question library in the new version of D2L, Daylight Experience. Basic familiarity with D2L is recommended for participants interested in this workshop.
Facilitating Discussions and Collaborative Work in D2L: Tuesday, May 14, 10:00-11:30am, Room Ewing 110
- In this workshop we will examine a variety of online communication tools within D2L, and discuss various facilitation techniques that you can use to engage learners and promote collaboration online.
D2L Design Considerations for Mobile Devices: Tuesday, May 21, 2:00-3:30pm, Room Ewing 110
- More and more students are using mobile devices (phones and tablets) to work in their D2L course sites. But how does it actually look to students? Bring your tablet and phones to this workshop, and try out some design techniques to make sure your students can get the most out of your D2L site on their own devices.
Fun with Rubrics: Friday, May 24, 9:00am-12:00pm, Room Ewing 110
- This hands-on workshop will discuss best practices around designing a variety of rubrics and integrating them into your assessment, participation, and feedback strategies. Note that we will set up a simple rubric during the session to practice using the tool, but participants are encouraged to bring their own rubrics for discussion with the group. Basic familiarity with D2L is recommended for participants interested in this workshop.
Creating Community in the Online Classroom: Online May 20-27 + Face-t0-Face Monday, May 27, 2:00-3:30pm, LLC151
- What does it mean to create an online community for your students? What considerations do you need to keep in mind when developing online activities to support that online community? This blended workshop will give you the opportunity to engage in online community building, and to work with your peers face-to-face to develop strategies for integrating online community-building activities into your course. NOTE: the online component will run first, taking 1-2 hours to complete over a week, and will be followed by a 1½ hour face to face session.
Social Media use in Education: Wednesday, May 29, 10:00am-12:00pm, LLC151
- Interested in integrating social media into your classroom? This workshop will examine various social media tools used in the teaching and learning and discuss best practices. In addition, participants will have the opportunity to share strategies on how social media can be incorporated into their own courses.
Getting Started with Readspeaker/TextAid in D2L: Thursday, May 30, 2:00-4:00pm, Room Ewing 100
- ReadSpeaker offers text-to-speech solutions for websites, online course materials, e-books and digital documents. In this session, we will introduce you to the collection of ReadSpeaker tools we now have available within D2L courses and show you how you and your students can use and access these tools.
Getting Started with ePortfolio in D2L: Friday, May 31, 10:00am-12:00pm, Room Ewing 110
- Looking for options for your students to collect and share documents, assessments, presentations, etc. with other students and faculty across their Program? Come find out how ePortfolio in D2L might support you!
Kaltura 1: Getting Started with Kaltura: Streaming Media at Camosun! Monday, June 3, 2:00-4:00pm, Room Ewing 110
- Kaltura is Camosun’s a streaming media tool (we sometimes call it Camosun’s YouTube). This means faculty and students now have a place to create, edit, and house their course-related videos. Kaltura also integrates with D2L. Come to this hand-on session to find out more about what Kaltura is, what it can do, and learn how you can use it for your courses.
Kaltura 2: Kaltura Media Capture: Creating Multimedia Magic! Tuesday, June 4, 10:00am-12:00pm, Room Ewing 100
- Are you interested in creating engaging media pieces for your courses? Not sure where to begin? Join Bob Preston for this hands-on workshop Kaltura Capture Space.
BlackBoard Collaborate Ultra: Information session: Wednesday, June 5, 10:00-11:00am, LLC151
- Blackboard Collaborate Ultra is a synchronous classroom tool that is coming to Camosun. This means that faculty now have an online tool with audio, video, chat, and whiteboard/desktop sharing capabilities to support their teaching in real-time. Come find out more about Blackboard Collaborate and how it can be used, as well as when it will be available, at this information session.
Kaltura 3: Best practices around integrating media into D2L: Wednesday, June 5, 2:00-4:00pm, Room Ewing 100
- This hands-on workshop covers the technical consideration of integrating multimedia into a D2L course, answering the questions: What do you need to keep in mind when integrating a multimedia piece into a D2L course? What are the benefits of linking versus embedding? Where can I store my video files? Why can’t I just import media files into D2L? How do I effectively insert audio files? When is copyright a consideration? Time will be set aside for you to integrate and test your multimedia components in D2L. Basic familiarity with D2L is recommended for participants interested in this workshop.
Interurban D2L Workshops
Designing for Engagement: Moving beyond Text and Images: Thursday, May 16, 10:00-11:30am, LACC135
- Come learn how to transform your content to accommodate a variety of learning styles and abilities. We’ll begin with an overview of the content tool and its functionality to get you started with building content. We’ll then explore how you can transform various types of content including (but not limited to): PDFs, PPT and Word documents to a web-accessible format that improves the teaching and learning experience.
Getting Started with Kaltura, Thursday, May 16, 1:30-3:30pm, LACC235
- Kaltura is Camosun’s a streaming media tool (we sometimes call it Camosun’s YouTube). This means faculty and students now have a place to create, edit, and house their course-related videos. Kaltura also integrates with D2L. Come to this hands-on session to find out more about what Kaltura is, what it can do, and learn how you can use it for your courses.
Introduction to Blackboard Collaborate Ultra: Information Session: Friday, May 17, 10:30-11:30am, LACC235
- Blackboard Collaborate Ultra is a synchronous classroom tool that is coming to Camosun. This means that faculty now have an online tool with audio, video, chat, and whiteboard/desktop sharing capabilities to support their teaching in real-time. Come find out more about Blackboard Collaborate and how it can be used, as well as when it will be available.
Setting up Your Gradebook: Thursday, May 23, 1:00-2:30pm, LACC235
- This hands-on workshop will focus on setting up your D2L Gradebook from start to finish. Please bring your course outline (or a breakdown of your assessment items) to the workshop if you wish to build your own Gradebook.
Quizzes & Leveraging Course Analytics in D2L: Friday, May 24, 10:00-11:30am., LACC235
- This workshop will begin with an overview of how to create, customize and grade quizzes. Participants will also learn how to take advantage of the D2L’s robust analytics to enhance the learner experience and identify redesign opportunities.
Exploring Different Ways to Use Rubrics: Thursday, May 30, 10:00-11:30am, LACC235
- Come learn how you can streamline your assessment strategy, communicate expectations and feedback for your learners while also building in quality assurance measures and cutting down on manual marking. Various examples, lessons learned and planning tips will be shared. Participants will have the opportunity to build or refine a rubric.
Taking a Closer Look at Communication & Collaboration in D2L: Thursday, June 6, 10:00-11:30am, LACC235
- Take a closer look at how instructors can use communication tools to connect with students and support collaborative learning experiences.
Kaltura 2: Creating Media Magic using Kaltura Capture, Thursday, June 6, 1:30-3:30pm, LACC235
- Are you interested in creating engaging media pieces for your courses in D2L? Not sure where to begin? Join Bob Preston for this hands-on workshop on Kaltura Capture. Learn the basics of creating and chaptering basic screencasts, PowerPoint presentations with voiceover, as well as creating video quizzes that you can link to the gradebook.
Editing Closed Captions in Kaltura, Tuesday, June 11, 9:30-11:30am, LACC235
- In order to ensure your videos are accessible to a wide range of students, it is important to have accurate closed captioning. If you are planning to create and stream videos through Kaltura, the built in captioning software is only 70% accurate. This hands-on workshop will walk you through how to edit the captioning to ensure 100% accuracy. This workshop will also explore some best practices in video creation to support effective learning for students.
Conditional Release + Intelligent Agents: Thursday, June 13, 10:00-11:30am, LACC235
- This workshop will provide participants with an overview of how conditional release and intelligent agents can support the development of personalized learning paths for students within your course.
Creative Applications in eLearning: Friday, June 14, 10:00-11:30am, LACC235
- This workshop will showcase some creative ways to deliver content, engage learners and put a twist on some of the common teaching tools in D2L.