Interurban Workshops
To register for Interurban Workshops, visit our Registration Form. Questions about Interurban Workshops? Contact Monique Brewer or Meghan Campbell.
Getting Started with D2L (New Instructors)
Day/Time: Friday, May 1, 9:30-11:30am
Room: LACC 251J
Register
This workshop will provide you with an overview of the essential teaching tools available in our learning management system, D2L. Whether you are looking to supplement your face-to-face classes, transition from using a basic course website or simply want to learn more about how to enhance your current teaching methodologies with using D2L, this workshop has a little something for everyone. Come explore the tools and the possibilities!
Enhancing Your Courses with Video
Day/Time: Tuesday, May 5, 10:00am-12:00pm
Room: LACC 251J
Register
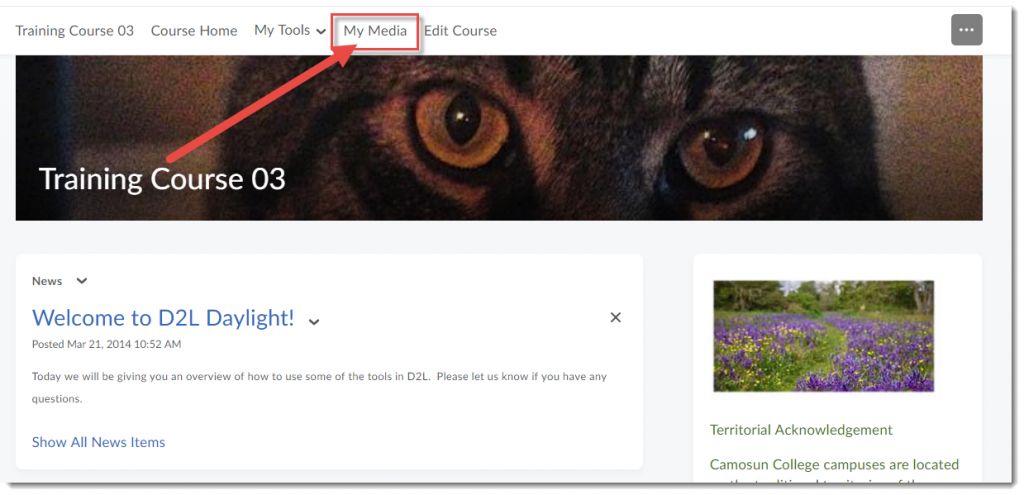
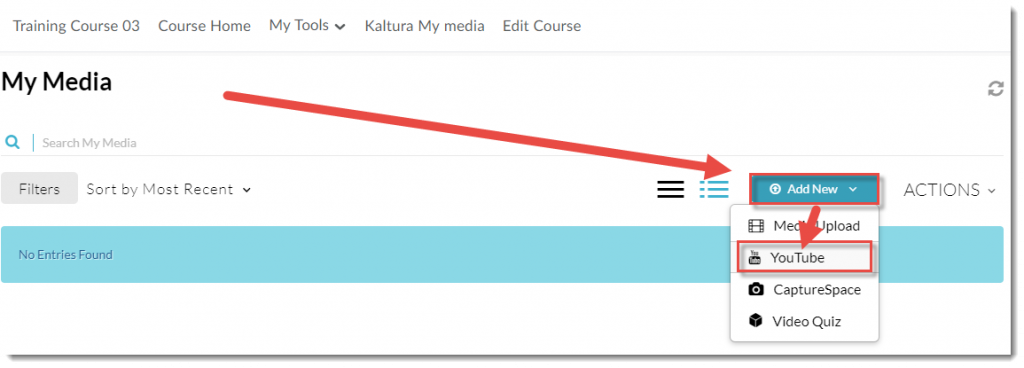
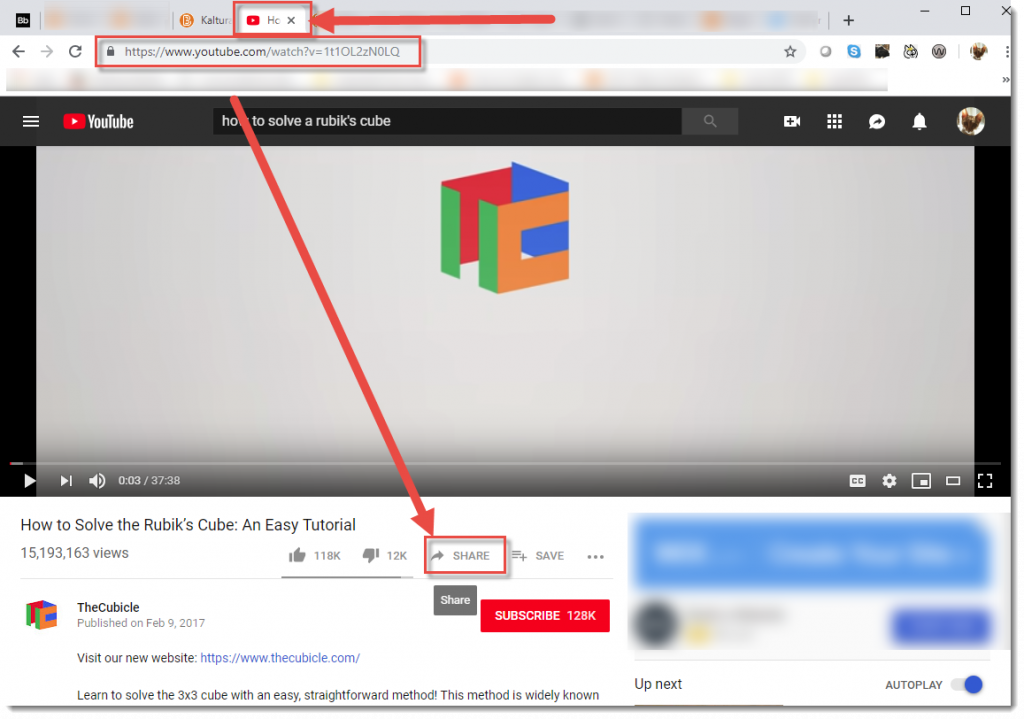
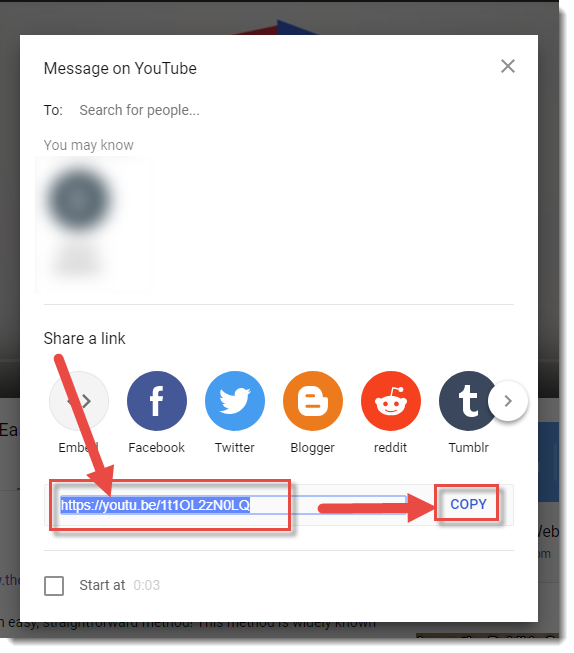
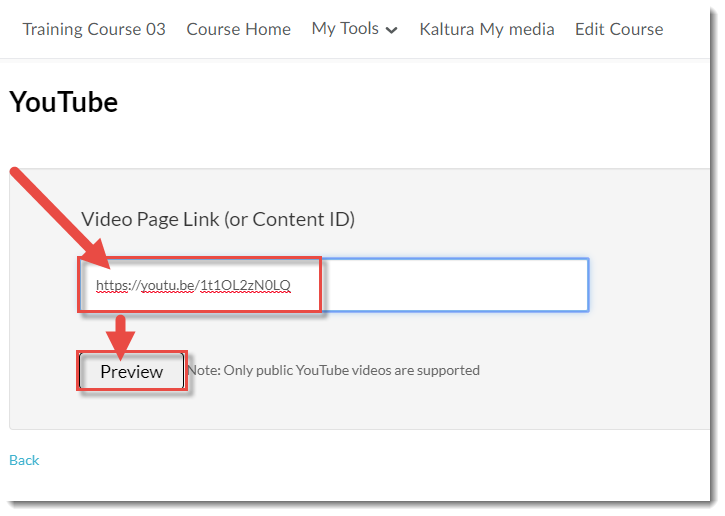
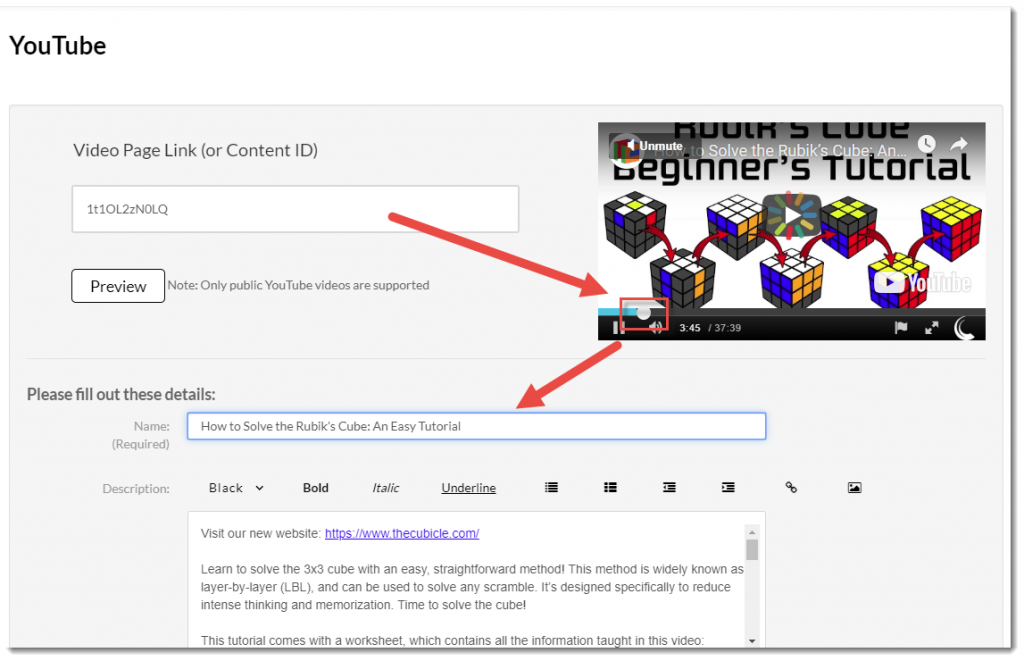
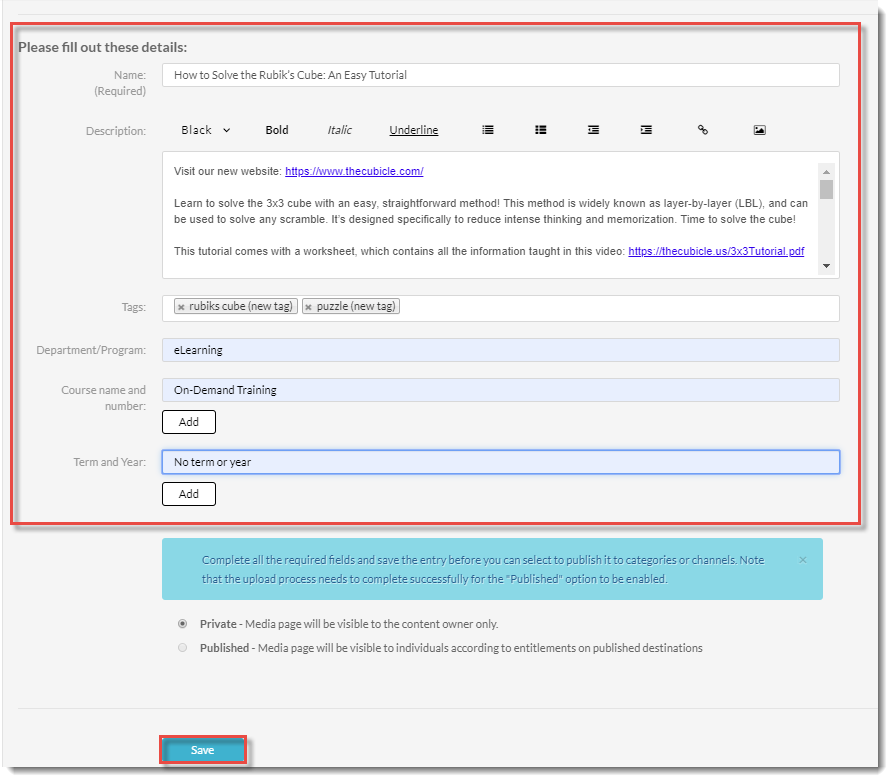
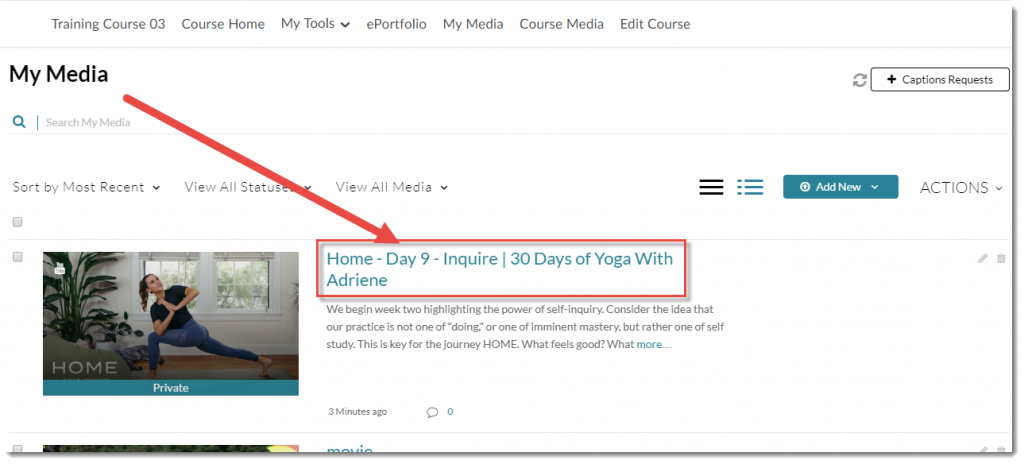
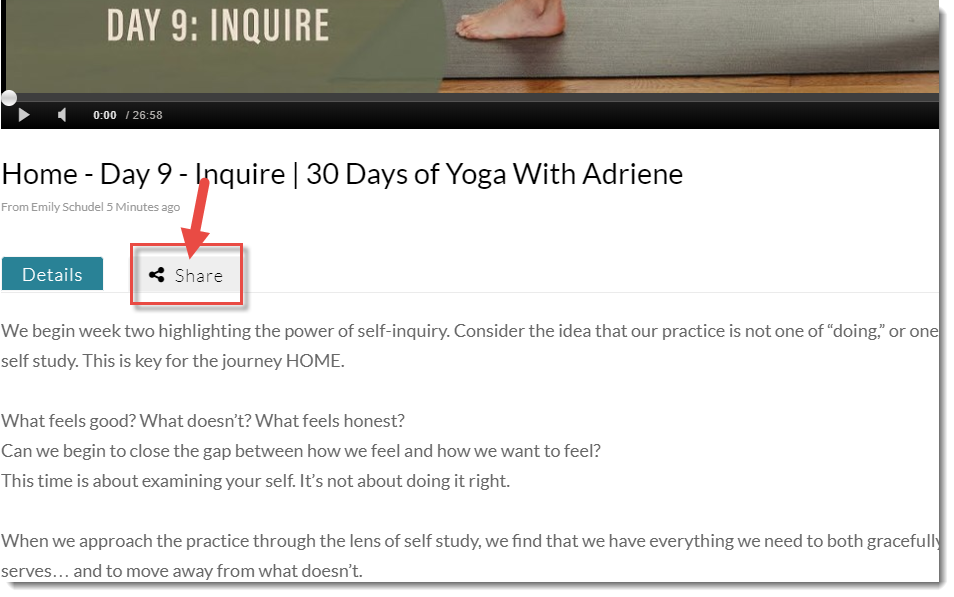
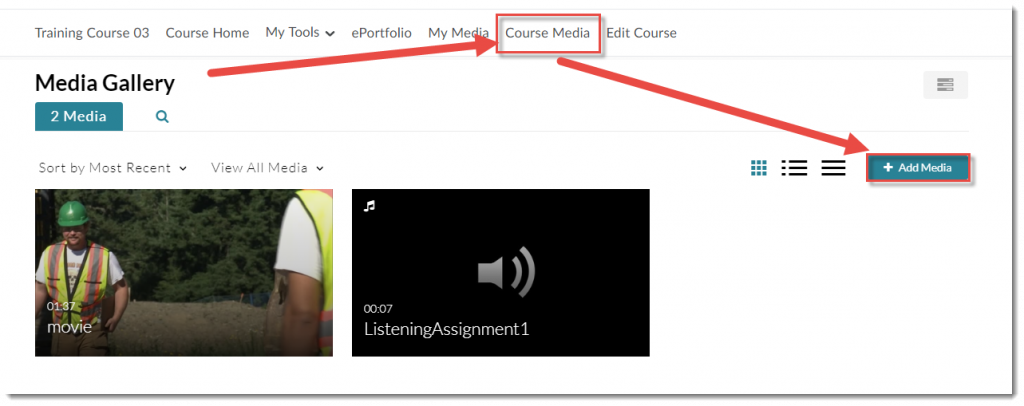
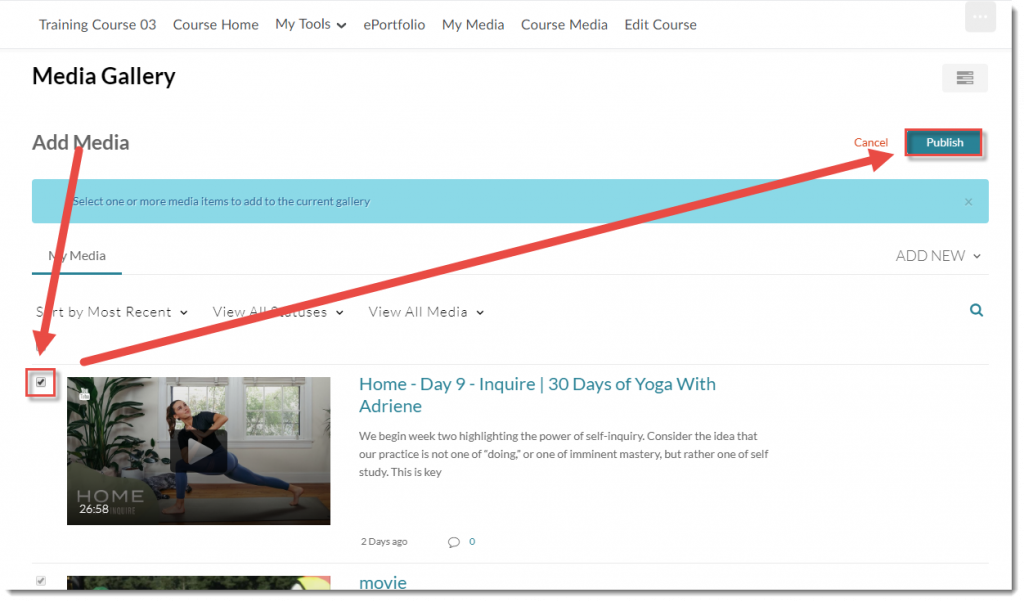
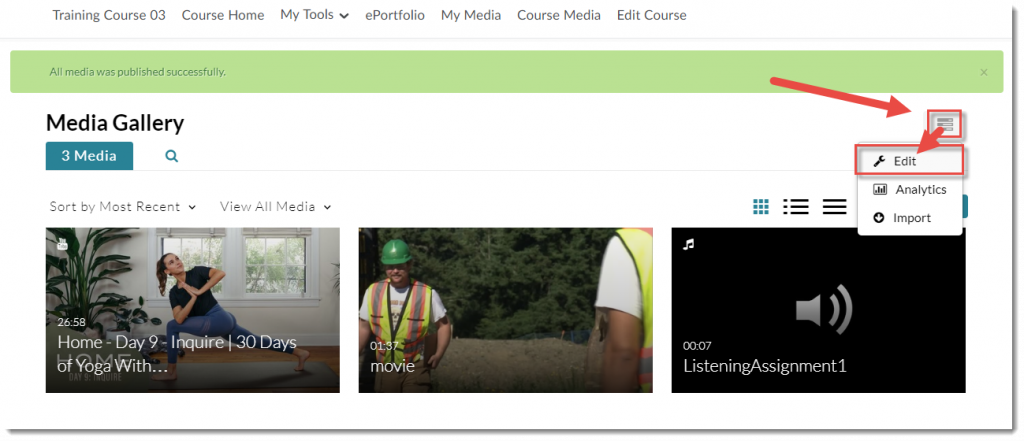
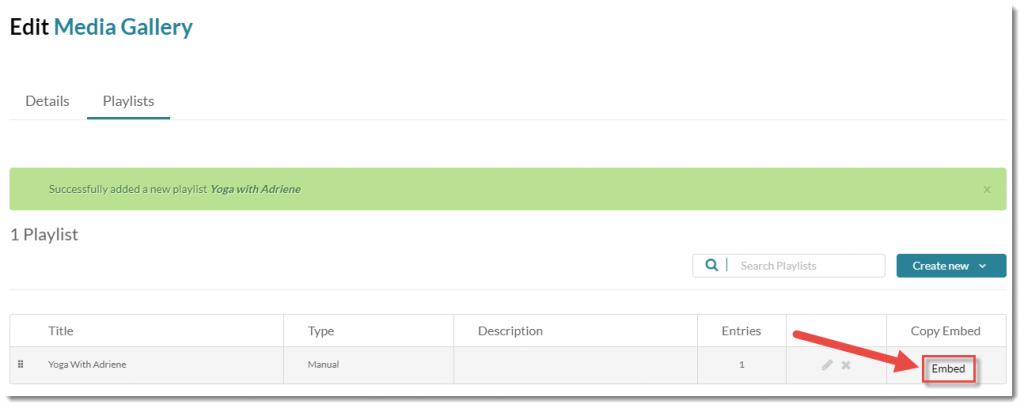
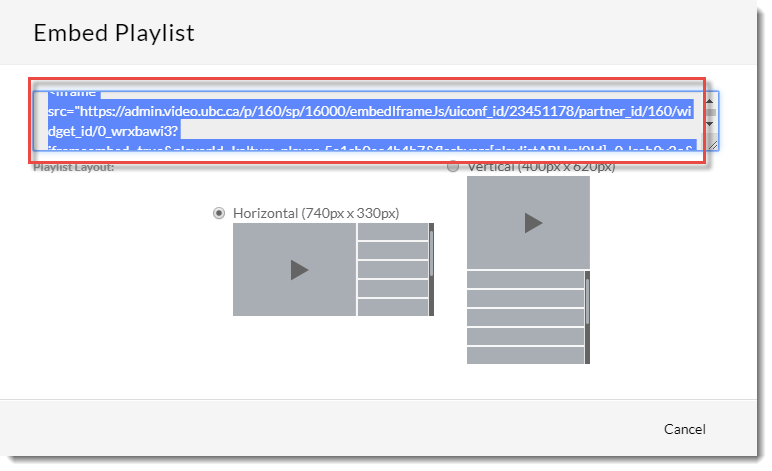
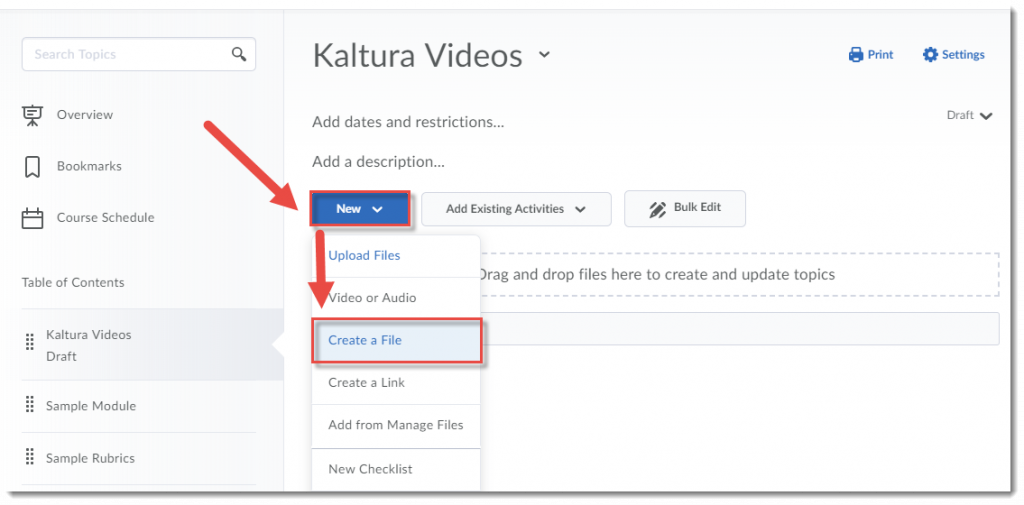
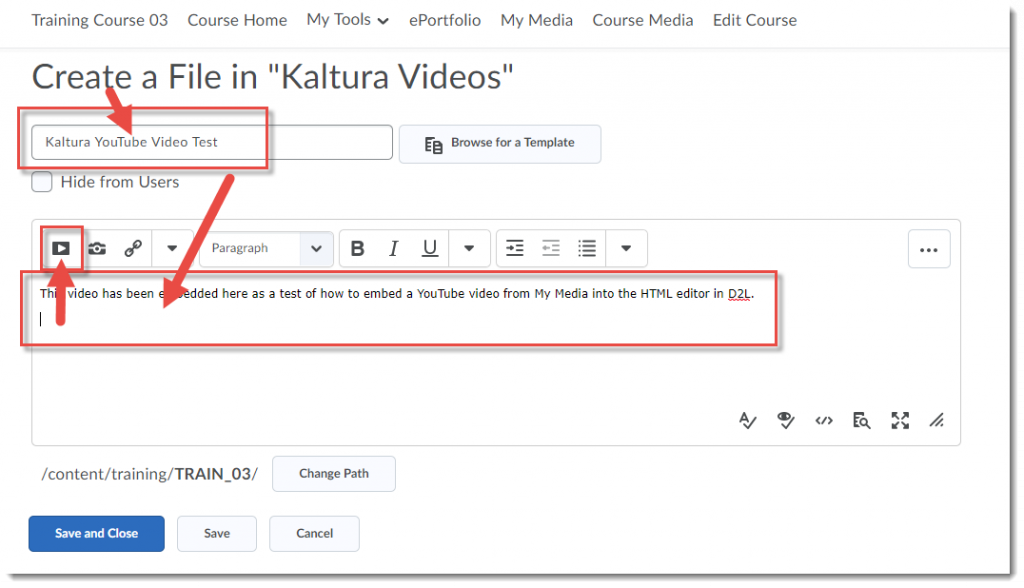
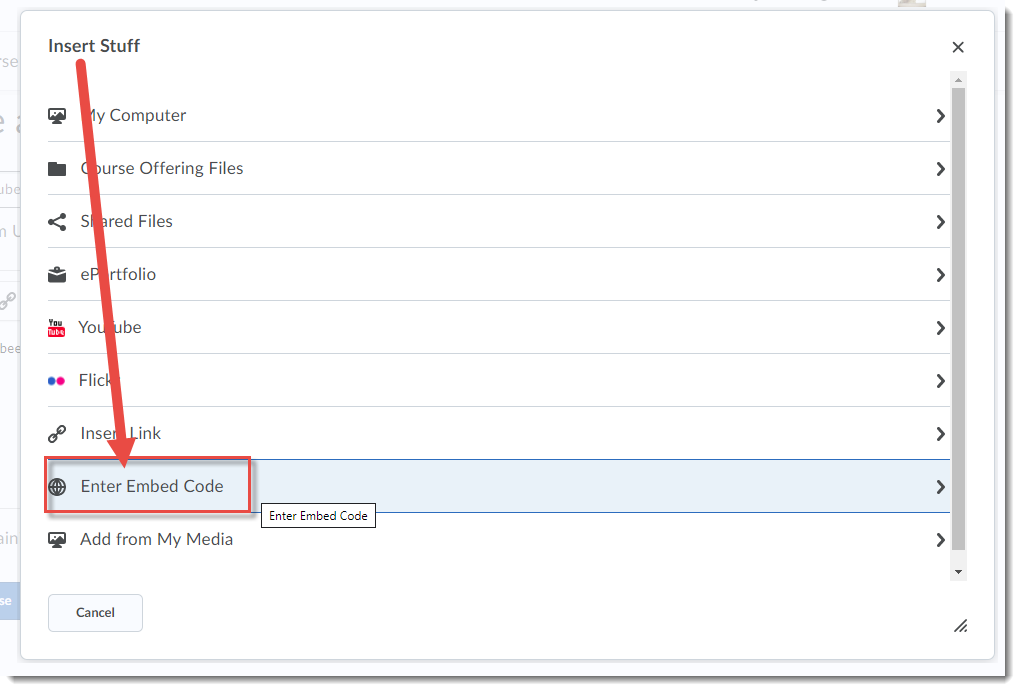
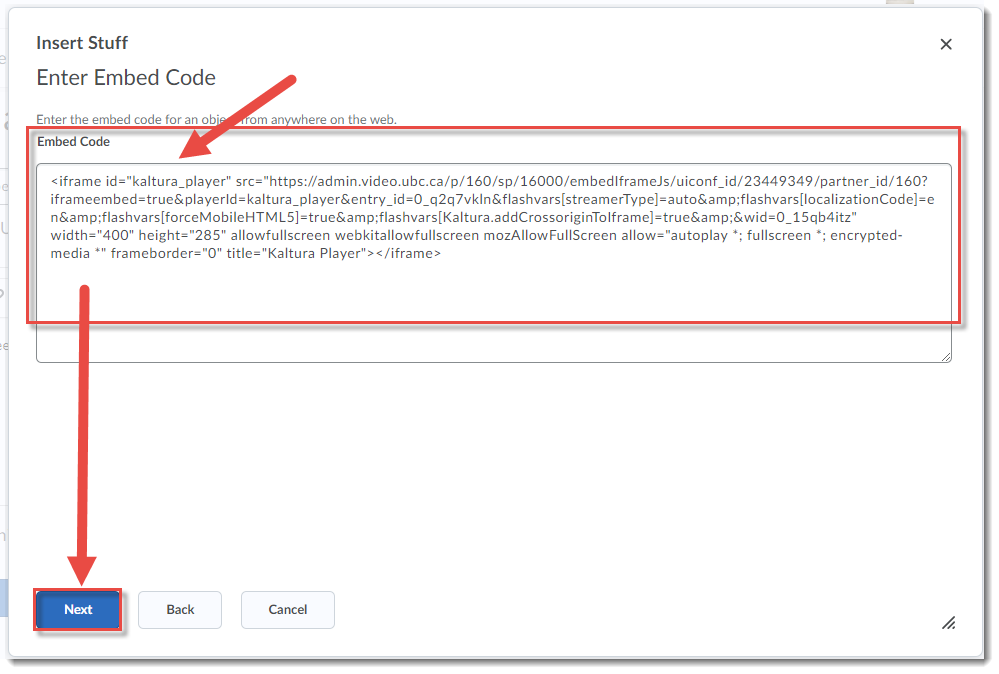
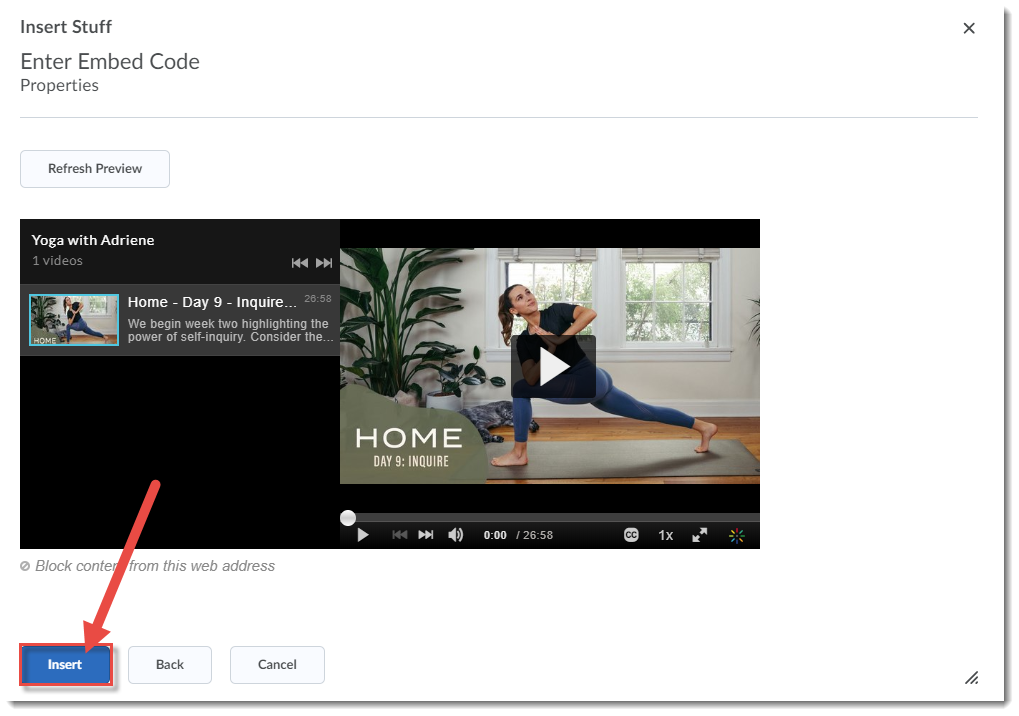
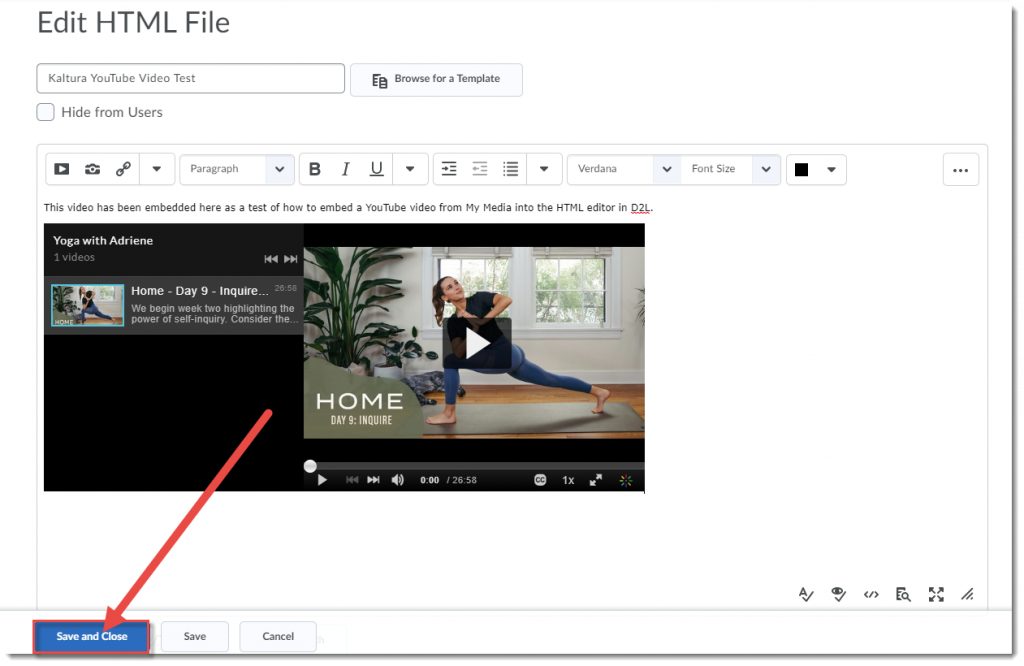
Kaltura is Camosun College’s streaming media service that offers easy-to-use video management and creation tools that integrate directly into D2L. Think of it as Camosun’s own YouTube service. This means faculty and students now have a place to create, edit, and house their course-related videos from one central location. This hands-on workshop will provide you with a high level overview of the Kaltura tools and get you started with using them in one of your courses. The workshop will be more meaningful if you come with a video to work with.
Course Spring Cleaning
Day/Time: Tuesday, May 5, 1:30-3:00pm
Room: LACC 251J
Register
Do you have a development site or a course offering that is need of clean up? Question libraries that need tweaking or manage files that need organization? This hands-on workshop will cover key best practices surrounding course maintenance and efficiencies in how to manage release dates associated with your course from one central location in D2L (saving you time!).
Designing for Inclusion with the Help of a New Ally!
Day/Time: Wednesday, May 6, 10:30-11:15am
Room: LACC 251J
Register
To support Camosun’s commitment to a more inclusive student experience, the eLearning team is introducing a new tool within D2L that will help all of us to prepare course content that meets Web Content Accessibility Guidelines (WCAG) and automatically generate alternative formats of the content for students. The tool comes from the Blackboard company and is called “Ally”.
Ally doesn’t change how anything works in your course, and won’t affect your course files. It provides you guidance on how to correct technical accessibility issues with your digital course content, which means your learning materials will work better on mobile phones and tablets as well as with assistive technologies.
Your students will also be able to download “alternative formats” of your files by clicking the dropdown icon next to the file name, and choosing a version of the file most appropriate for their device and need.
Attend this info session to learn more about how Ally can support accessibility in your D2L courses.
Articulate 360: An Overview
Day/Time: Wednesday, May 6, 1:00-3:00pm
Room: LACC 251J
Register
Come explore ways to increase interactivity, learner engagement and satisfaction within online learning environments. A series of multi-disciplinary templates have been developed to address instructional challenges and support interactive and authentic online learning experiences in 3 key areas including: content management, quiz games and scenario-based learning (choose your own adventure). This workshop will provide an overview of the templates and for those interested in creating their own learning objects can get a sense of what is involved.
Working with Master Courses
Day/Time: Friday, May 8, 10:00-11:30am
Room: LACC 251J
Register
Master courses are an excellent way to ensure consistency in course delivery across multiple sections and increase workload efficiencies for instructors. However, master courses also require annual review and maintenance in order to reap their benefits. This hands-on workshop will help course owners assess the current state of their master courses and develop a strategy to ensure the courses are ready to go for September. Come to the session with any questions and concerns you have about your course. Course participants may want to book a follow-up one-on-one session with an instructional designer for individual training and support.
Articulate 360: Content Management
Day/Time: Monday, May 11, 10:00am-12:00pm
Rom: LACC 251J
Register
Description: A challenge faculty face is how to present complex and in many cases “heavy” content in more interactive and engaging manner while also accommodating learning styles and preferences. Many report wanting to move beyond text and images to enable learners to interact with course materials in different ways and provide more options for learners to choose how they achieve the learning outcomes. Come learn how content can be transformed through various visuals, menus, tabs and navigational elements and considers different ways to engage with the content. Learners will be able to take away a template to get started.
Articulate 360: Creating Quiz Games
Day/Time: Monday, May 11, 2:00-4:00pm
Room: LACC 251J
Register
Increasing engagement often equates to contextualizing the content, assessment and activities for the learner in creative ways. Whether it be gamifying a simple multiple choice quiz or developing a way to provide real-time feedback for learners, come learn how to incorporate “fun” back into the teaching and learning experience while improving participation, motivation and in some cases mastery of skills, knowledge or concepts. Learners will be able to take away a template to get started.
Articulate 360: Choose Your Own Adventure
Day/Time: Wednesday, May 13, 10:00pm-12:00pm
Room: LACC 251J
Register
Providing learners with the ability to “choose their own adventure” and make key decisions within a safe educational environment can have a significant and lasting impact. Come learn how to put your learners in the drivers’ seat – by incorporating authentic scenarios, integrated rich content and coaching opportunities which enables them to make decisions and realize the consequences and impact. Learners will be able to take away a template to get started.
Designing for Engagement: Moving beyond Text and Images
Day/Time: Thursday, May 14, 10:00-11:30am
Room: LACC 251J
Register
Come learn how to transform your content to accommodate a variety of learning styles and abilities. We’ll begin with an overview of the content tool and its functionality to get you started with building content. We’ll then explore how you can transform various types of content including (but not limited to): PDFs, PPT and Word documents to a web-accessible format that improves the teaching and learning experience.
Setting up Your Gradebook
Day/Time: Tuesday, May 19, 10:30 am-12:00pm
Room: LACC 251J
Register
This hands-on workshop will focus on setting up your D2L Gradebook from start to finish. Please bring your course outline (or a breakdown of your assessment items) to the workshop if you wish to build your own Gradebook.
First Steps in Creating Accessible Course Content
Day/Time: Thursday, May 21, 10:30am -12:00 pm
Room: LACC 251J
Register
Take the first steps to make your digital course content more accessible to a diverse population of students.
Improving the technical accessibility of your course content will not only help students with disability-related challenges to access your materials, it will also improve course content access for students who use mobile devices, need ESL assistance, want options for engaging with content during long commutes, or have unreliable Internet access off-campus. When you prepare D2L content to meet the technical standards defined by Web Content Accessibility Guidelines (WCAG), you give your students meaningful options for accessing content how and when they need it.
With the help of a new tool in D2L called “Ally”, this hands-on session will help you assess the current accessibility status your own D2L content. In addition, this session will guide you through some key steps you can take when creating Word documents, PDFs, PowerPoints, and web pages to ensure they are as technically accessible as possible.
Quizzes & Leveraging Course Analytics in D2L
Day/Time: Friday, May 22, 10:00-11:30am
Room: LACC 251J
Register
This workshop will begin with an overview of how to create, customize and grade quizzes. Participants will also learn how to take advantage of the D2L’s robust analytics to enhance the learner experience and identify redesign opportunities.
Using Rubrics to Streamline Your Assessment Process
Day/Time: Tuesday, May 26, 10:00-11:30am
Location: LACC 251J
Register
Is there a specific assignment or project you struggle to assess? Rubrics may the answer for you. Rubrics help to clarify expectations for students as well as build in quality assurance measures and reduce manual marking for instructors. This workshop will provide an overview of what rubrics are and how you can use them within D2L. There will also be opportunity to share your assessment challenge and start to build or refine a rubric to address that challenge. Course participants may want to book a follow-up one-on-one session with an instructional designer to finalize and test their rubric.
Text-to-Speech Support for Students: An Orientation to ReadSpeaker in Your D2L Course
Day/Time: Wednesday, May 27, 9:30-11:00am
Room: LACC 251J
Register
If you use D2L to share content files with your students, you have probably noticed the presence of the “webReader” and “docReader” tools at the top and/or bottom of the content-display pages. These tools (from the ReadSpeaker company) are designed to convert text into speech, without requiring students to download and install additional software.
Text-to-speech technology is especially valuable to students who have learning disabilities, reduced vision, or who are coming to English-as-a-second-language. The ReadSpeaker tools that we have integrated into our D2L system will read text aloud while simultaneously highlighting it so that readers can easily follow along.
In addition to the two readers that are automatically available in D2L Content, we have a third tool in our ReadSpeaker collection: TextAid. This tool has been in limited pilots to date but is available for any instructor to add to their D2L courses. In addition to providing text-to-speech support for external websites and students’ own documents, TextAid also has potential to support students with their own written composition work.
In this hands-on session we will look at webReader, docReader and TextAid in our D2L environment, sample the readability of current course content in participants’ courses, and explore the writing-support possibilities of TextAid.
Taking a Closer Look at Communication & Collaboration in D2L
Day/Time: Thursday, May 29, 10:00-11:30am
Room: LACC 251J
Register
Whether you want bring guest speakers into your class virtually or create opportunities for students to collaborate with each other in real time outside of class using technology, D2L has tools to support you. This workshop will take a closer look at how instructors can use communication tools to connect with students and support collaborative learning experiences. Learn alongside an instructor who has been integrating a number of tools and techniques to increase learner collaboration in her online course.
Going Deeper with Videos and Kaltura
Day/Time: Thursday, June 4, 10:00am-12:00pm
Room: LACC 251J
Register
If you have dabbled with Kaltura this year, you may be ready to learn more about the service’s capability. This hands-on session will cover advanced Kaltura topics, including video editing and chaptering, editing closed captions, creating video quizzes and linking video quizzes to the gradebook. To get the most of out the session, come prepared with some videos ready to edit and/or develop into a quiz.
Creative Applications in eLearning
Day/Time: Friday, June 5, 10:00-11:30am
Room: LACC 251J
Register
This workshop will showcase some creative ways to deliver content, engage learners and put a twist on some of the common teaching tools in D2L.