Designed for faculty who have previous experience using D2L, and who have had some experience with Blackboard Collaborate Ultra (e.g., attended an information session or a hands-on session), this tutorial will cover the features available to you in BBCU rooms and sessions. Information on how to use individual feature is contained in relevant tutorial documents. For further information, please contact desupport@camosun.ca for assistance.
Steps
- Go to the location in your course site where you have linked to your Blackboard Collaborate Ultra room (for example, in the Content tool). For information on how to set up this link, see the tutorial Create a Blackboard Collaborate Ultra Room in D2L.
- Click on the Blackboard Collaborate Ultra For information on how to set up a session, see the tutorial Create a Blackboard Collaborate Ultra Session in D2L.
- Click on the title of the Room or Session you want to access.
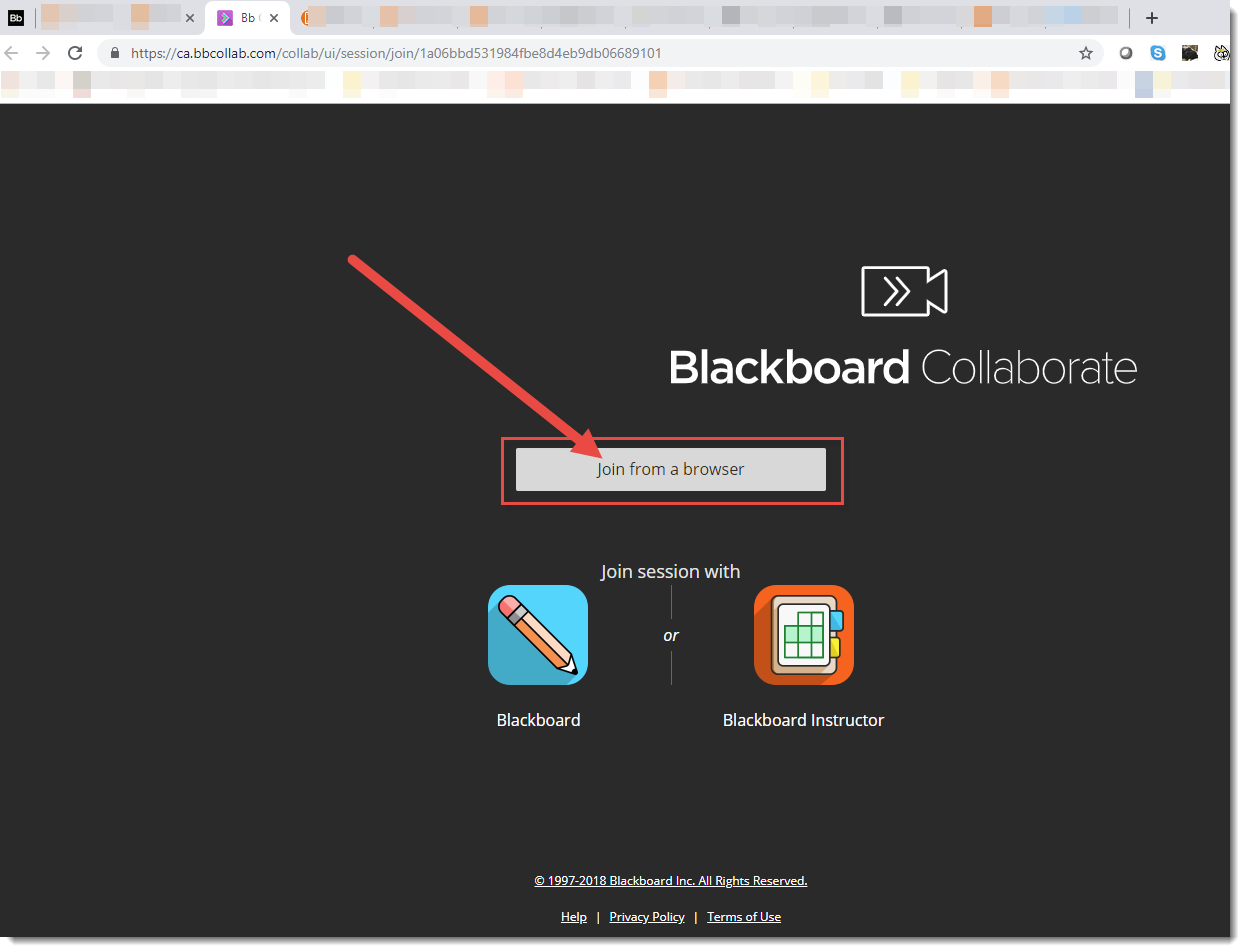
- You will first be asked if you want to join the session from a browser, or from the Blackboard or Blackboard Instructor app. We recommend joining with a browser, unless you are familiar with and have downloaded the appropriate app.

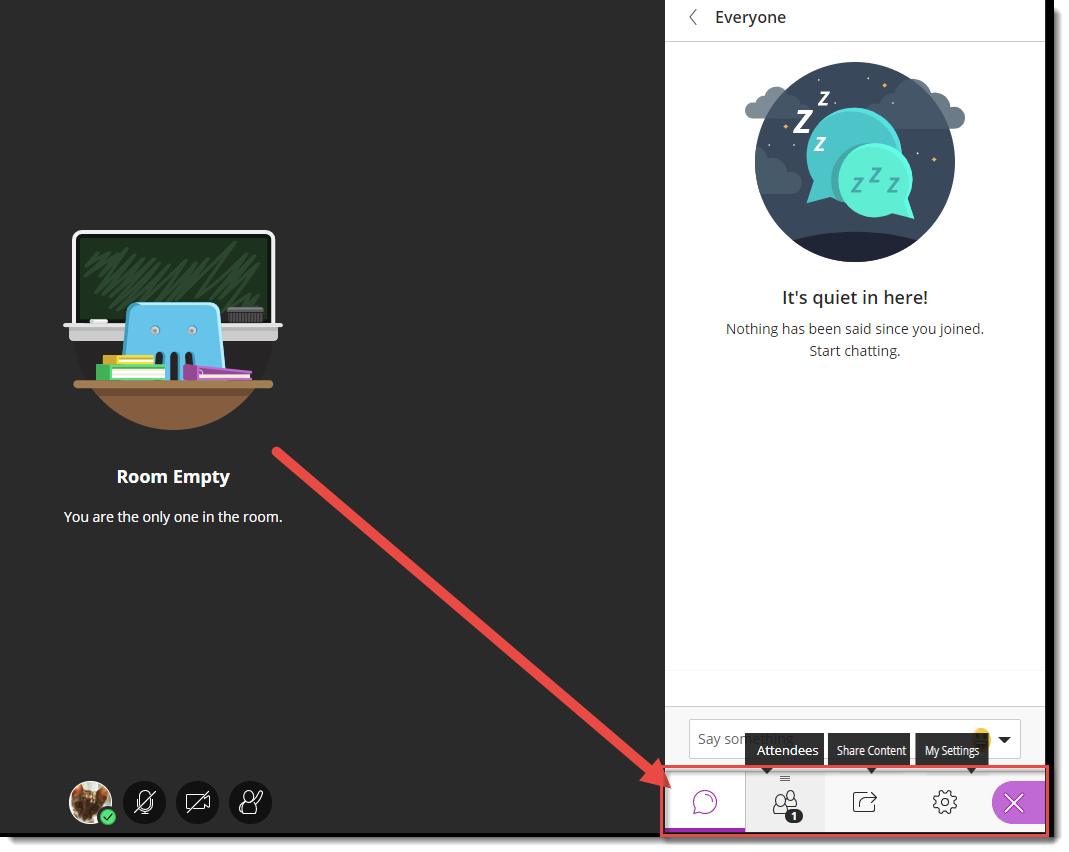
- Here is what you will see when you enter your session. You will see a menu at the top left, a list of tools at the bottom, and another menu at the bottom right. We will look at each of these in turn.
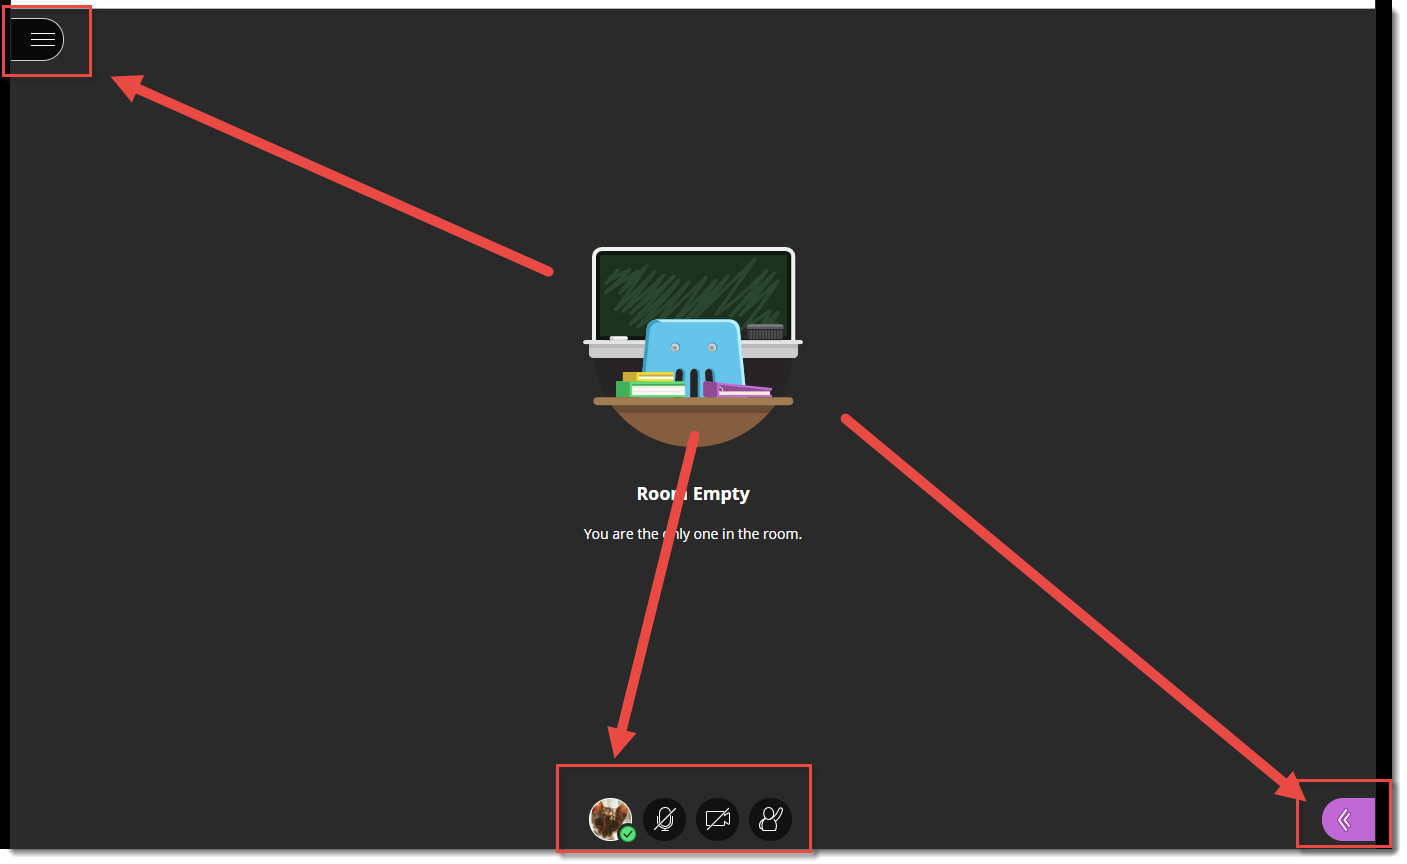
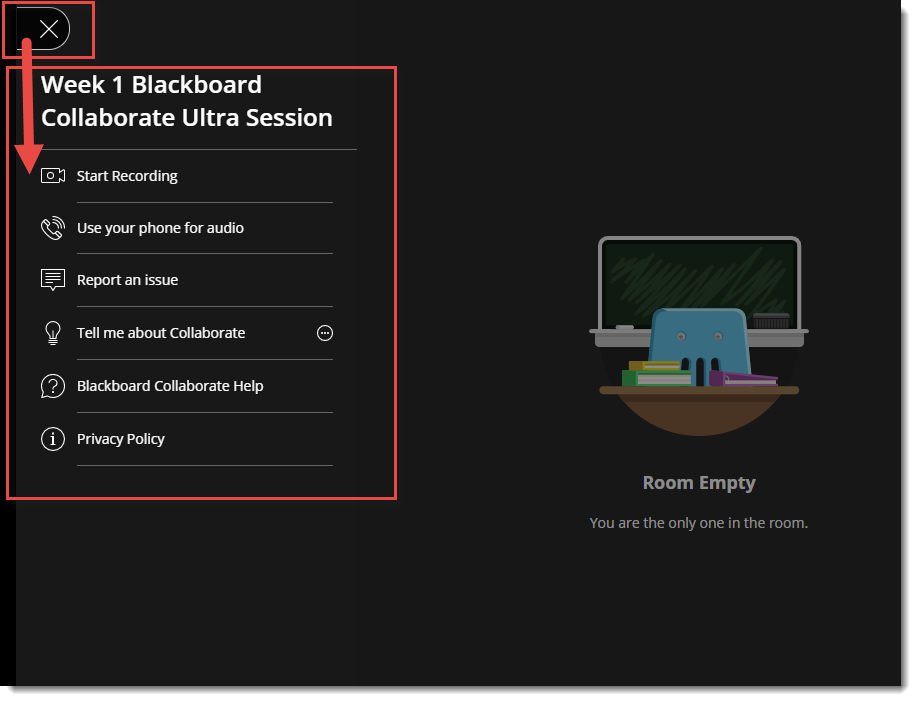
- If you click the menu at the top-left, you will see
- Start Recording (see the tutorial Recording Sessions in Blackboard Collaborate Ultra for more information)
- Use your phone for audio (see the tutorial Using your Phone for Audio in Blackboard Collaborate Ultra for more information)
- Report an issue
- Tell me about Collaborate
- Blackboard Collaborate Help
- Privacy Policy

- If you click on the menu at the bottom-right, you will see:
- The Chat area (see the tutorial Using Chat in Blackboard Collaborate Ultra for more information).
- The Attendee area (see the tutorial Managing Attendees in Blackboard Collaborate Ultra for more information).
- The Share Content area (see the tutorials Managing the Whiteboard in Blackboard Collaborate Ultra, Screen/Application Sharing in Blackboard Collaborate Ultra, Sharing Files in Blackboard Collaborate Ultra, Polling in Blackboard Collaborate Ultra, Using the Timer in Blackboard Collaborate Ultra, and Creating Breakout Rooms in Blackboard Collaborate Ultra for more information).
- The My Settings area (see the tutorial Managing your Settings in Blackboard Collaborate Ultra for more information).

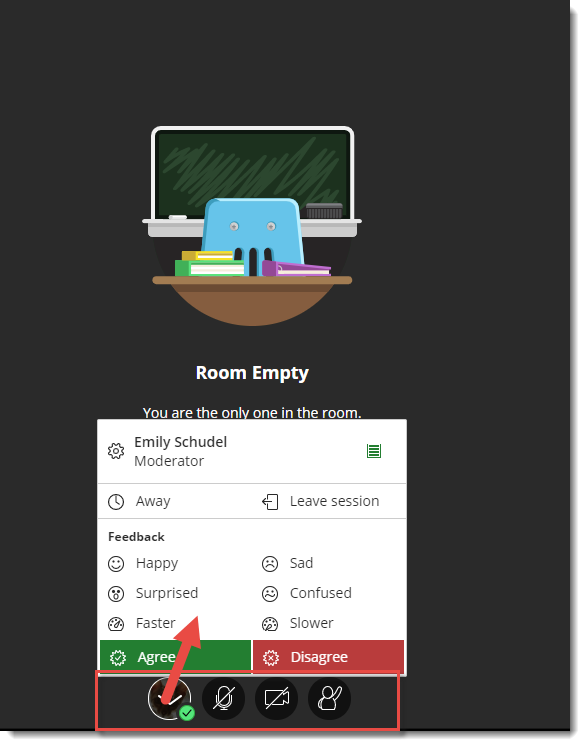
- Finally, the bottom icons are features you can use during a session to indicate you are away from your computer, to indicate feedback, to raise hand as a request to speak, or to control your microphone and camera:
- My Status and Settings (Away, Leave Session, Feedback emoticons, Agree/Disagree)
- Microphone share/unshare
- Video share/unshare
- Raise hand

Things to Remember
Before you run your first Blackboard Collaborate Ultra session with live participants, take some time to practice running a session and learning how to use all the features you will need. We also recommend inviting a colleague (or an instructional designer in eLearning) to attend with you to help you practice!
![]() This content is licensed under a Creative Commons Attribution 4.0 International Licence.Icons by the Noun Project.
This content is licensed under a Creative Commons Attribution 4.0 International Licence.Icons by the Noun Project.