eLearning Interurban Workshops for Fall

We are starting to plan our fall training, and have some Interurban workshops up and ready to register for!  Lansdowne workshop listings will be posted in August once everyone is back and raring to go for Fall!

Check out descriptions below, and register at our Survey Monkey form.

D2L Overview

Date & Time: Tuesday, August 27 from 10-11:30am; Thursday, August 29 from 10-11:30am
Location: LACC 251J, Interurban Campus
Description: This workshop will provide instructors with an overview of the essential teaching tools available in our learning management system, D2L (also known as Brightspace). Whether you are supplementing your face-to-face classes, transition from using a basic course website or simply want to learn more about to enhance your current teaching practice using D2L, this workshop has a little something for everyone. Come explore the possibilities!

Course Tune-up

Date & Time: Wednesday, August 28 from 10-11:30am
Location: LACC 251J, Interurban Campus
Description: This workshop will focus on setting up your course for Day 1. We’ll cover copying course components and customizing your homepage, widgets and navigation bar. We’ll all show you how to manage release dates associated with your content, discussions, assignments, grades, news and quizzes – from one central location in D2L.

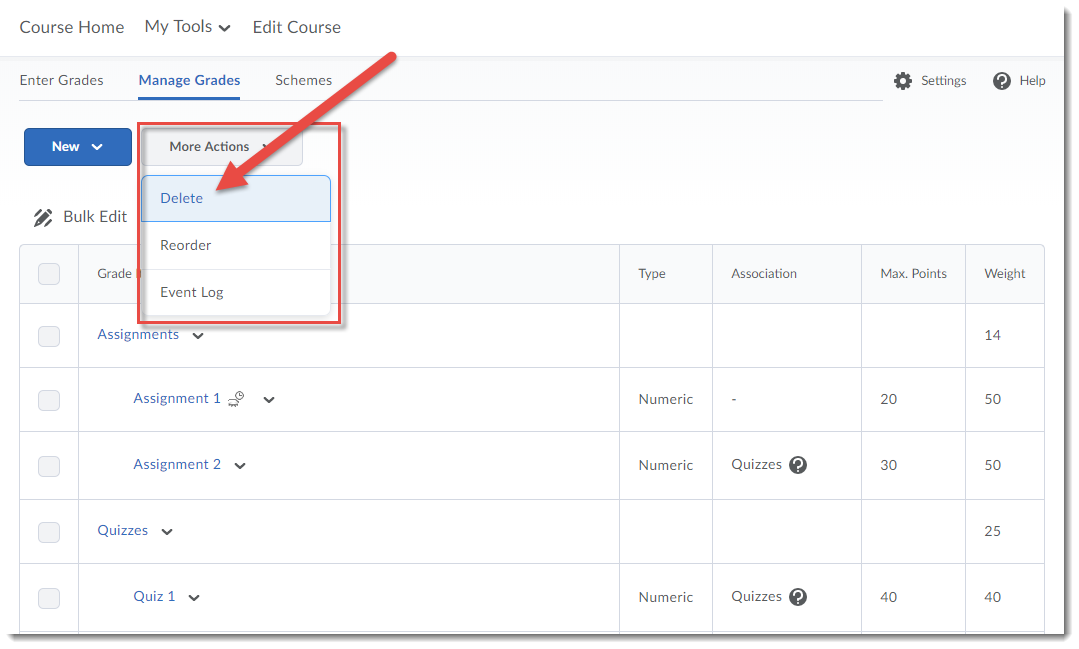
Setting up Your Gradebook

Date & Time: Friday, September 13 from 10-11:30am
Location: LACC 251J, Interurban Campus
Description: This hands on workshop will focus on setting up your Gradebook from start to finish. Please bring your course outline (or a breakdown of your assessment items) if you wish to build your own Gradebook during the workshop.

Managing Groups in D2L

Date & Time: Friday, September 20 from 10-11:30am
Location: LACC 251J, Interurban Campus
Description: This workshop will provide an overview of how to create and manage groups in D2L. A demonstration of how to create private group discussions and group assignment folders will be provided.

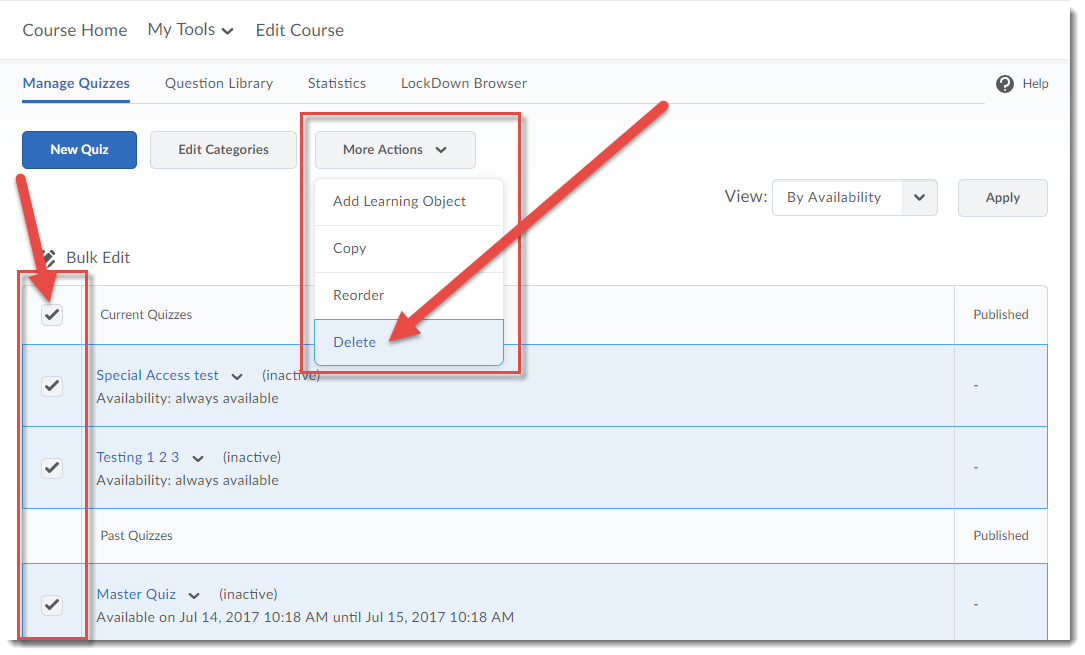
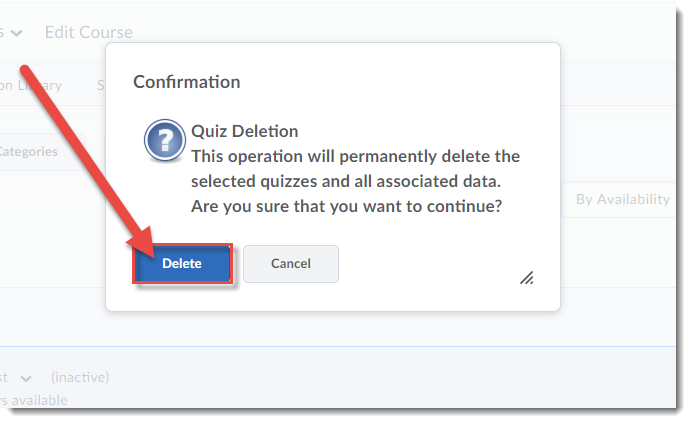
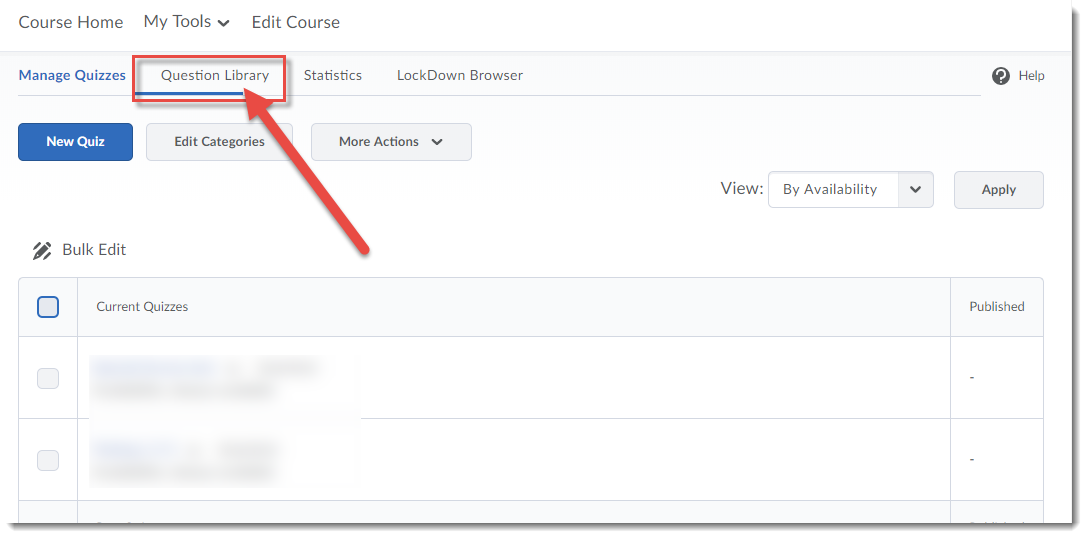
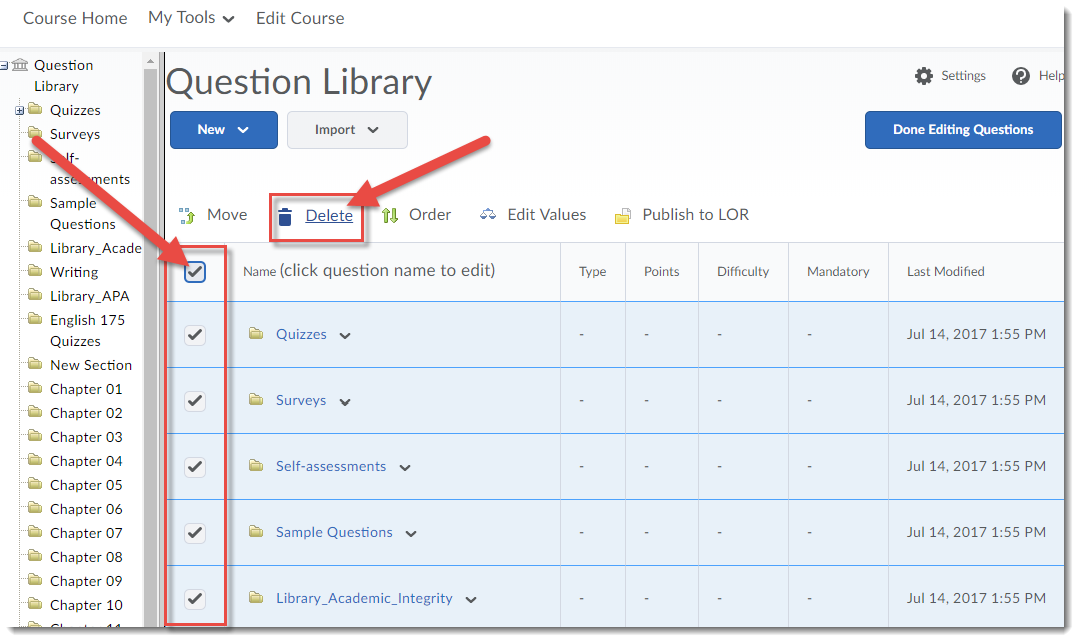
Building Quizzes in D2L

Date & Time: Friday, September 27 from 10-11:30am
Location: LACC 251J, Interurban Campus
Description: This workshop will explore ways to create, customize and grade quizzes. We’ll also tackle creating Question Pools and how to organize your questions in the Question Library.

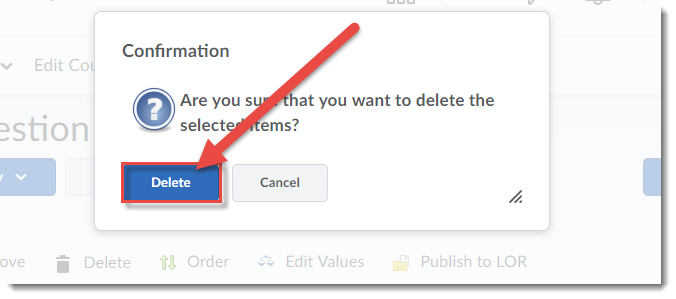
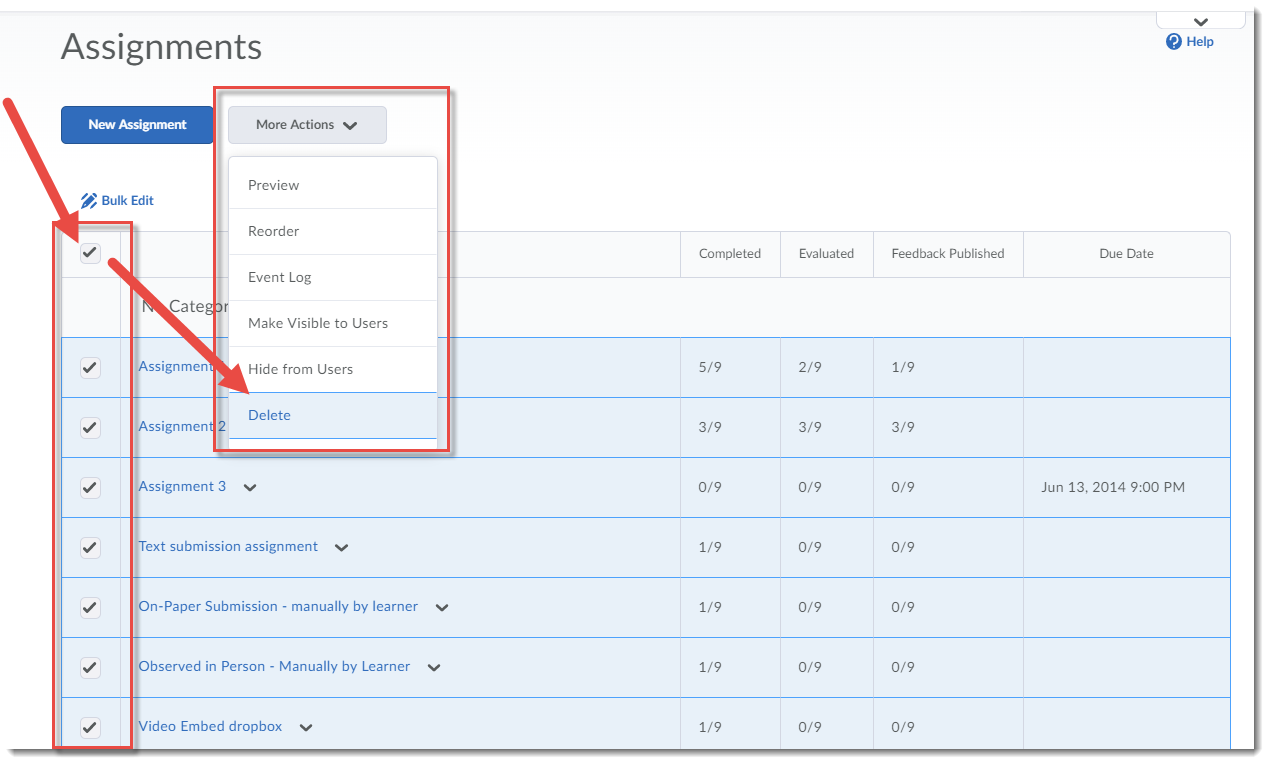
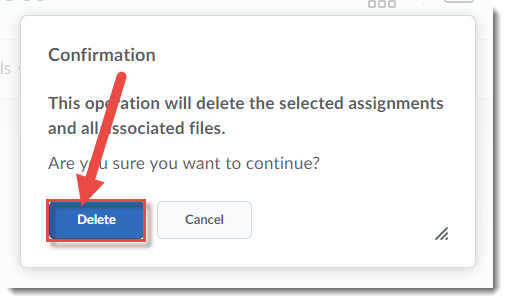
Managing Assignments

Date & Time: Friday, October 4 from 10-11:30am
Location: LACC 251J, Interurban Campus
Description: The Assignment tool in D2L enables students to submit assignments while streamlining the grading process for instructors. This workshop provides hands-on practice creating, managing and grading assignments.

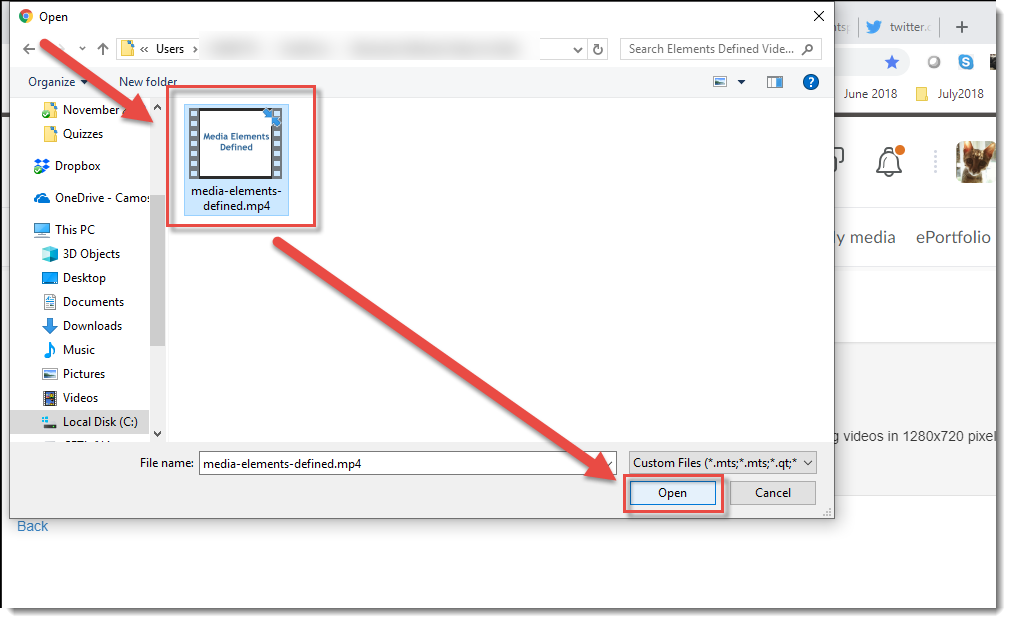
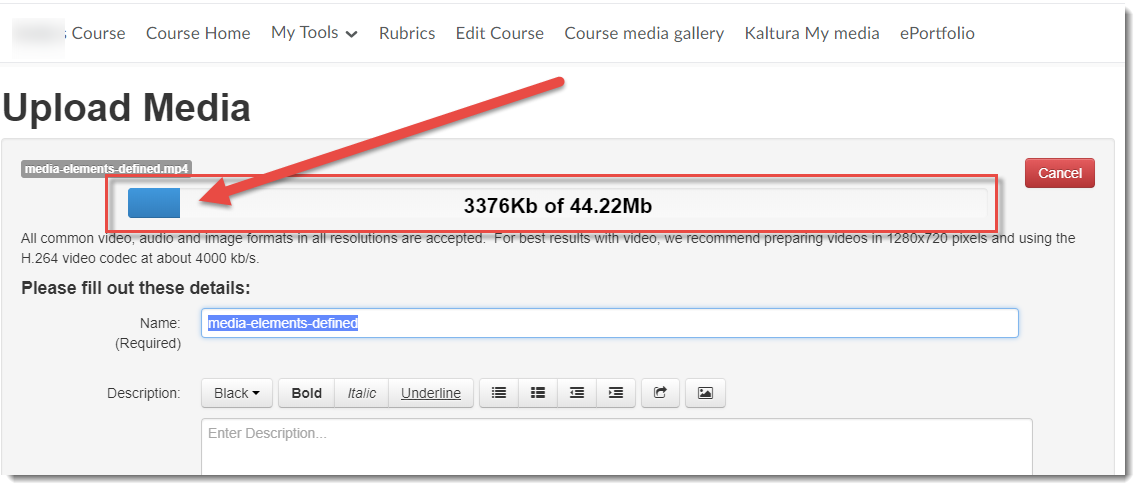
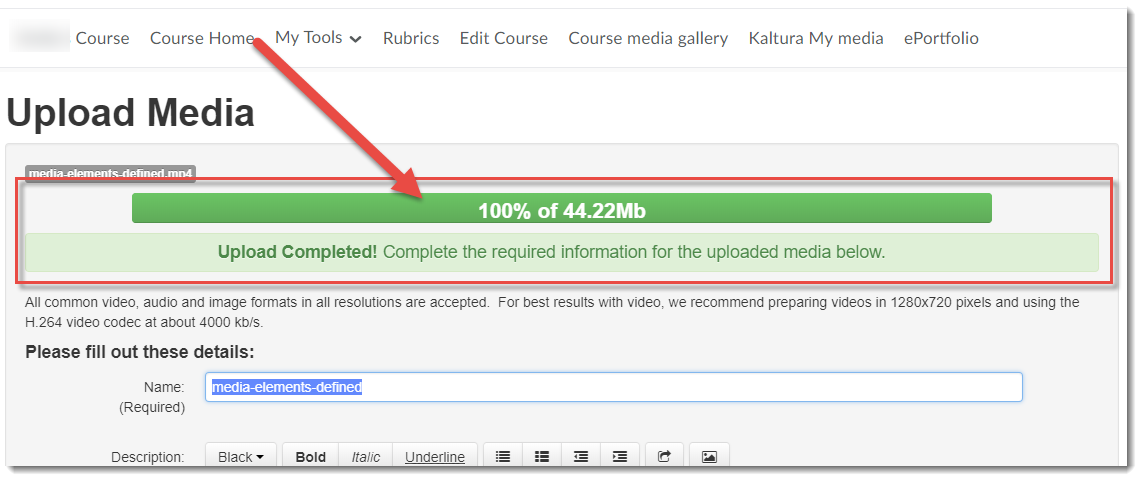
Getting Started with Kaltura (Streaming Media Service)

Date & Time: Friday, October 11 from 10-11:30am
Location: LACC 251J, Interurban Campus
Description: Kaltura is Camosun College’s streaming media service that integrates into D2L. This means faculty and students now have a place to create, edit, and house their course-related videos. Kaltura also integrates with D2L.Come find out more about what Kaltura is, what it can do, and how you can use it for your courses. Bring a laptop to the session if you have one.

Connecting with Your Students in Real-time

Date & Time: Friday, October 25 from 10-11:30am
Location: LACC 251J, Interurban Campus
Description: Blackboard Collaborate Ultra is Camosun’s web conferencing tool. Whether you teach face-to-face, blended, or online, this tool can help you increase instructor-student and student-to-student engagement. Come find out more about how you can connect with learners synchronously. This session requires you bring a laptop to participate.

Managing Final Grades in D2L

Date & Time: Friday, December 13, 10-11:30
Location: LACC 251J, Interurban Campus
Description: It’s grading time again! This workshop is designed to provide a quick refresher on how to input and manage grades in D2L. An overview of how to apply grade schemes and release calculated and adjusted final grades will also be provided.

Deleting Everything in a D2L Course Site – Updated

This tutorial will cover the steps involved when you wish to delete everything (content and activities) in your D2L course in order to “start from scratch”. Note that you cannot “delete all” in one step – you will need to delete the content/activities in each tool used in the course separately.

We recommend that you do not delete everything in course site that has student data in it (i.e., a course site for a past offering). It is better to do this in a DEV or MASTER course site only.

If the course you are deleting from also has custom homepages or navigation bars, or incorporates tools beyond the list below (for example the Glossary or Survey tools), you will need to delete content contained in those tools as well. If you are unsure of how to delete content from homepages, navigation bars or other tools not included in this tutorial, contact desupport@camosun.ca or an instructional designer for assistance.

Deleting Content and Files in File Manager

  1. Go to the Content tool in your course.
  2. Click on the down arrow next to Table of Contents (at the top of the page), and select Delete All Modules.Select Delete all Modules
  3. To delete all Modules and Topics in the Content tool, as well as all the linked files (stored in Manage Files) AND linked activities (in other D2L tools), select the second option in the pop-up box.Select the second option and click Delete
  4. Now, click on Related Tools and select Manage Files.Under Related Tools, select Manage Files
  5. Click on the select box at the top of the File Manager table to select everything in the table. Then click on the trash can, and click Yes in the Confirmation pop-up window.Select all in Manage Files and click the trash can to delete

Deleting Quizzes

  1. Go to the Quizzes tool in your course.
  2. Click on the select box at the top of the quizzes table to select all quizzes in your list. Click on the More Actions drop-down menu, and select Delete.Select all quizzes, under More Actions select Delete
  3. In the Confirmation pop-up box, click Delete.In the pop-up box select Delete
  4. Next, click on Question Library.Click Question Library
  5. Click on the select box at the top of the Question Library table to select everything in the list. Click on the trash can/Delete.Select all in the Question Library, then click Delete
  6. In the Confirmation pop-up box, click Delete.Click Delete

Deleting Assignment Activities

  1. Go to the Assignments tool in your course.
  2. Click on the select box at the top of the Assignments table to select all Assignments in your list. Click on the More Actions drop-down menu, and select Delete.Select all Assignments, under More Actions, select Delete
  3. In the Confirmation pop-up box, click Delete.Click Delete

Deleting Gradebook Items

  1. Go to the Grades tool in your course.
  2. Click on the More Actions drop-down menu, and select Delete.

    Under More Actions, select Delete

  3. Click on the select box at the top of the Delete Grade Items and Categories table to select everything in the list and click Delete. NOTE: If grade items are attached to other activities in your D2L course site (eg, a dropbox or quiz), you will need to delete those activities BEFORE you can delete their grade items.

    Select all grade items, and click Delete

  4. In the Confirmation pop-up box, click Delete.

    In the pop-up box, click Delete

Deleting Discussion Forums and Topics

  1. Go to the Discussions tool in your course.
  2. Click on the More Actions drop-down menu, and select Delete.

    Under More Actions, select Delete

  3. Click on the select box at the top of the Delete Forums and Topics table to select everything in the list and click Delete.

    Select all the forums and topics, and click Delete

  4. NOTE: You will NOT be asked to confirm the deletion of Discussion Forums and Topics. BUT you will be able to restore them later if you have deleted them in error.

Deleting News Items

  1. Go to your Course Homepage.
  2. Click News (to go to the News tool).

    Click News to go to the News tool

  3. Click on the select box at the top of the News listing to select everything in the list and click Delete.

    Select all your News items, and click Delete

  4. In the Confirmation pop-up box, click Yes.

    In the pop-up box, click Yes

Things to Remember

Note that even if you delete Discussion Forums and Topics, you can restore them at any time (they are never really gone). This is the same for Dropbox activities, Grade items, and News items.

This content is licensed under a Creative Commons Attribution 4.0 International Licence.Icons by the Noun Project.


Media tagging advice and best practices: A Kaltura tutorial

The goal of this post (written by Alexandra Flynn, one of our Camosun librarians) is to encourage thoughtful collaboration regarding Kaltura media tagging. This will lead to the creation of a tagging system that makes sense to your department and for the users most likely to be accessing your media content on Kaltura.

Definitions

For the purposes of this post:

  • Private content means media that is limited to student use in D2L, for internal college or department use only, and requires a login to view; Public content is general promotional or information sharing/ instruction that does not require a Kaltura login.
  • Tags: are alternate search terms or keywords that you create which help people discover or retrieve your videos and help you and your colleagues organize them [1].
  • Taxonomy: “A hierarchical classification scheme made up of categories and subcategories of information plus a controlled vocabulary of terms, usually used to describe a specific area of knowledge [2].”
  • Folksonomy: “The mental model, or classification system, of a taxonomy of content or concepts in the minds of content consumers. Includes vocabulary, organization, relationships, and interactions [2].”

General advice

Imagine only be able to search for TV shows by episode number, or using a music app that organized all songs by release date rather than musician or band name! Such frustration should be avoided; having a logical tagging system helps!

  1. Avoid repetition; do not re-use information that you entered as part of the upload process.  Example: no need to have a ‘CHEM’ or ‘COOK’ as a tag because the Kaltura Upload interface requires you to add a Course Code.
  2. Avoid tags that are too generic like “Assignment 1” – or “Unit 1”
  3. Do use specific terms that provide immediate clarity: ”Thermodynamics”
  4. Do meet with your department/program group to decide which tags to use or to choose a guiding theme or taxonomy your group will follow 

Possible strategies to guide tag creation

Recommendation 1: Pair the category tag (in bold) with course or assignment specific tag

Examples:

  • Keyword tags pulled from assignments, for exampleEssay-Research | Essay-argumentative | Essay-persuasive
  • Learning outcomes/objectives, for exampleatomic mass factual, meat cutting procedure, etc [3]
  • Cognitive process (create, evaluate), for example analyse author bias [3]
  • Media content/purpose, for example demonstration, promotional, problem-solve etc.
  • Audience for example prospective students, Camosun employees, Community Partners

Recommendation 2: Add additional information as per the Upload interface (see image)

  • Department/Program
  • Course name and number
  • Term and Year

Your media content can then still be easily discoverable without the use of tags.

Fields for organization

Recommendation 3: Additional considerations

  • For private / Instructional content, your department/program group may decide you do not need tags.
  • For public or promotional material, you may intentionally use tags that overlap with other departments, programs, or student events.
  • Do you want a hierarchy of granularity or specificity? Three levels of required information (highlighted in image) may mean you decide to limit tags to three levels. [4]
  • Do you want students to be able to add tags? Social-tagging/folksonomies are often ambiguous, unrelated to content or create unwanted overlap with other media [1].

Sample Tagging Practice

The image below shows the tags that were added to a short video of the games and puzzles in the Interurban library (the tags include promotions, interurban, marketing, board games, library, puzzles, and stress busting.)

In the image, the Marketing tag is marked with a red X because it is too vague; it could indicate a Marketing Course, or the college Marketing Department, or part of an event. That tag should be removed. Additionally, Promotions could be changed to Library marketing and Interurban could be replaced with Interurban Library, etc.

Tag examples

Best Practices for you & your department/program group

  1. Have a meeting or create a shared document to decide what tagging strategies you will use.
  2. Create a list of agreed-upon tags and distribute to all Kaltura users in your department.
  3. Make sure this information is shared with new Kaltura users and eLearning (the Kaltura administrators).
  4. Create tag guidelines for students who will be uploading media that they have created.
  5. Anticipate how terminology in your disciple overlaps with other disciplines and use language that is more precise. Example “CREST Scan” instead of “Environmental scan” to tag a Business course video.

References

[1] J. Ignacio Vazquez, J, Abaitua, and D. LĂłpez de Ipiña. Feb. 2006. [Online]. “The Ubiquitous Web as a model to lead our environments to their full potential” W3. Available: https://www.w3.org/2006/02/Deusto_Position_Paper_v1.0.pdf [Accessed: Mar. 26, 2019]

[2] “Taxonomy – the secret ingredient of great content – and how it is linked to business strategy” The Verditer. Jan. 16, 2019. [Online]. Available: https://www.theverditer.com/blog/2019/1/15/taxonomy- the-secret-ingredient-of-great-content-and-how-it-is-linked-to-business-strategy   [Accessed: Mar. 25, 2019]

[3] “Ensuring Technological Plurality through effective Learning Design” SlideShare. Jan. 26, 2017. [Online]. Available: https://www.slideshare.net/Simon_Atkinson/ensuring-technological-plurality-through-effective-learning-design [Accessed: Mar. 25, 2019]

[4] “Digital Commons Three-Tiered List of Academic Disciplines” bepress. Jan. 2017. [Online]. Available: https://www.bepress.com/wp-content/uploads/2016/12/Digital-Commons-Disciplines-taxonomy-2017-01.pdf [Accessed: Mar. 25, 2019]

Universal Design for Learning conference at Royal Roads University!

The Third Pan-Canadian Conference on UDL will take place at Royal Roads University October 2- 4, 2019. This is an amazing opportunity for people working in Universal Design for Learning (UDL), wanting to connect with some of the leaders in the field, or wanting to find out more about UDL and what it might mean for their teaching and learning.  Early bird registration is available until the end of this month, so check it out – I hope to see you there!

Rather than repeat everything on the conference website, I am simply going to give you the link to it here.

https://udlcanada.ca/index.html


Adding Links to Library Resources – a D2L Tutorial

I posted a version of this tutorial about 4 years ago (can you believe it?), but things in D2L have changed a bit, so I thought it would be a good time for a refresher!  So, here I will cover the steps involved with adding licensed library e-resource permalinks into the HTML editor. For the purposes of this tutorial, we will work in the Content tool. For further information, please contact desupport@camosun.ca  for assistance.

Steps

  1. Go to the Content tool in your course.
  2. In the Table of Contents box, click on the title of the Module to which you wish to add your library resource links.Click the title of the Module to which you want to add your library resource links
  3. Click on the New button and choose Create a File.Click New then Create a File
  4. Give your new Content page a Title, then add some text into the HTML editor (for example, to set the context for the article you are going to link to), then put your cursor where you would like the link to the library resource to appear (in the image below, the cursor is below the text). Then click the Insert Stuff icon.Give your page a title, then click Insert Stuff
  5. In the Insert Stuff box that opens, click Insert Link.Click Insert Link
  6. Open a new browser tab or window, and go to the Camosun Library website to search for the article you wish to link to in D2L. (For more information on permalinks, persistent links and stable URLs, go to the Camosun Library’s Libguides (http://camosun.ca.libguides.com/c.php?g=92275&p=1238057).
    1. If your licensed library e-resource has a permalink (or persistent link/stable URL) option, first click on the Permalink option, then copy the link that appears in the Permalink box and paste the permalink into the Insert Link URL box.

      Find a permalink for your article and copy it
      Paste the permalink into the Insert Link URL box

    2. If your licensed library e-resource does NOT have a permalink option, contact Camosun Library staff for help.
  7. Once you have copied the appropriate link into the Insert Link box, click Next.

    Click Next

  8. Add the title of the article into the Link Text box. If you don’t add anything here, students will see the full URL (which can be a bit long). Click Insert. The library resource has now been linked in your Content page. Note that the link will open in a new tab or window when the students click on it.

    Add Link Text, then click Insert

  9. Make sure that you use the Change Path button to save your file to the appropriate folder in your Manage Files area. Then click Publish or Save as Draft. Remember that if you save your file as draft, you will need to publish it before students can see it.

    lick Change Path to make sure your file is saving to the right place in Manage Files, then click Publish or Save as Draft.

Things to Remember

DO NOT use the Quicklink –> URL option to add permalinks to the HTML editor in D2L. Always use Insert Stuff. In fact, we recommend you always use Insert Stuff when adding web links of any kind into an HTML page in D2L.

It’s a good idea to test the link to your library resource once you have Published or Saved as Draft to ensure that it works, and that it opens the page/document you wish it to open. We also recommend you test opening the link from off-campus to make sure students will also be able to access it from off-campus (using their C# and password.)

This content is licensed under a Creative Commons Attribution 4.0 International Licence.Icons by the Noun Project.

A Brief Introduction to ePortfolio in D2L

Looking for options for your students to collect and share documents, assessments, presentations, etc. with other students and faculty across their Program? You might want to come see us to find out how ePortfolio in D2L might support you and your students!

D2L’s ePortfolio is a personal portfolio tool for storing, organizing, reflecting on, and sharing items that represent their learning. Students can include items such as documents, graphics, audio files, videos, presentations, and course work to demonstrate their improvement or mastery in certain areas.

ePortfolio is a system-wide tool which can be accessed by students in any course, and because it is a D2L tool, students can use ePortfolio to save course-related materials so that they can access them for as long as they are registered at Camosun, and they can export some of their ePortfolio items when they leave.

Students can control what items they want to include in their portfolios, how portfolios are organized, and who they are shared with. When items are shared items with peers, mentors, or potential employers, students can control permission to view items, edit items, see or add comments, and see or add assessments to receive feedback.

ePortfolio items and collections can be shared with other students and with instructors, added to the Assignment tool, and used to create presentations. In addition, comments can be enabled on artifacts, collections, reflections, presentations (which can be shared externally to D2L as well), etc., and others in the course can provide evaluation and feedback through the Assignments tool or using Rubrics.

Items that can be saved to ePortfolio include:

  • Reflections (to which you could embed a video or audio file, for example from Kaltura)
  • Links to external websites
  • Files uploaded from a device (documents, images, audio files, etc.)
  • D2L News items
  • D2L Grade items (but ONLY if the instructor has enabled that feature)
  • D2L Quiz Submissions (but ONLY if the instructor has enabled that feature)
  • D2L Assignment submissions (but ONLY if the instructor has enabled that feature)

If you would like to find out more about ePortfolio and how it could be used to support you and your students, contact desupport@camosun.ca to arrange for a consult with one of our instructional designers. To find out more about the benefits of keeping an ePortfolio, check out the following websites:

Uploading Media to Kaltura’s My Media in D2L

This tutorial will cover the steps involved when you wish to upload a video (or other media file, such as an image or an audio file) from your device into your My Media space (Kaltura) in D2L so that you can then embed it into a D2L page, or add it to a playlist in your Course Media area. Note that there are a few ways to access My Media in D2L – see the tutorial Setting up My Media (Kaltura) in D2L for more information.   For further information, please contact desupport@camosun.ca for assistance.

Steps

  1. Go to your D2L course.
  2. Go to My Media (it may be a link on your NavBar or in your My Tools drop-down menu, or it may be added as a link using Insert Stuff within a Draft Topic in the Content tool) to open your personal Kaltura space. For the purposes of this tutorial, we will have the My Media link on the NavBar.Go to My Media
  3. Click Add New, and select Media Upload.

    Click Add New and select Media Upload

  4. Click Choose a file to upload, find the video file you want to upload from your device, and click Open. All common video, audio and images format are accepted. Only one file can be uploaded at a time.

    Click Choose file to upload
    Select video and click Open

  5. It may take a bit of time for the video file to upload – the bar at the top of the screen will track the upload, and let you know when the upload is complete (as shown in the second image).

    Status bar for video upload
    Completed upload status bar

  6. Fill in the details as listed. You will be required to give your media file a Name, and we highly recommend adding information to the Description, Tags, and the additional fields to help you filter/sort your media files as you build your collection, and to help your students search for specific media files.Tags are words that can be used to search for specific media files, so think of terms that would most likely be used by your students to search for your video.

    Note that you do NOT need to Publish your video for it to be available for use in your course. Click Save when you have filled in all the details (you can edit this information later if needed). Your media file has now been saved to My Media, meaning that it is available for you to use in any of your D2L courses.

    Complete the details as much as you can, then click Save.

Things to Remember

There are additional features you will want to set up before using your video in a course. See the tutorial Adding Features to Your Kaltura Media to learn more.

This content is licensed under a Creative Commons Attribution 4.0 International Licence.Icons by the Noun Project.