Using Blackboard Collaborate Ultra from your Classroom to Another

Do you have students who can’t make it to class? Snow keeping students from heading down the Malahat? Need to broadcast your class from one classroom to another, or from your classroom to those students who can’t be in class? We have a possible solution for you: Blackboard Collaborate Ultra.

Blackboard Collaborate ultra

With a microphone and a camera connected to a classroom computer, both easily booked at the ITS Helpdesk, and a little help from your friends in eLearning, you can learn how to send your classroom to your students.

You can also use Blackboard Collaborate Ultra on your own personal computer and engage with students at multiple computers around the city, province, Canada, and the world.

Contact DE Support (desupport@camosun.ca) to arrange to talk to an instructional designer about your options, and to learn all about how this could support you and your students.

Using the Whiteboard in Blackboard Collaborate Ultra in D2L

This tutorial is designed for faculty who have previous experience using D2L and Blackboard Collaborate Ultra, will cover how to use the Whiteboard in your Blackboard Collaborate Ultra session. For further information, please contact desupport@camosun.ca for assistance.

Steps

  1. Go to the location in your D2L course site where you have linked to your Blackboard Collaborate Ultra room (for example, in the Content tool), click on your Blackboard Collaborate Ultra session and enter your session.
  2. Open the Collaborate panel (the bottom right icon).Open the Collaborate panel
  3. Click the Share Content icon.Click Share Content
  4. Click Share Blank Whiteboard. The Whiteboard will open in the main session area.

    Click Share Blank Whiteboard

  5. Use the drawing tools at the top-left to Select items, Point to items, draw with the Pencil, add Shapes, write Text, and Clear everything (note that there is NO undo for this!). When you select Pencil, Shapes, or Text, the Colours selector will also appear.

    The drawing tools

  6. You can also use the View Controls to Zoom In, Zoom Out, see the Best Fit, and view the Actual Size.

    View Controls

  7. Click the Stop icon (top right of the slide in the main window) to stop sharing the Whiteboard.

    Click Stop

Things to Remember

You can’t save a Whiteboard session, and once you have stopped sharing the Whiteboard, it will disappear. If you need to keep a copy of what happens in the Whiteboard, you can either use the screen printing option on your computer, or right-mouse click on the whiteboard, to save an image of the Whiteboard to your computer.

You can’t add an image (picture, graphic, etc.) to the Whiteboard. To present and work with an image in the main session area, you need to use Share Files.

This content is licensed under a Creative Commons Attribution 4.0 International Licence.Icons by the Noun Project.


Showing PowerPoints in Blackboard Collaborate Ultra in D2L

This tutorial is designed for faculty who have previous experience using D2L and Blackboard Collaborate Ultra, and will cover how to show PowerPoints in your Blackboard Collaborate Ultra session. For further information, please contact desupport@camosun.ca for assistance.

Steps

  1. Go to the location in your D2L course site where you have linked to your Blackboard Collaborate Ultra room (for example, in the Content tool), click on your Blackboard Collaborate Ultra session and enter your session.
  2. Open the Collaborate panel (the bottom right icon).

    Open the Collaborate panel

  3. Click the Share Content icon.

    Click Share Content

  4. Click Share Files.

    Click Share Files

  5. Click Add Files to upload a PowerPoint from your computer (or drag the PowerPoint into the Add Files box).

    Click Add Files

  6. When the file has finished uploading, select it, then click Share Now.

    Click Share Now

  7. Select a slide to begin sharing (the slide will appear in the main window of your session).

    Select a slide to being sharing

  8. You can either use the arrow under the main slide to navigate through your presentation, or click on any slide in the Navigate Slides area to jump to another slide. Use the drawing/pointing icons at the top-left to enhance the presentation. Click the Stop icon (top right of the slide in the main window) to end the presentation.

    Presentation controls

Things to Remember

Once you have added a PowerPoint file to a session, it will stay there as long as the session is active. Once the session is over (and disappears from your Blackboard Collaborate Ultra room in D2L), it will disappear and have to be re-uploaded to any new sessions you create.

This content is licensed under a Creative Commons Attribution 4.0 International Licence.Icons by the Noun Project.

Understanding Blackboard Collaborate Ultra Rooms and Sessions in D2L

Designed for faculty who have previous experience using D2L, and who have had some experience with Blackboard Collaborate Ultra (e.g., attended an information session or a hands-on session), this tutorial will cover the features available to you in BBCU rooms and sessions. Information on how to use individual feature is contained in relevant tutorial documents. For further information, please contact desupport@camosun.ca for assistance.

Steps

  1. Go to the location in your course site where you have linked to your Blackboard Collaborate Ultra room (for example, in the Content tool). For information on how to set up this link, see the tutorial Create a Blackboard Collaborate Ultra Room in D2L.
  2. Click on the Blackboard Collaborate Ultra For information on how to set up a session, see the tutorial Create a Blackboard Collaborate Ultra Session in D2L.
  3. Click on the title of the Room or Session you want to access.
  4. You will first be asked if you want to join the session from a browser, or from the Blackboard or Blackboard Instructor app. We recommend joining with a browser, unless you are familiar with and have downloaded the appropriate app.Session login screen
  5. Here is what you will see when you enter your session. You will see a menu at the top left, a list of tools at the bottom, and another menu at the bottom right. We will look at each of these in turn.

    Your Session room

  6. If you click the menu at the top-left, you will see
    1. Start Recording (see the tutorial Recording Sessions in Blackboard Collaborate Ultra for more information)
    2. Use your phone for audio (see the tutorial Using your Phone for Audio in Blackboard Collaborate Ultra for more information)
    3. Report an issue
    4. Tell me about Collaborate
    5. Blackboard Collaborate Help
    6. Privacy Policy

      Contents of the top-left menu

  7. If you click on the menu at the bottom-right, you will see:
    1. The Chat area (see the tutorial Using Chat in Blackboard Collaborate Ultra for more information).
    2. The Attendee area (see the tutorial Managing Attendees in Blackboard Collaborate Ultra for more information).
    3. The Share Content area (see the tutorials Managing the Whiteboard in Blackboard Collaborate Ultra, Screen/Application Sharing in Blackboard Collaborate Ultra, Sharing Files in Blackboard Collaborate Ultra, Polling in Blackboard Collaborate Ultra, Using the Timer in Blackboard Collaborate Ultra, and Creating Breakout Rooms in Blackboard Collaborate Ultra for more information).
    4. The My Settings area (see the tutorial Managing your Settings in Blackboard Collaborate Ultra for more information).

      Contents of the bottom-right menu

  8. Finally, the bottom icons are features you can use during a session to indicate you are away from your computer, to indicate feedback, to raise hand as a request to speak, or to control your microphone and camera:
    1. My Status and Settings (Away, Leave Session, Feedback emoticons, Agree/Disagree)
    2. Microphone share/unshare
    3. Video share/unshare
    4. Raise hand

      Bottom icons

Things to Remember

Before you run your first Blackboard Collaborate Ultra session with live participants, take some time to practice running a session and learning how to use all the features you will need. We also recommend inviting a colleague (or an instructional designer in eLearning) to attend with you to help you practice!

This content is licensed under a Creative Commons Attribution 4.0 International Licence.Icons by the Noun Project.

Create a Blackboard Collaborate Ultra Session in D2L

This tutorial will cover the steps involved when you wish to create and configure a new Session in your Blackboard Collaborate Ultra room that you’ve set up access for in your D2L course. For further information, please contact desupport@camosun.ca for assistance.

Steps

  1. Go to the location in your course site where you have linked to your Blackboard Collaborate Ultra room (for example, in the Content tool). For information on how to set up this link, see the tutorial Create a Blackboard Collaborate Ultra Room in D2L.
  2. Click on your Blackboard Collaborate Ultra link to open your Blackboard Collaborate Ultra room.
  3. Click Create Session.Click Create Session
  4. Give the Session a Name (for example, Week 1 Blackboard Collaborate Ultra Session).

    Add a Name

  5. Under Event Details, add Start and End dates for the Session. Select No end if you want an open session with no end, or Repeat session if you want to have a session repeat at selected intervals (for example, Daily, Weekly, Monthly). Select an Early Entry time so participants can come in early and configure their audio and video. You can also select No early entry, but we advise allowing participants a bit of time to ensure technical issues are dealt with before the session starts.

    Add Event Details

  6. Under Session Settings, select a Default Attendee Role (you can choose Participant, Presenter, or Moderator. See the tutorials Understanding Blackboard Collaborate Ultra Session Roles for more information about the three roles). Select Recording options and Moderator permissions if needed.

    Begin to select your Session Settings

  7. Scroll down to select options for Participants can, select Enable session telephony (recommended), and select Private Chat options (to prevent completely private chatting between students). Click Save.

    Complete the Session Settings and click Save

  8. You will be able to click on the session to edit the settings, but you and your students will NOT be able to enter the session until the start day/time.

    Session link

Things to Remember

For information on how to manage and facilitate a Blackboard Collaborate Ultra session, see the relevant tutorials.

Create a Blackboard Collaborate Ultra Room in D2L

This tutorial is designed for faculty who have previous experience using the Content tool in D2L, and who have had some experience with Blackboard Collaborate Ultra (BBCU) (e.g., attended an information session or a hands-on session), and will cover the steps involved when you wish to set up a link to a BBCU room in D2L through the HTML editor (for example, in News item or a Content page) or a Topic link in the Content tool. For further information, please contact desupport@camosun.ca for assistance.

Steps for Linking to a BBCU Room in a Content Page (HTML editor)

  1. Go the Content tool in your D2L course.
  2. Click on the title of the Module you want to add the BBCU room to, or create a New Module.
  3. Click Add New and select Create a File.

    Click Add New and select Create a File

  4. Add a Title, then add contextual and/or instructional text into the HTML editor box. Highlight the words you want to link the BBCU room to, and click the Quicklink icon.

    Highlight text and click Quicklink

  5. Select External Learning Tools (you may need to scroll down in the list).

    Select External Learning Tools

  6. Select Blackboard Ultra.

    Select Blackboard Collaborate Ultra

  7. The link to the Blackboard Collaborate Ultra room has now been created. Click Publish. When you click on the link in the page you just created, and your BBCU room (named for the D2L course) will appear.

    Click Publish

Steps for Adding BBCU Room as a Content Topic (HTML editor)

  1. Go the Content tool in your D2L course.
  2. Click on the title of the Module you want to add the BBCU room to, or create a New Module.
  3. Click Add Existing Activities and select External Learning Tools.

    Click Add Existing Activities and select External Learning Tools

  4. Select Blackboard Ultra.

    Select Blackboard Collaborate Ultra

  5. The link to the Blackboard Collaborate Ultra room has now been created, and when you click the Blackboard Ultra link, your BBCU room (named for your D2L course) will appear.

Next week I will show you how to create scheduled sessions within your Blackboard Collaborate Ultra room.

Top 10 Things for Faculty to Know about Blackboard Collaborate Ultra

What is Blackboard Collaborate Ultra?

Blackboard Collaborate Ultra (BBCU) is a synchronous classroom tool, which means that faculty now have an online tool with audio, video, chat, and whiteboard/desktop sharing capabilities to support their teaching in real-time. BBCU integrates with D2L, which means you can link students to your BBCU room and sessions from inside your D2L course. You can, however, also use BBCU without D2L by creating sessions and emailing session links to participants. To use BBCU outside of D2L, you will need to arrange to have an account created by contacting Bob Preston at prestonb@camosun.ca.

Talk to eLearning before Starting!

Because Blackboard Collaborate Ultra is a complex tool, we recommend you either attend a BBCU workshop or make an appointment with an instructional designer in eLearning prior to setting up and using BBCU in or outside of your D2L course site. Tutorials will be available in the On-Demand Training site, but they have been designed as reminders rather than as first-step learning tools. You will find contact phone numbers and emails on page 2!

Top 10 questions about Blackboard Collaborate Ultra

Where do I find BBCU in D2L?

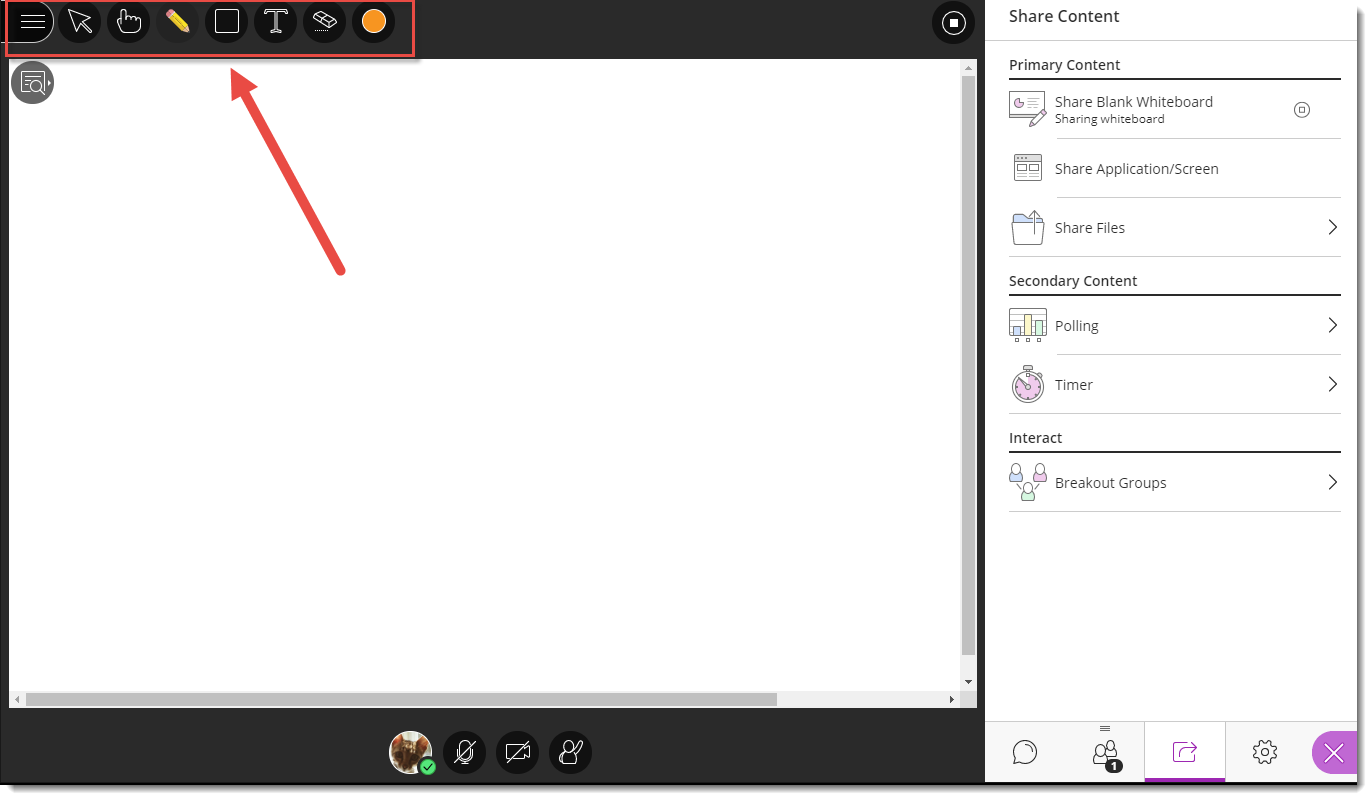
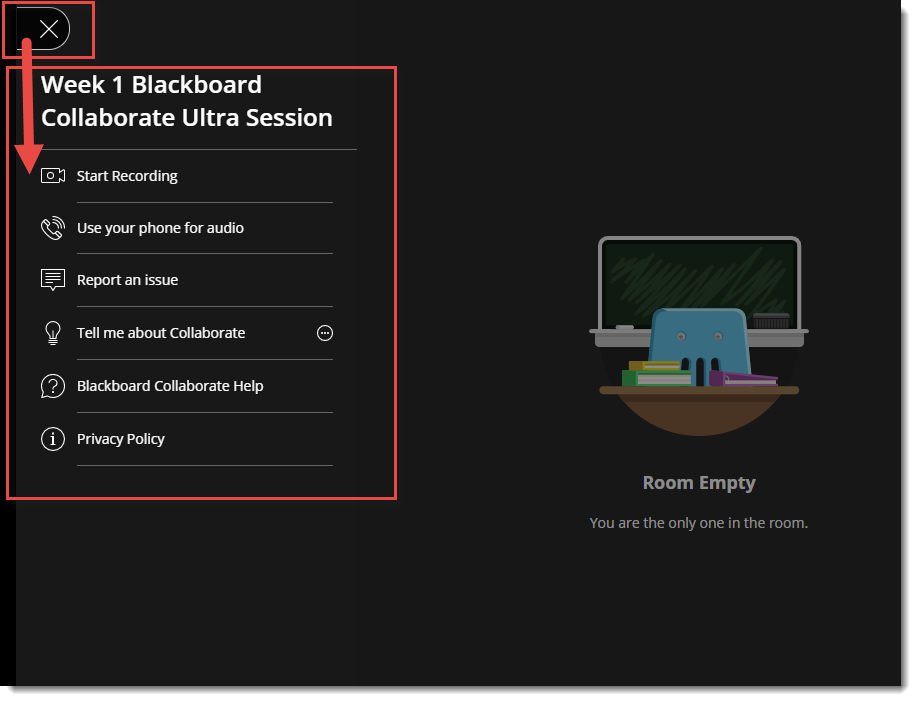
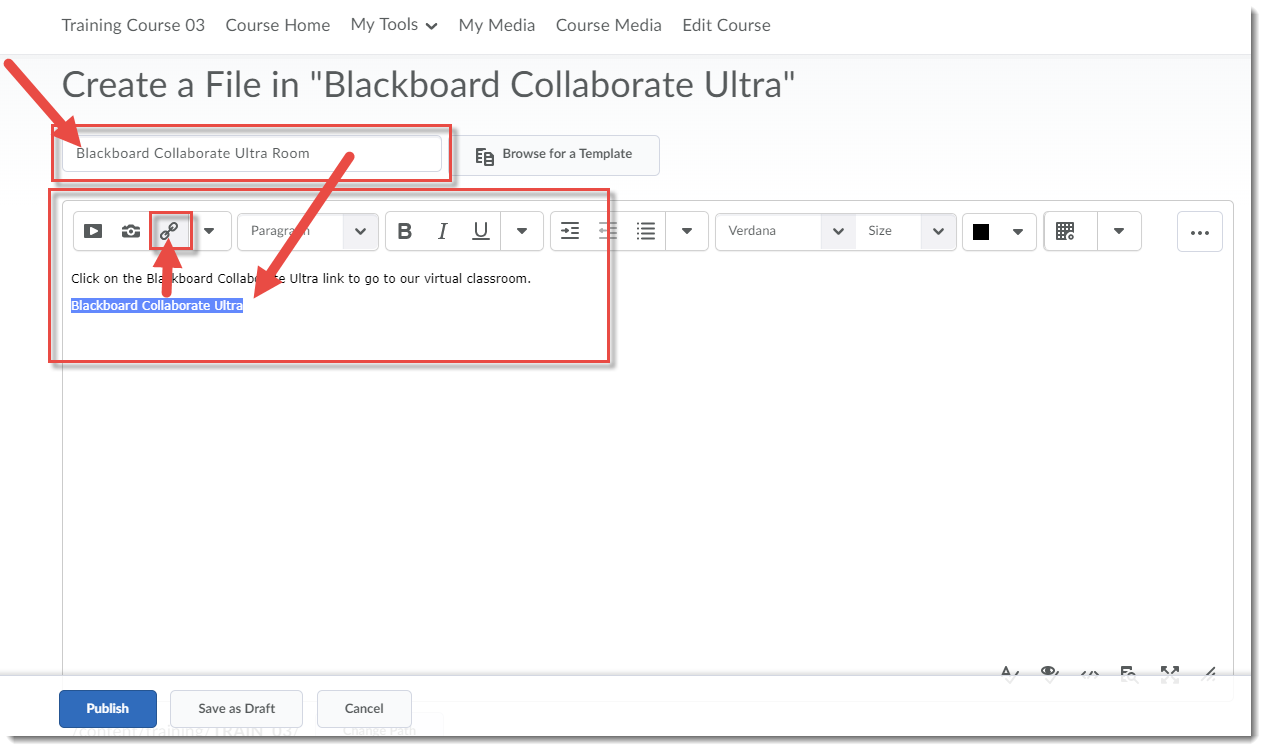
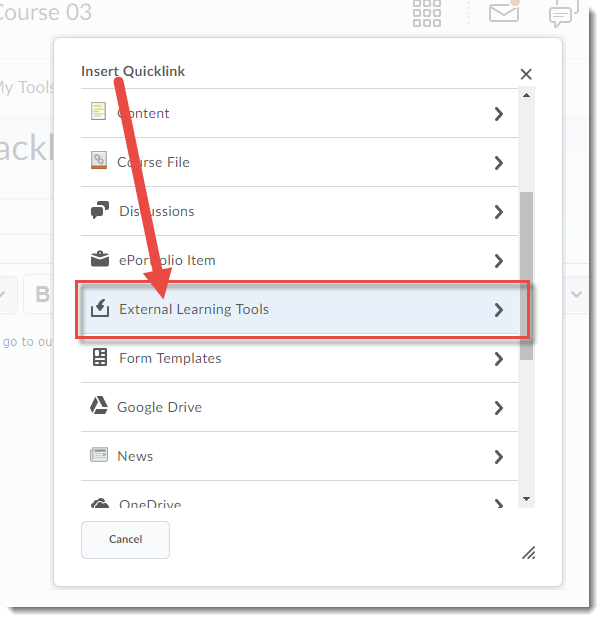
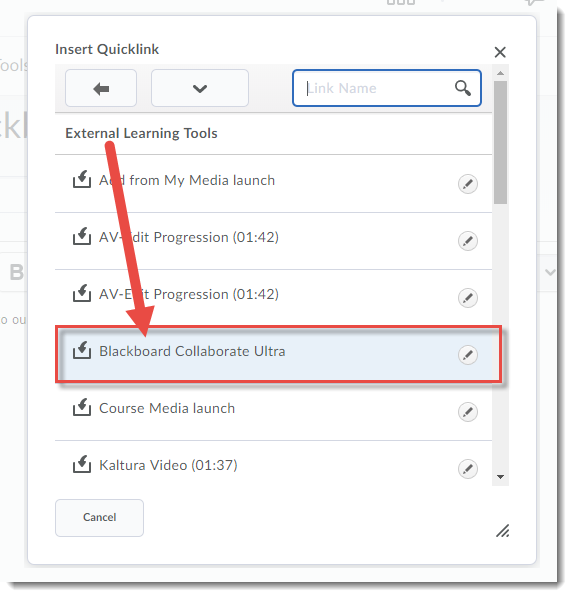
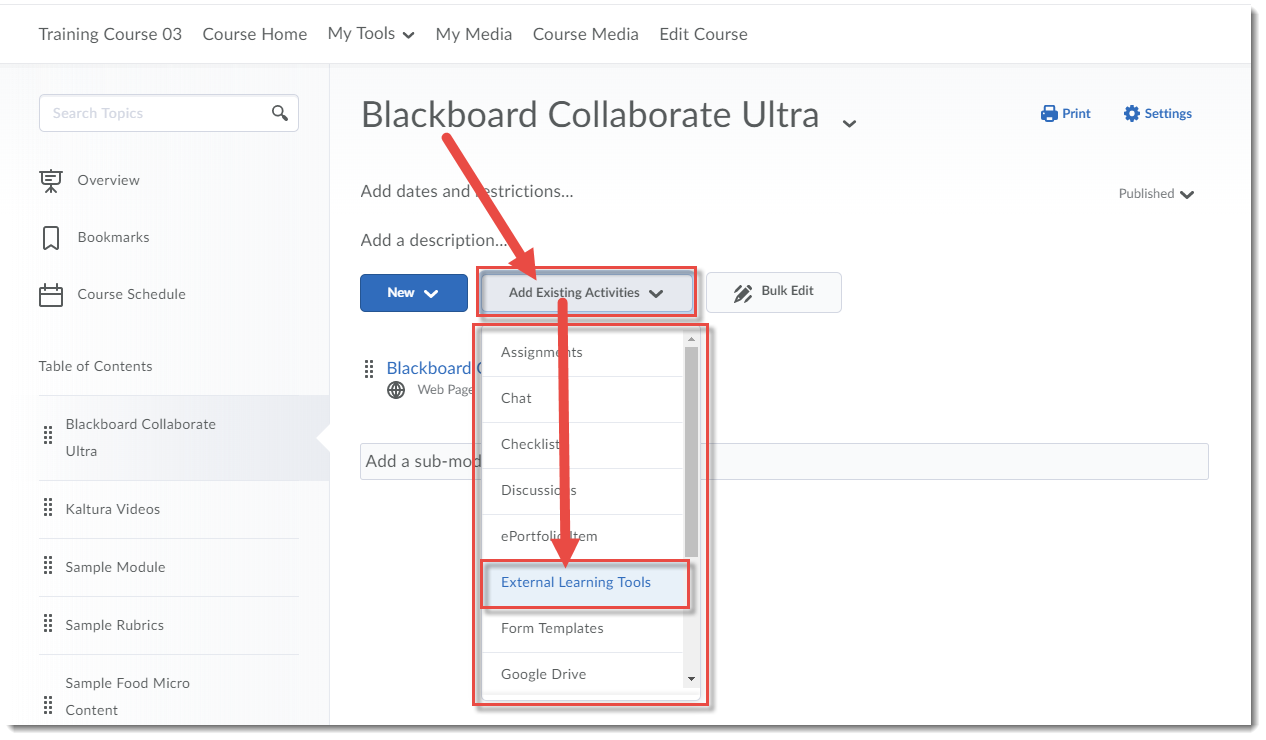
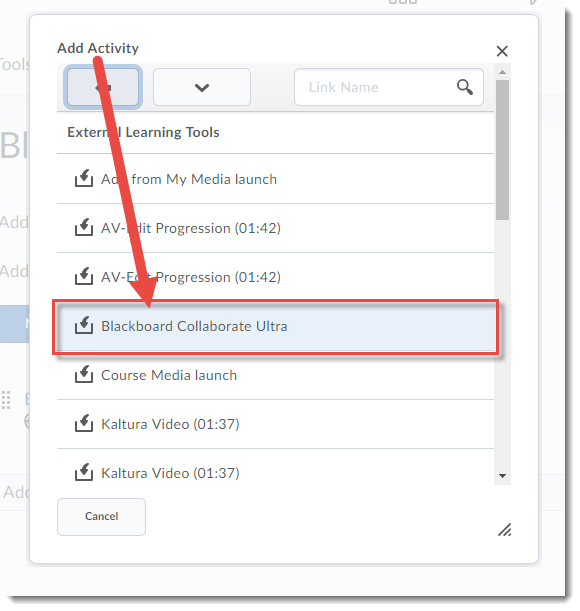
BBCU is an External Learning Tool in D2L, meaning that you can add a link to it in the Content tool (using Add Existing Activity) or in any tool which has access to the HTML editor (using the Quicklink option).

Can my students use BBCU in D2L?

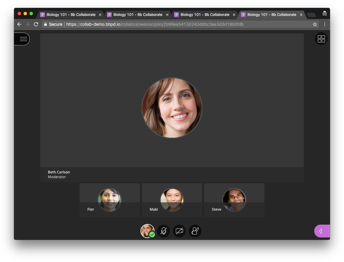
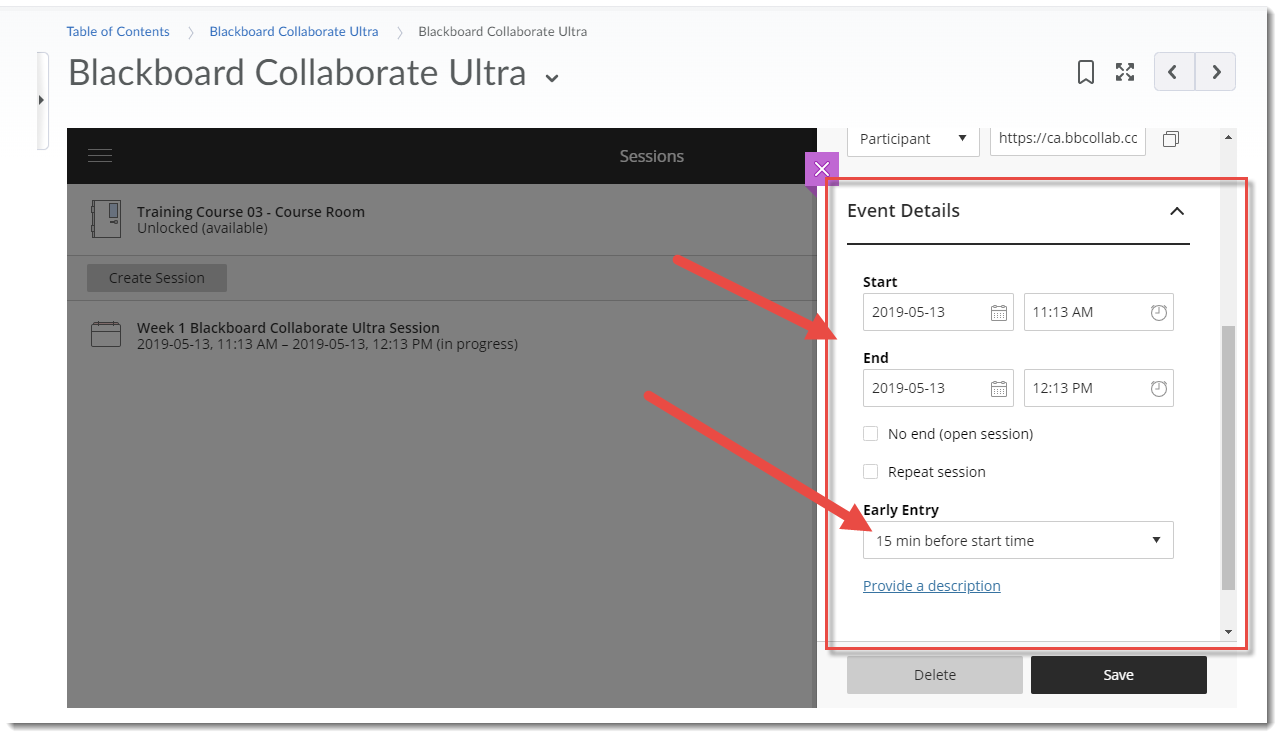
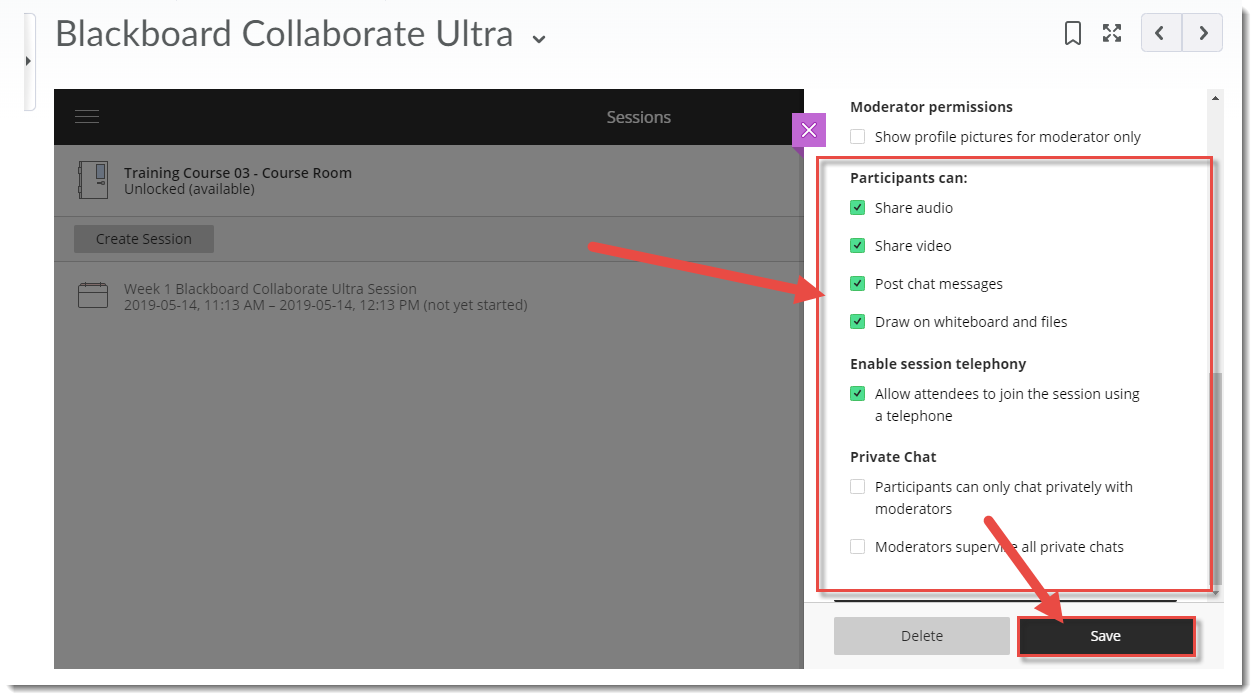
If you create a BBCU room with active sessions, your students can enter those sessions while they are open. You do not need to be in the session with your students, but you will need to consider if your students need Moderator, Presenter, or Participant access to the sessions by selecting the appropriate Guest Access for them. We have developed tutorials to support you with this.

Can I use BBCU without having to use D2L?

Yes. You need to contact Bob Preston (see above) to arrange for an account.

What do my students and I need to use BBCU?

You will need a computer with an internet connection and a browser, or a mobile device with an internet connection and either a browser or the Blackboard Collaborate app. In addition, you will need speakers and a microphone (preferably a headset if you are using your own personal device), as well as a camera/webcam, although a camera is not mandatory. BBCU has an audio/video setup wizard you can run when you enter a session, and you should advise your students to come into the session early to check their audio (and video if they are using it) to ensure they are ready when the session begins.

The more participants in the session, the more we recommend considering either disabling the ability for participants to use their cameras, or advising them to turn them off when they enter the session.

What if someone doesn’t have a camera or a microphone?

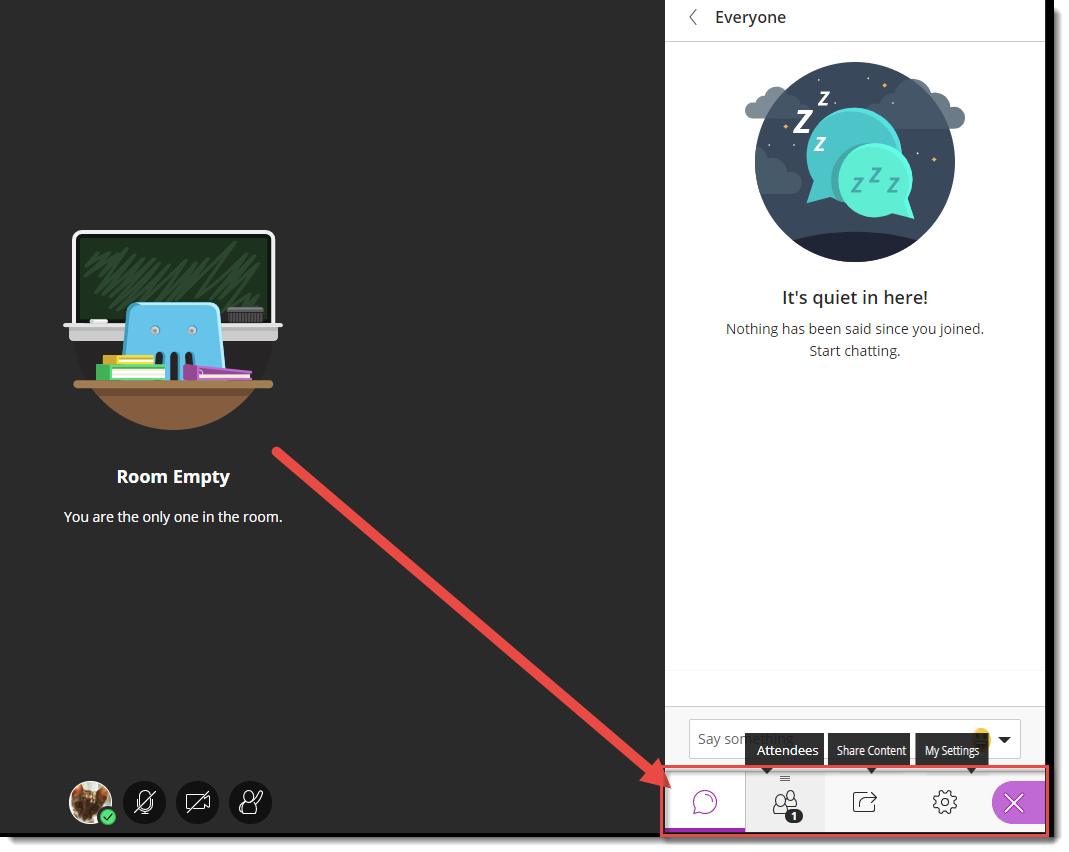
Participants can also utilize the text chat in the BBCU session, which means you or a co-facilitator should be moderating the chat to ensure you don’t miss any questions.

How many people can be in a BBCU session at once?

In theory, up to 500, but we would advise considering how much engagement you will be requiring of the students, and if you have a co-facilitator on hand to support you with a large group of virtual students, and less if you want a lot of engagement (although you can use breakout rooms to accommodate small group work). If you do not need your students to be visible, we recommend you consider either asking them to disable their cameras (and to mute their microphones when not speaking) or disabling their cameras (and microphones if necessary) when setting up the session.

If your students access a session set up in D2L, you will be able to see their names within the session. If you are creating a session outside of D2L, students will have to add their names as they enter, so you may want to remind them to do this so you know who all is there!

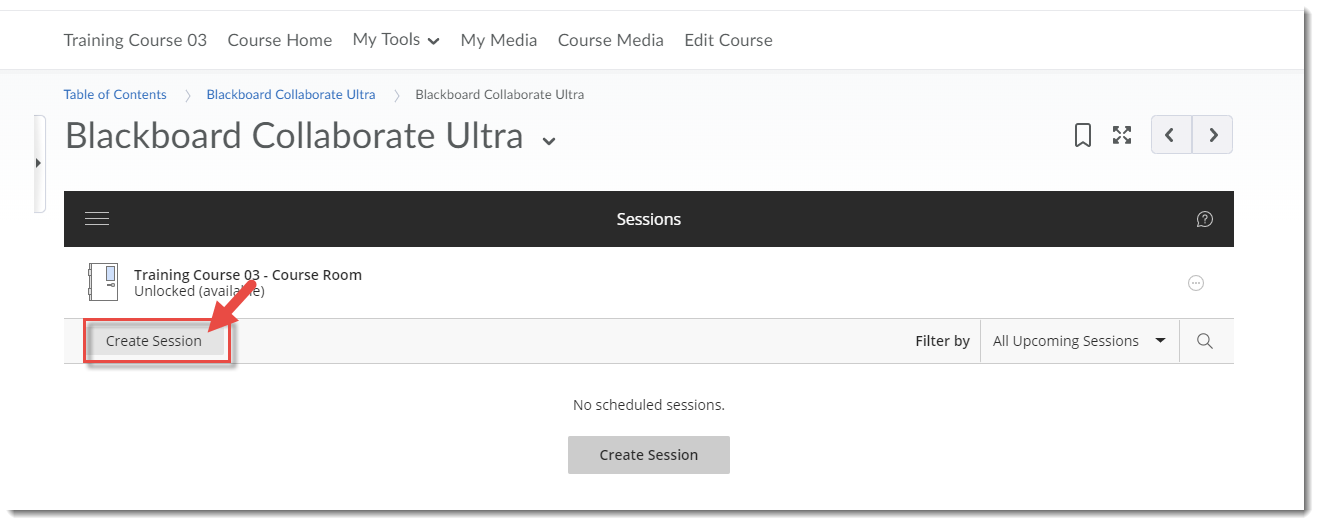
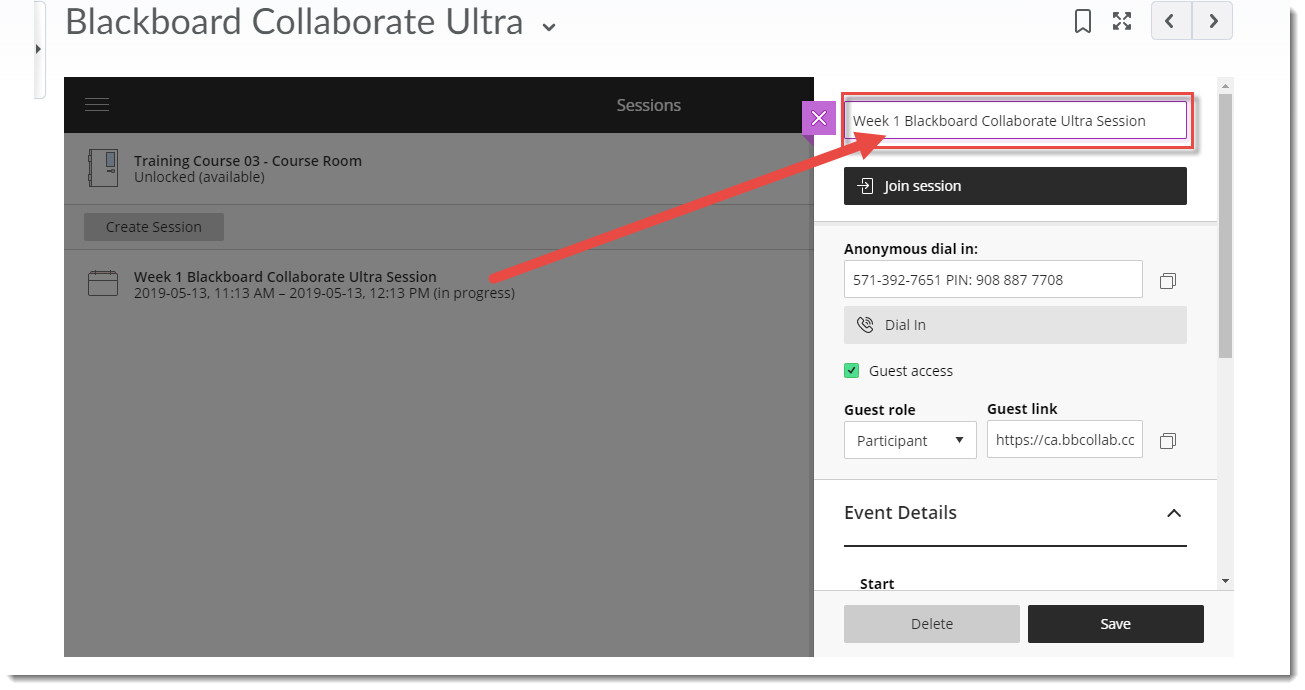
Can I have multiple sessions in BBCU?

Yes. You have one BBCU Room in a D2L course, but you can create multiple Sessions within that room.

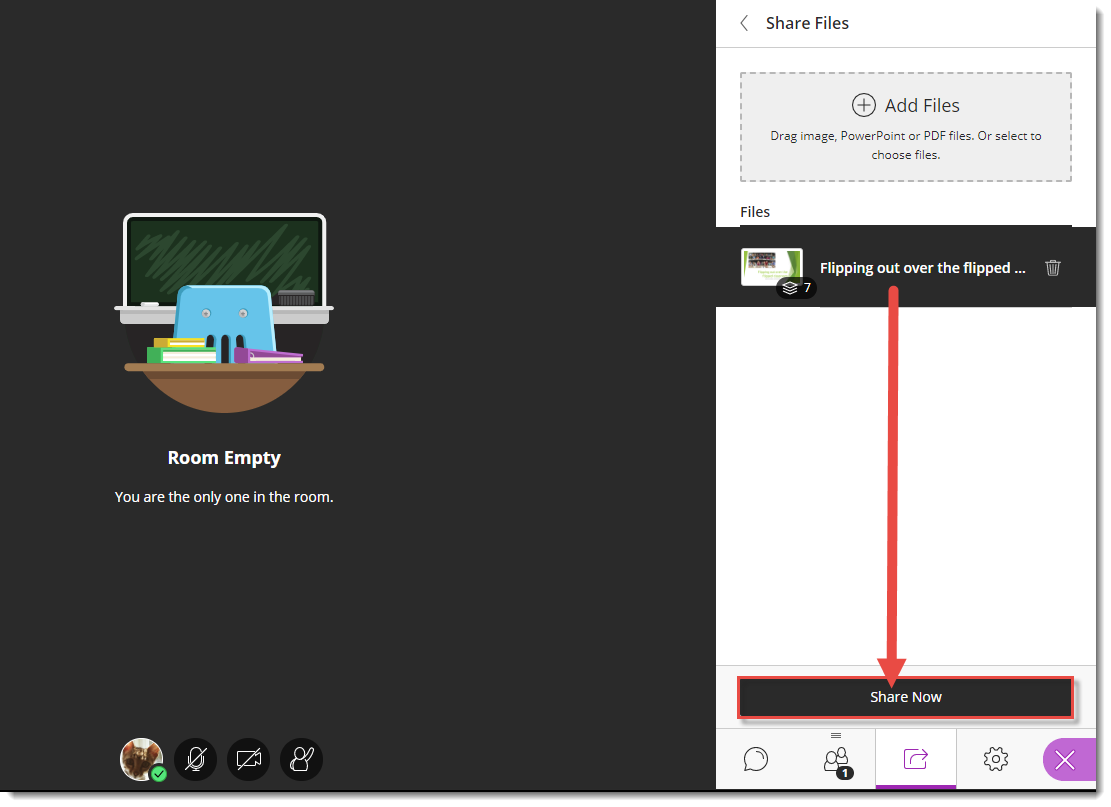
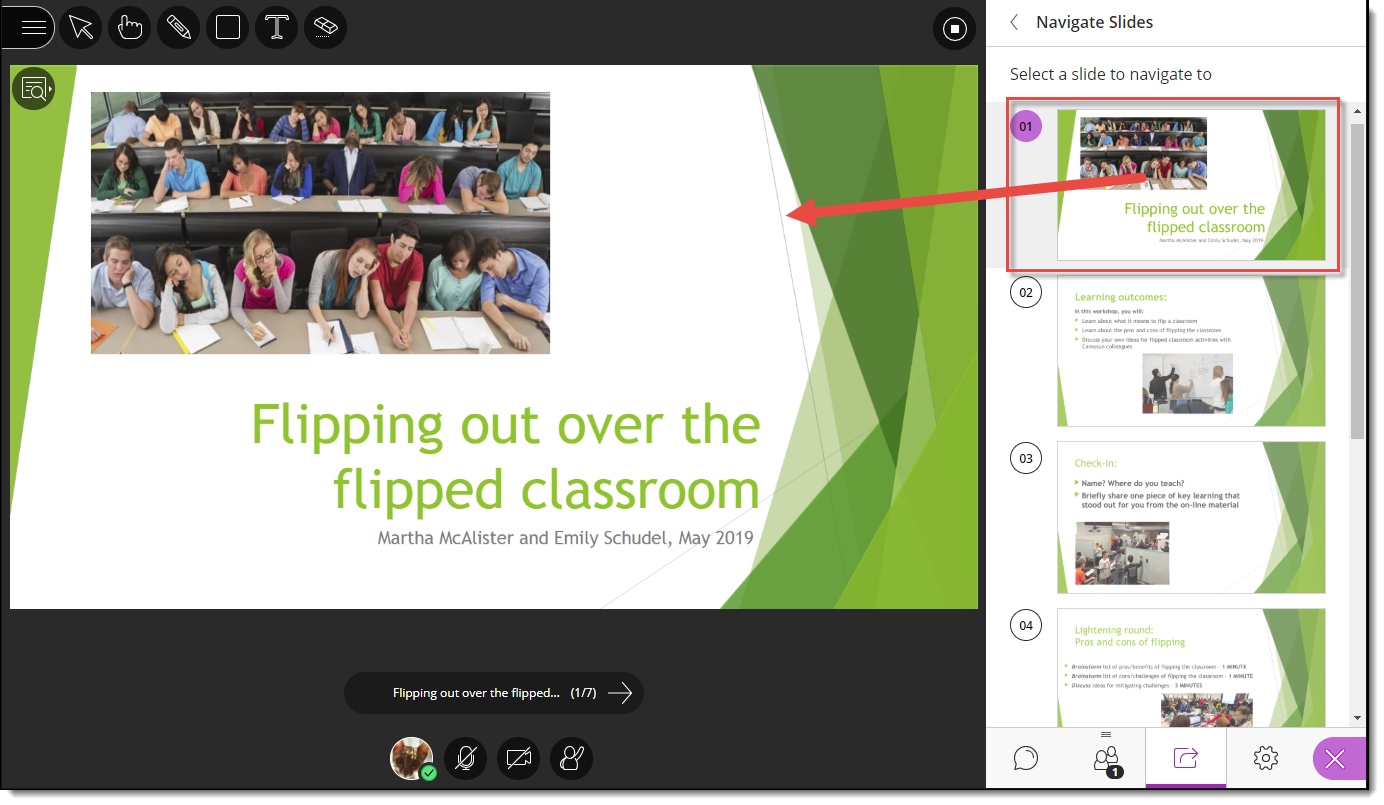
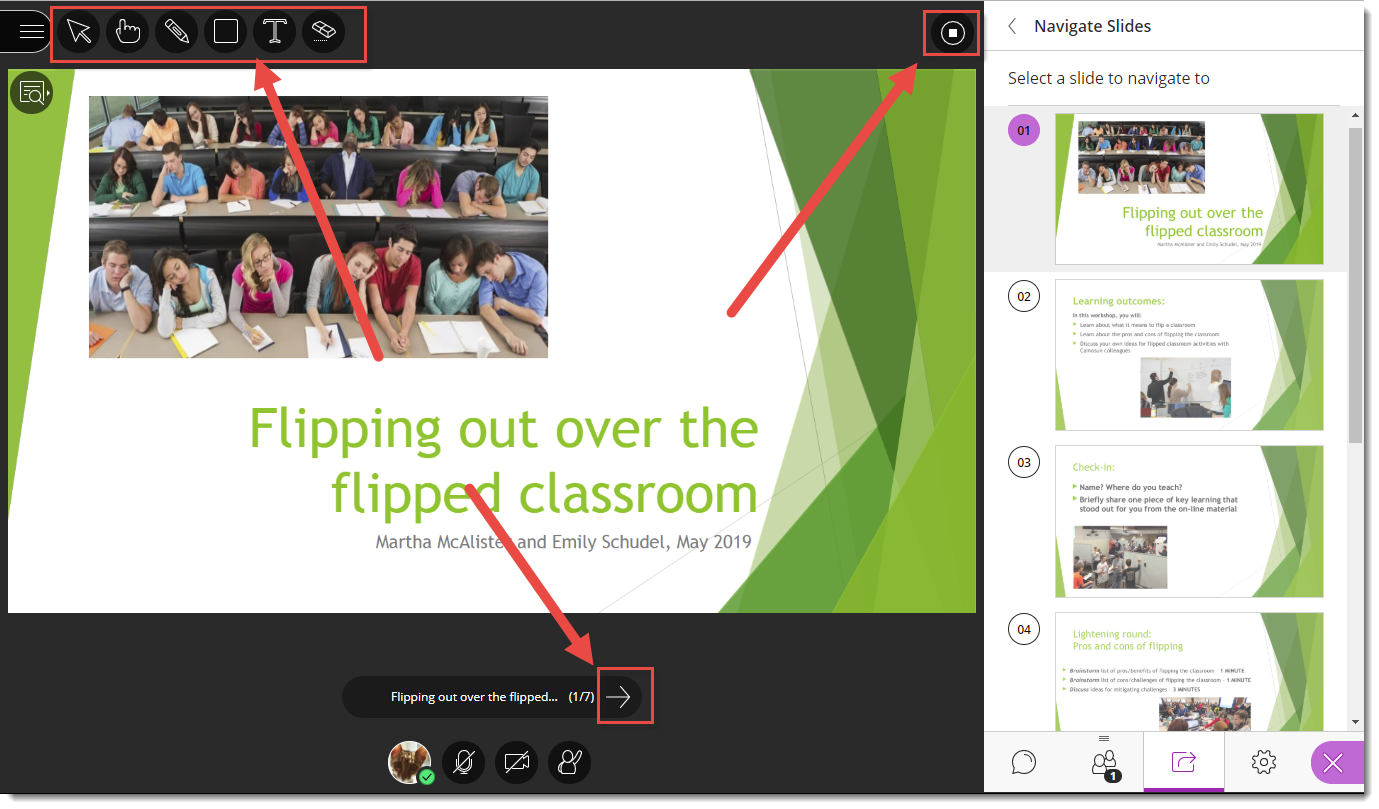
Can students show presentations in BBCU?

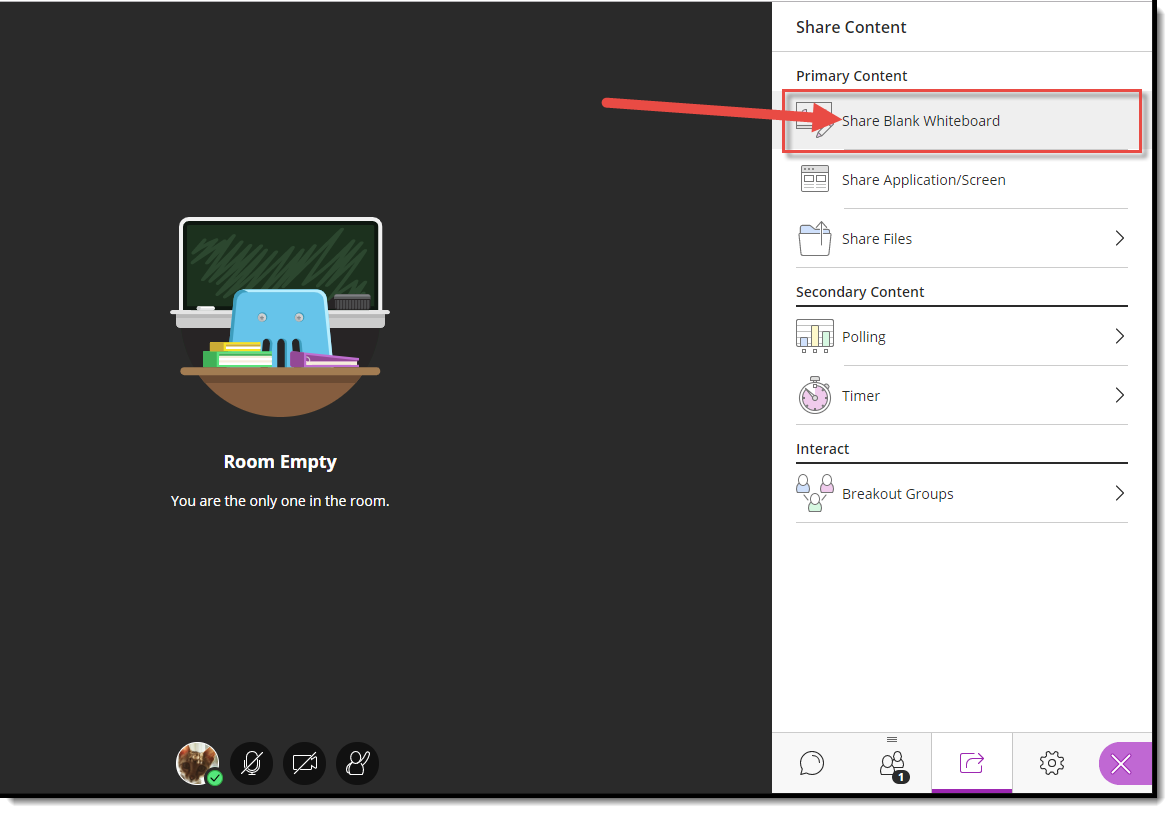
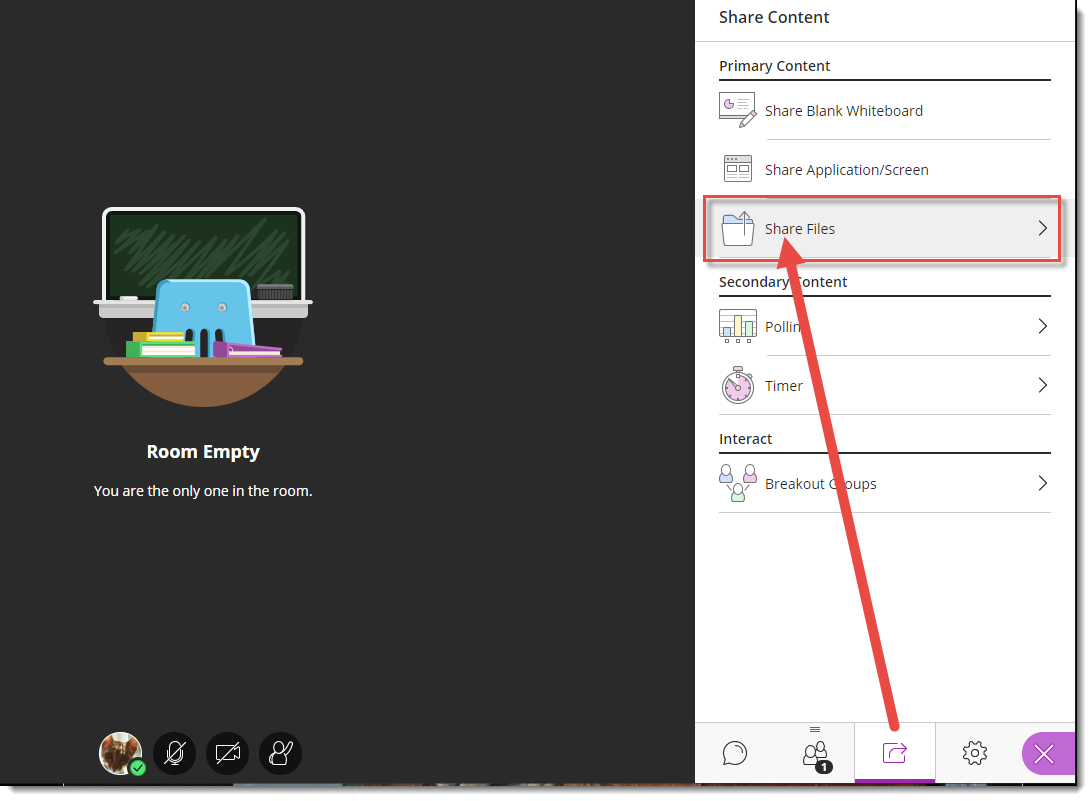
Yes. You can change the role of a Participant to a Presenter (or even to a Moderator) at any point during a session. As a Presenter, a student can share files in the main BBCU area.

Can I create a recording of my BBCU sessions?

Yes. You can create a video recording of your BBCU sessions which you can watch from a link, or download (if you have enabled recording download when creating the session) and edit, and then upload to Kaltura for embedding in your D2L course site.

Where can my students and I get help with BBCU?

You and your students can get help with BBCU from eLearning. Contact desupport@camosun.ca to arrange for a consult with an instructional designer to get you started, or for technical support when you are in a BBCU session

Blackboard Collaborate Ultra: Video/Audio Class Conferencing Online

If you have been paying attention to the workshop announcements for May/June, you may have noticed the following:

BlackBoard Collaborate Ultra: Information sessions

  • Lansdowne: Wednesday, June 5, 10:00-11:00am, LLC151
  • Interurban: Friday, May 17, 10:30-11:30am, LACC235

Blackboard Collaborate Ultra is a synchronous classroom tool that is coming to Camosun. This means that faculty now have an online tool with audio, video, chat, polling, and whiteboard/desktop sharing capabilities to support their teaching in real-time. Kaltura can be used as a stand-alone teaching tool, or can be integrated into a D2L course, and it works on computers and mobile devices (yes, even phones!)

Blackboard Collaborate Ultra rooms include a collaborative whiteboard tool that allows you to interact with students in real time, breakout rooms for smaller group discussions, and the ability to display desktop applications and web resources such as multimedia. In addition, an interactive recording can be created for each session allowing students the opportunity to review material at a later date.

Some specific activities which work well in Blackboard Collaborate Ultra are:

  • Facilitating live, online discussions around specific topics using video and audio, which can then be recorded so students can go back and review at any time
  • Showing students how to use different kinds of technologies through desktop sharing, and presenting polls at intervals to check comprehension
  • Breaking your class into smaller groups for discussions, then bringing them back to the main room for a debrief
  • Giving students space to do online class presentations using PowerPoint or a virtual whiteboard
  • Providing online office hours, or online space for student group work

More information about how you will be able to access Blackboard Collaborate Ultra will be coming in late April, and hands-on sessions will be offered in the spring. Go to https://decamosun.wordpress.com/2019/01/28/elearning-spring-workshops-open-for-registration/ to find out more.

If you have any questions about how and when you can have access to Blackboard Collaborate Ultra, or if you would like a demo or to talk to someone about how you might use Blackboard Collaborate Ultra, contact desupport@camosun.ca to arrange for a meeting with Bob Preston, or one of our instructional designers.