Blind Marking Quizzes in D2L

Marking quizzes in D2L and wondering if there is a way to mark them without knowing which students submitted which quiz to reduce bias? This tutorial will walk you through how to blink mark in the Quizzes tool.

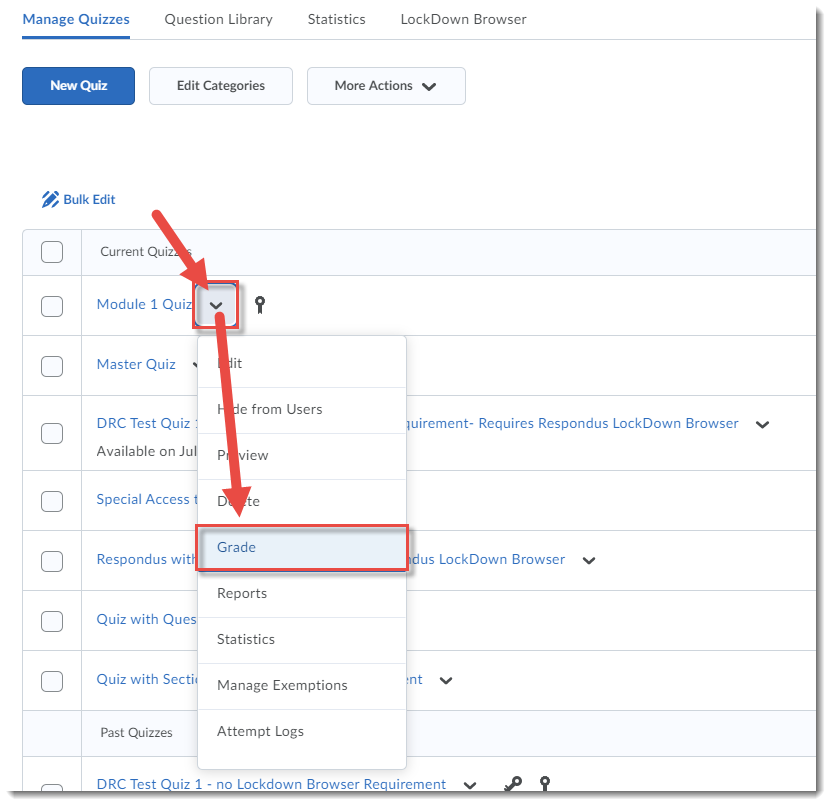
  1. Go to the Quizzes tool in your D2L course.
  2. Click the down arrow next to the quiz you wish to grade, and select Grade.Click Grade
  3. Click the Questions tab, then select Blind Marking. Then click the first question title to start marking.Questions tab, select Blind Marking, click a question
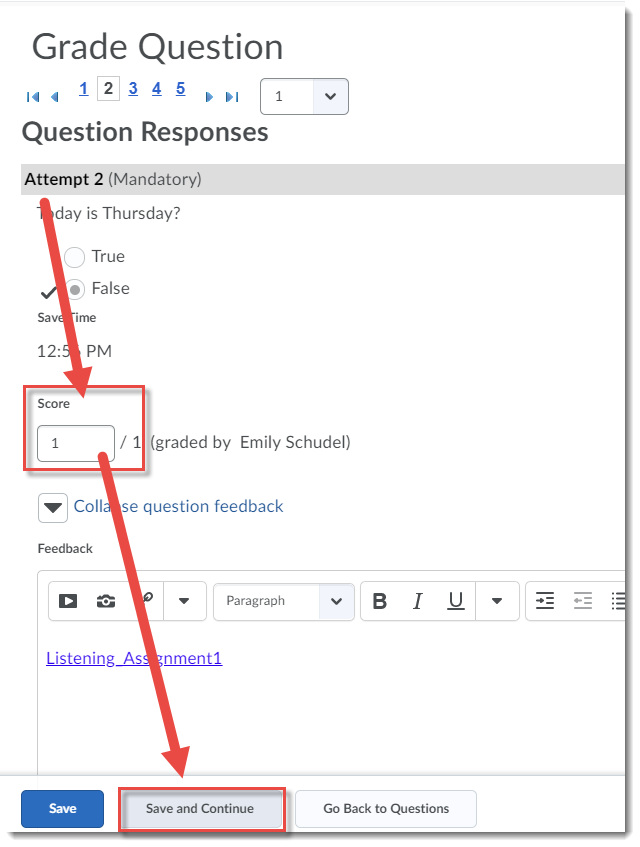
  4. Mark each question response, and click Save and Continue to move to the next question response.Grade, click Save and Continue
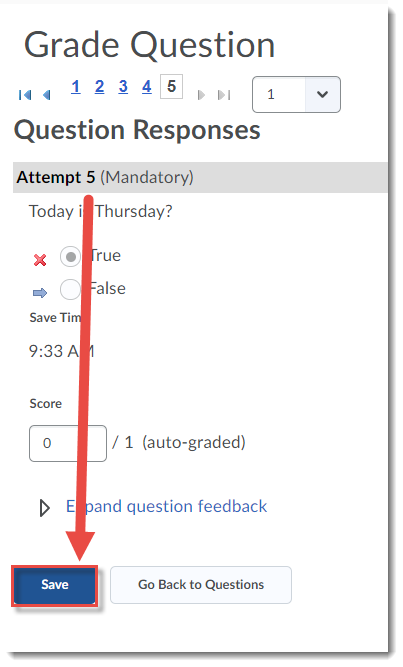
  5. When you have completed your marking, click Save.Click Save

Reminder: Releasing Final Adjusted Grades in D2L

This tutorial is designed for faculty who have previous experience using the Grades tool in D2L and will cover the steps involved when you wish to release your Final Grades to your students. For further information, please contact desupport@camosun.ca for assistance.

Steps

  1. Go to the Grades tool in your course, and make sure you are in the Enter Grades.
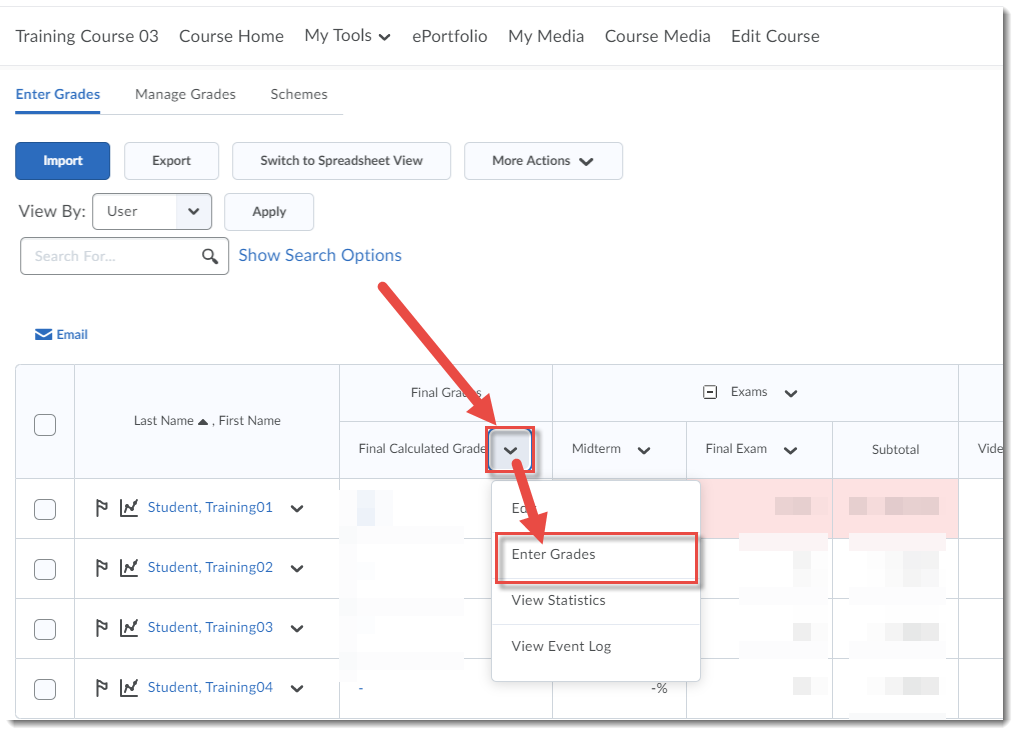
  2. Click on the down arrow next to the Final Grade (Calculated or Adjusted) and select Enter Grades.Select Enter Grades
  3. First, you want to transfer all the Final Calculated Grades into the Final Adjusted Grade column. To do this, click on the down arrow next to the title Final Grades, and select Transfer All.Click the down arrow next to Final Grades and select Transfer All
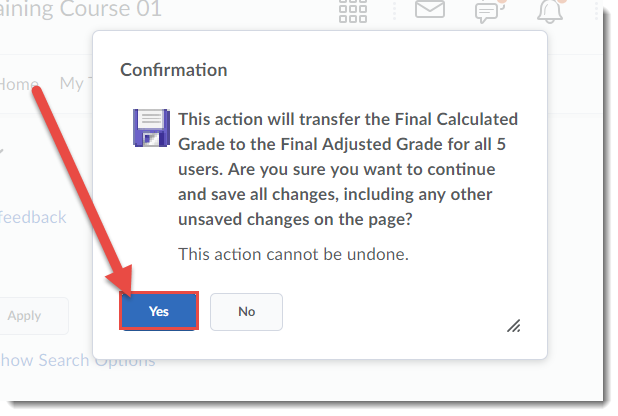
  4. Click Yes in the Confirmation pop-up box to continue.In the Confirmation box, click Yes
  5. Your Final Calculated Grades will be transferred into the Final Adjusted Grade column. To then release the Final Grades, move on to Step 6 below. If you do NOT want to release the grades at this time, click Save and Close. The final grades will be saved, but NOT released to students.Click Save and Close
  6. To release your Final Grades, click on the select box at the top of the student grade table to select all students.Select all students
  7. Click Release/Unrelease. You will then see checkmarks in the Release Final Adjusted Grade column. Click Save and Close. Click Yes in the pop-up box that appears.Click Release/Unrelease, then click Save
  8. You will then see the Final Adjusted Grades in the Enter Grades table, with open eye icons, indicating that those grades are now released to your students.The Final Adjusted Grades are now released

Things to Remember

As alluded to in Step 5, if you are not finalizing the grades for all your students at one time, you can set and save your Final Adjusted Grades without releasing them, and then release them once you have finalized all your students’ grades.

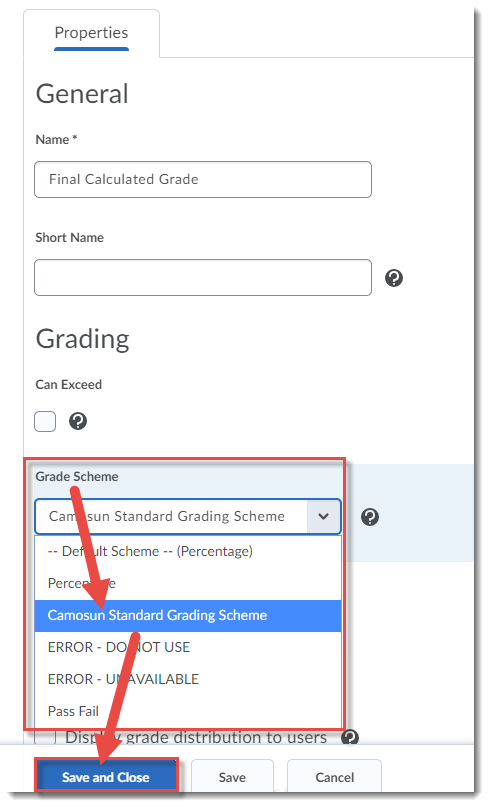
In addition, make sure your Final Calculated Grade is set to the Camosun Standard Grading Scheme:

  1. Edit your Final Calculated Grade.
  2. In the Grade Scheme drop-down menu, select Camosun Standard Grading Scheme, and click Save and Close.Camosun Standard Grading Scheme

Recording a Blackboard Collaborate Ultra Session in D2L

This tutorial is designed for faculty who have previous experience using D2L, and Blackboard Collaborate Ultra (BBCU), and will cover how to record your (BBCU) session, and what you can do with the recording later. For further information, please contact desupport@camosun.ca for assistance.

Steps

  1. Go to the location in your D2L course site where you have linked to your Blackboard Collaborate Ultra room (for example, in the Content tool), click on your Blackboard Collaborate Ultra session and enter your session.
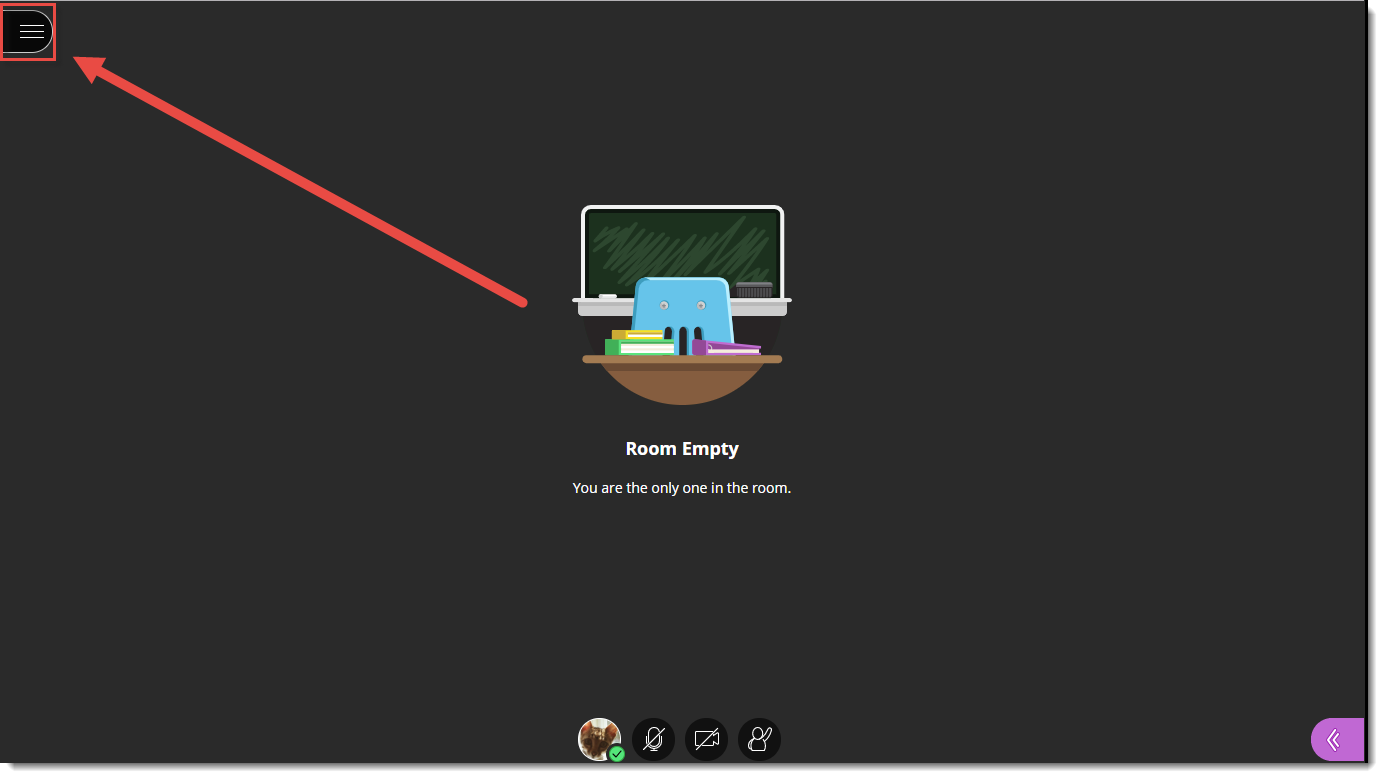
  2. Open the Session menu (the top left icon).

    Open the Session menu

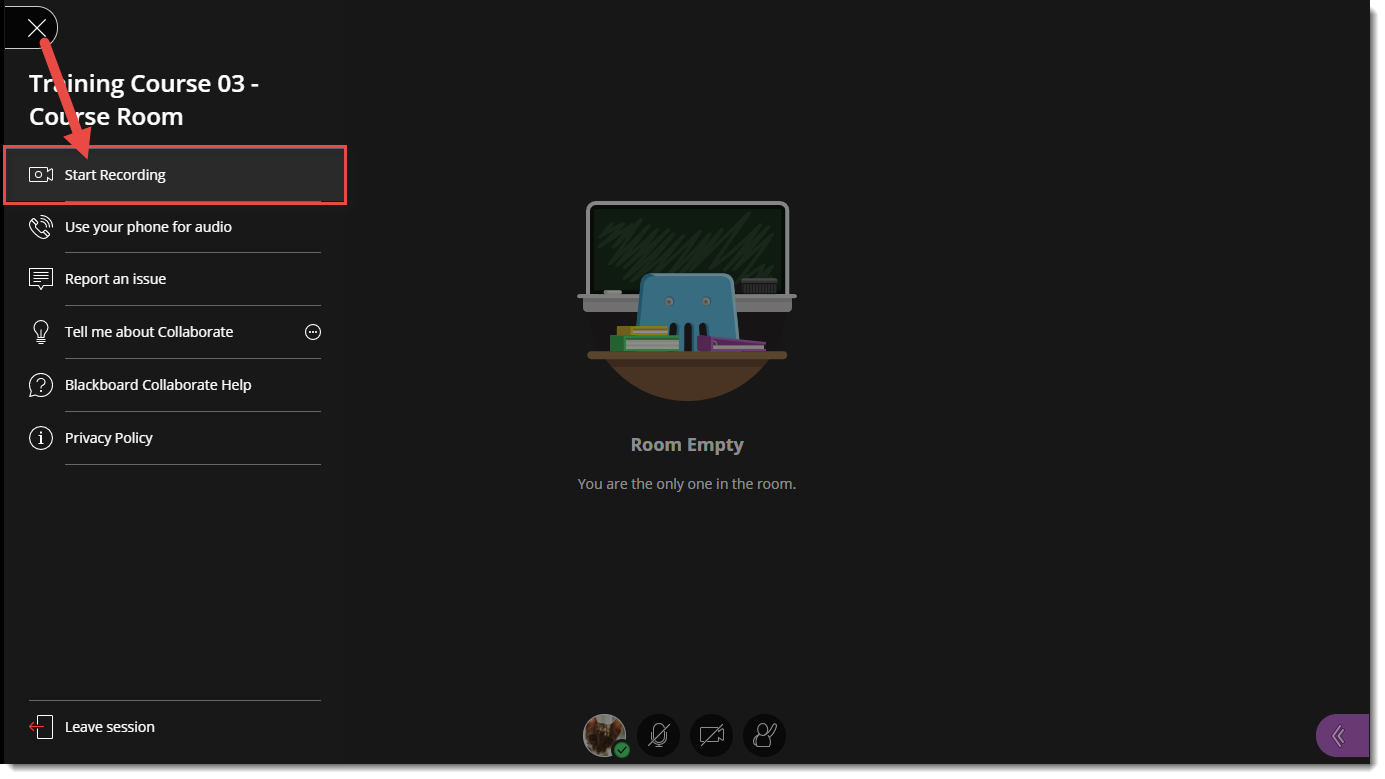
  3. Click Start Recording.

    Click Start Recording

    A Session is being recorded message will pop up.

    Session is being recorded message

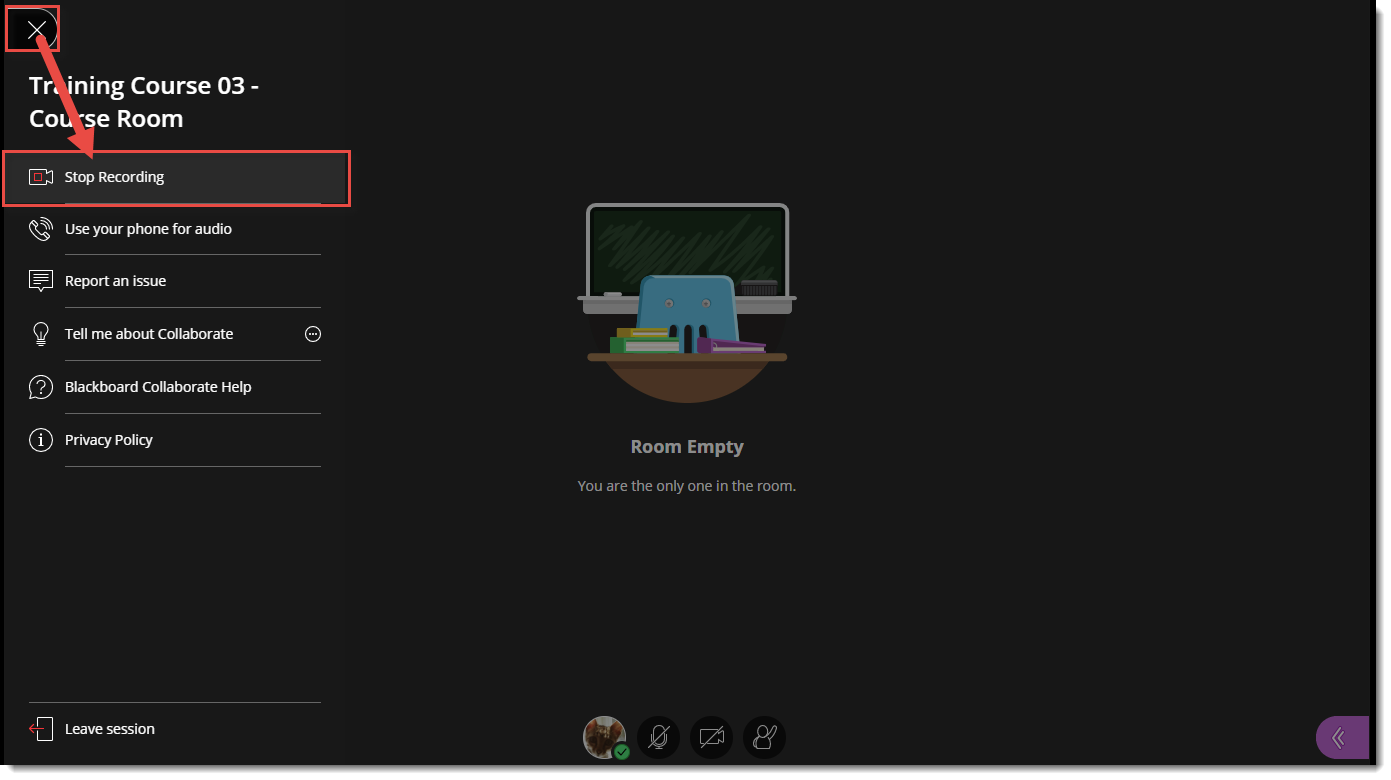
  4. To stop the recording, click the Session menu, and select Stop Recording.

    Click Session menu and select Stop Recording.

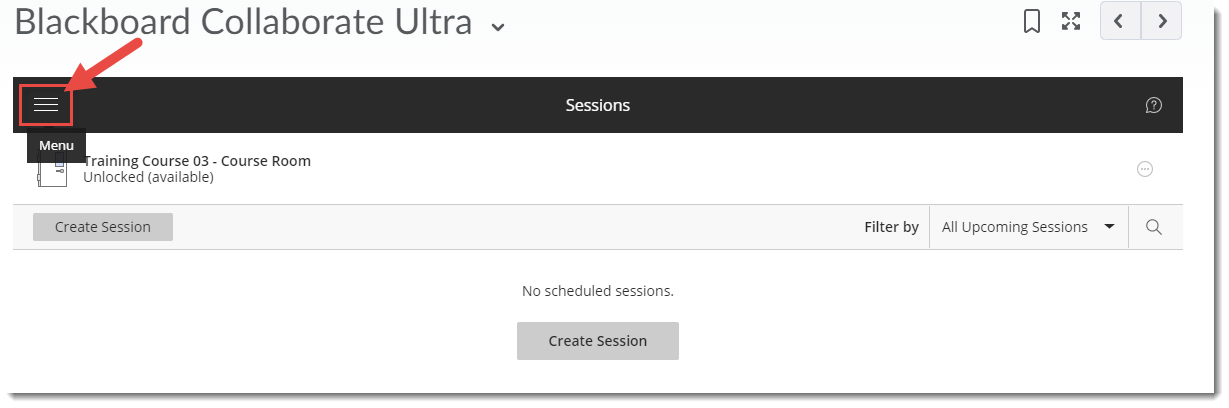
  5. To access your recording(s), go back to the location in your D2L course site where you have linked to your Blackboard Collaborate Ultra room (for example, in the Content tool), and click the Menu at the top left above the Course Room link.

    Click the Menu link

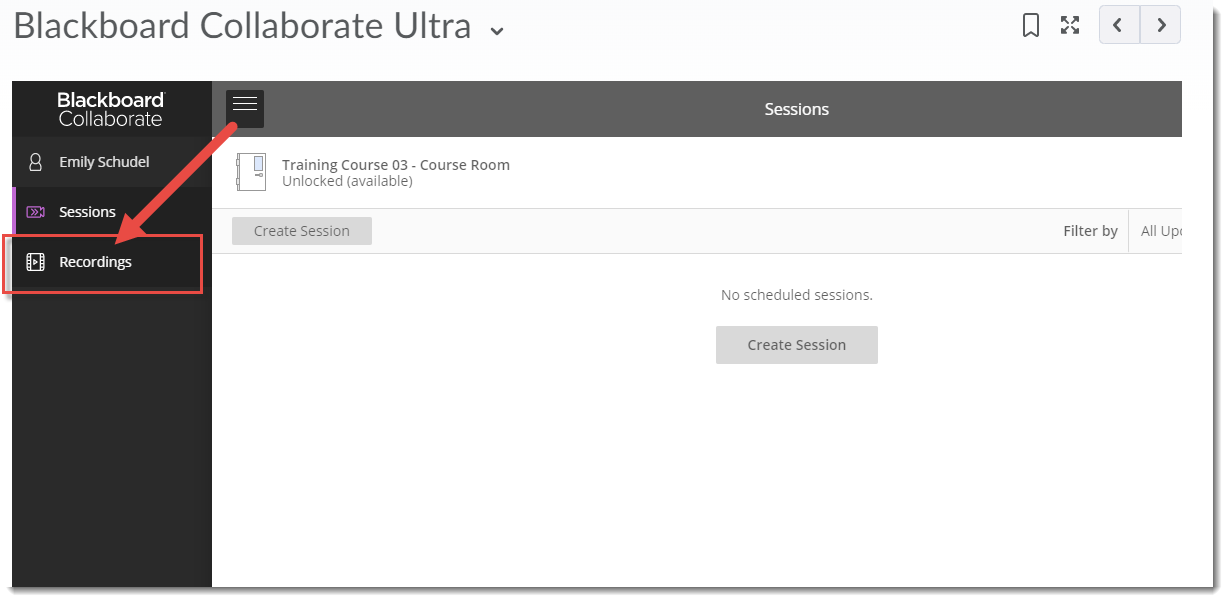
  6. Select Recordings (note that it may take a bit of time before the recording(s) appear – and you may need to log off of D2L and log back in again before you see them).

    Select Recordings

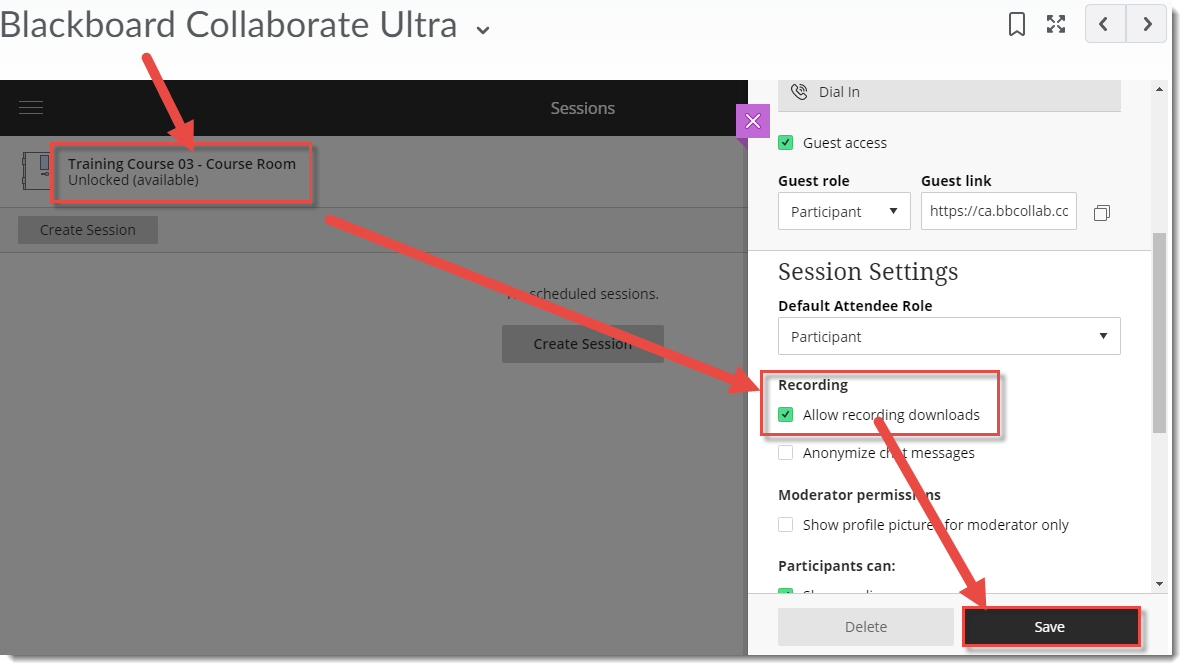
  7. Make sure Recording downloads are enabled by clicking on the Room (or Session) link and under Recording, selecting Allow recording downloads, and click Save.

    Click the Room link and under Recording, select Allow recording downloads, click Save

  8. Go back to the Recording area (see steps 5 and 6), and then click the three dots to the right of the recording you want to download, and select Download (from here you can also Watch the recording, Edit its name, Delete it, Copy its link for emailing to people, or Add a caption source, if you have a caption file saved on your computer. Note, if you would like the recording closed captioned, download it, upload it to Kaltura, and Kaltura will add auto closed-captions to it).

    Click the three dots and select Download

  9. Save the recording video to your device. You can then edit it using a video editing program, or upload it directly into Kaltura for sharing with your students.

Things to Remember

Recorded BBCU sessions are saved as MP4s, and only Moderators can turn recording on in sessions.

Recordings include the following activities from in the live session: Audio, shared content, active speaker video (if shared during the session), captions added during the live session, chat messages in the Everyone chat channel (NOT chat messages in breakout rooms).

Recordings can be viewed from any device, and can be viewed as often as needed – there are no view limits.

This content is licensed under a Creative Commons Attribution 4.0 International Licence.Icons by the Noun Project.

Open/OER Online Courses

Interested in learning more about Open Educational Resources (OER) and Creative Commons licensing?  Here are a couple of open courses for you to check out (and adopt or adapt – they are all CC licenced!)!

Open Content to Transform the Classroom by Matthew Bloom, licensed under a Creative Commons Attribution-ShareAlike 4.0 International License

  • Part 1: The Easy Way to Create, License, and Share Free Materials
  • Part 2: Exploring the Possibilities of Open Educational Resources

Learn OER managed by the Washington State Board for Community and Technical Colleges licensed under a CC-BY 4.0

  • Module 1: Introduction
  • Module 2: Copyright  License
  • Module 3: Understanding OER
  • Module 4: Open License
  • Module 5: Creative Commons Licensing
  • Module 6: Finding OER
  • Module 7: Public Domain
  • Module 8: Sharing OER
  • Module 9: Accessibility
  • Module 10: Why OER Matters

Finding Help in the D2L On-Demand Training Course

Getting ready to set up your courses for January, but not quite remembering what you need to remember? Go to the D2L On-Demand Training course site in D2L for 24/7 support through printable PDF tutorials. Here’s how to find them:

  1. Go to D2L and, in the My Courses widget, scroll to find and click on the Training tab.

    Click Training

  2. Find and click on D2L On-Demand Training.

    Click D2L On-Demand Training

  3. Click on Support Documentation in the navigation bar.

    Click Support Documentation

  4. In the Table of Contents, click on the Module you want to see tutorials for – here we will click on eLearning D2L Tutorial Documents, and then on Course Admin.

    Click the module you want to open

  5. Click on the title of the tutorial you wish to view – here we will click on Copy Course Components from one Course to Another.

    Click the tutorial you want to open

  6. To print the file you will have to download it to your device first by scrolling down, and clicking Download.

    Click Download

  7. You can then open the file and print it from your device.

Support documents not enough? We are here to help! Make an appointment with an instructional designer by emailing desupport@camosun.ca.

Complex Images and Accessibility – Portland Community College Website

When adding images to your documents or web pages/WordPress pages, to meet best practices around accessibility you need to add appropriate descriptive text to your images so that learners who can not see the images have an alternate way to access the images.  But adding text to images can be tricky when you are dealing with more complex images like graphs, maps, diagrams, charts, etc.

This Complex image Accessibility site (which opens in a new tab or window) from Portland Community College has some excellent guidelines for how to make complex images accessible to all.

Managing the Chatroom in Blackboard Collaborate Ultra in D2L

This tutorial is designed for faculty who have previous experience using D2L and Blackboard Collaborate Ultra, and will cover how you can manage your Blackboard Collaborate Ultra (BBCU) session Chatroom. For further information, please contact desupport@camosun.ca for assistance.

Steps

  1. Go to the location in your D2L course site where you have linked to your Blackboard Collaborate Ultra room (for example, in the Content tool), click on your Blackboard Collaborate Ultra session and enter your session.
  2. Open the Collaborate panel (the bottom right icon).

    Open the Collaborate panel

  3. Click the Chat icon.

    Click the Chat icon

  4. Moderators will be able to chat to Everyone or to Moderators only. Participants will be able to chat to Everyone, and may also be able to Private Chat another participant if the Moderator has not disallowed that function. Click Everyone to chat to the whole group.

    Click Everyone

  5. Type your message in the Say something box and hit Enter. Click the down arrow to select an emoji to add to your message.

    Type your message

  6. To toggle from Everyone to Moderators (or to chat with an individual) click the back arrow next to Everyone.

    Click the arrow next to Everyone

  7. To find a specific person to private chat with, start typing their name into the Find someone to chat with box, select them, and hit Enter.

    Find someone to chat with

Things to Remember

If the Collaborate panel is closed while you are facilitating your session, chat messages will pop up in the main window, and if your Collaborate panel is open, but NOT on Chat, chats will register as numbers at the bottom of the Collaborate panel next to the Chat icon.

Chat messages pop up Numbers appear next to Chat

CC-BYThis content is licensed under a Creative Commons Attribution 4.0 International Licence.Icons by the Noun Project.
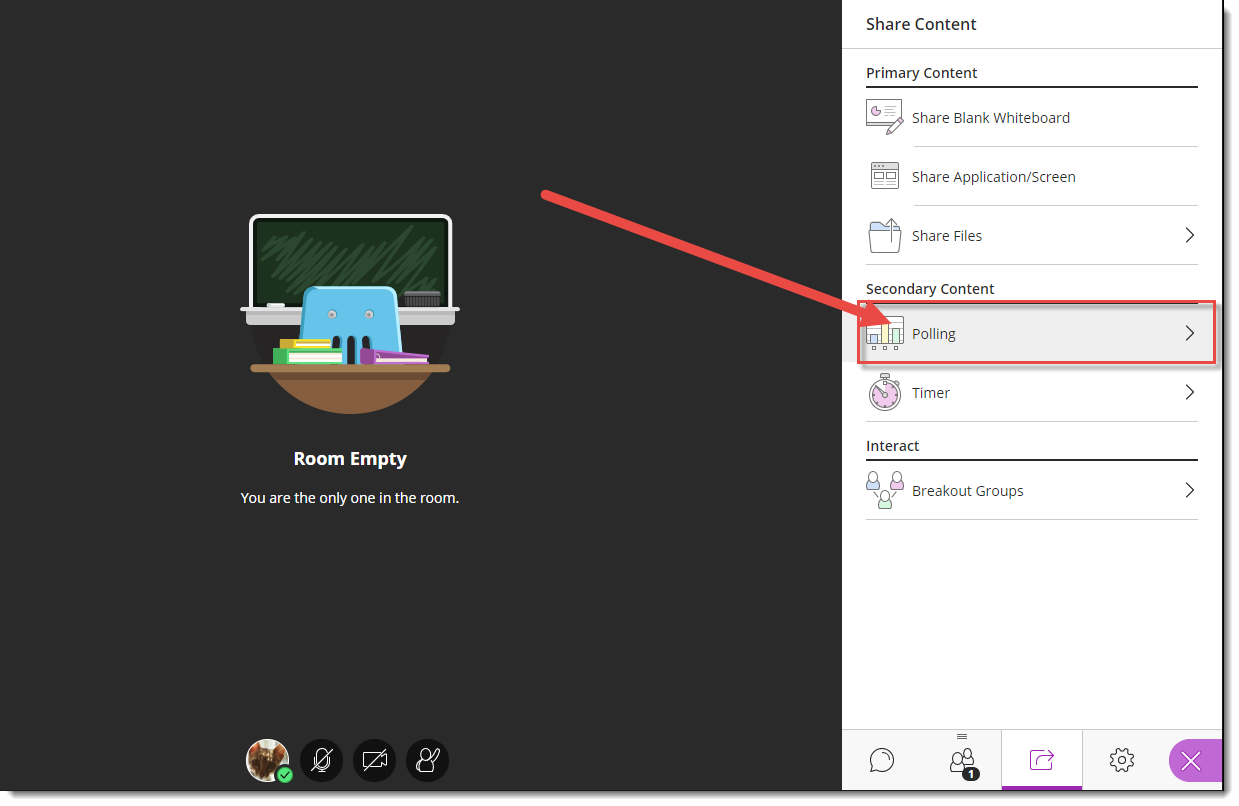
Reminder of where to get help to get ready for January

Looking for help with setting up your final grades, etc.? Getting ready to set up your courses for the Winter term? eLearning is here to help.

We have drop-in times at Interurban in LACC251J on Fridays from 11:30am-12:30pm and in December, on Tuesdays and Thursdays from 10:00am-12:00pm.  And don’t forget, you can also schedule one-on -one consults with an instructional designer at either campus.

Email desupport@camosun.ca to book an appointment today!!