Assignments versus Quizzes in D2L – what is best for assessment?

Many of you are struggling with how to assess students in these final few weeks of classes after the sudden move to online teaching and learning. While there are no easy answers, other than “it depends…” (because it does depend – on your course, your assessments, your students, what they need for accreditation, etc.) I wanted to take a moment to discuss two of the assessment tools in D2L and how they might support you in your final “exams”, if you have them. Note that throughout this post I link to our tutorial site , as well as to resources contained on the STLHE Teaching & Assessing (Online) site. Both these sites are being updated daily, and I highly recommend reviewing the many resources on alternative assessments on both the STLHE site and our Assessments libguide.

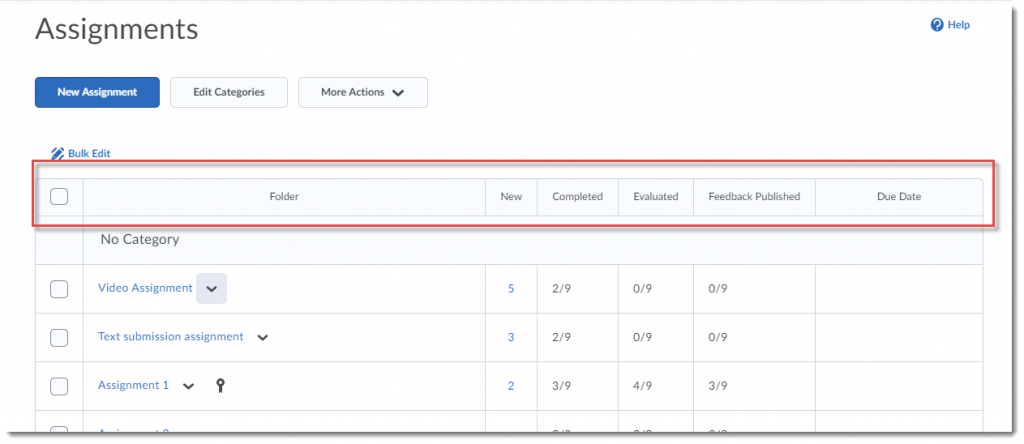
Assignments tool (used to be called Dropbox) is a place students can submit various kinds of assignments including WORD or PDF documents, EXCEL spreadsheets, images, audio, video (with or without using Kaltura). It can also be connected to the Grades tool in D2L. There are other things the Assignments tool can do, but I will stick to the basics.

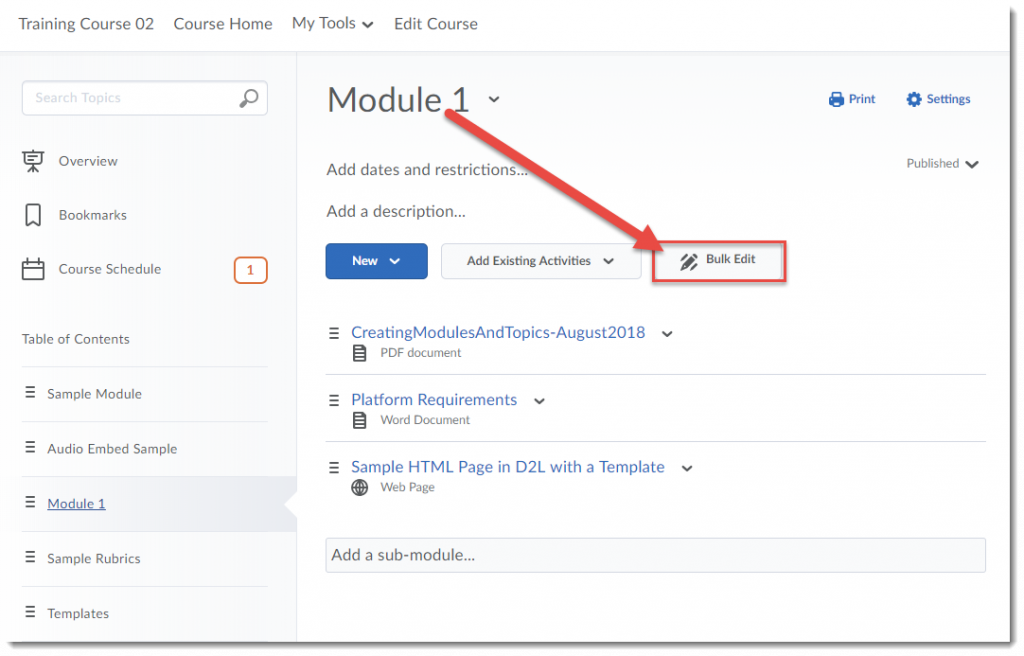
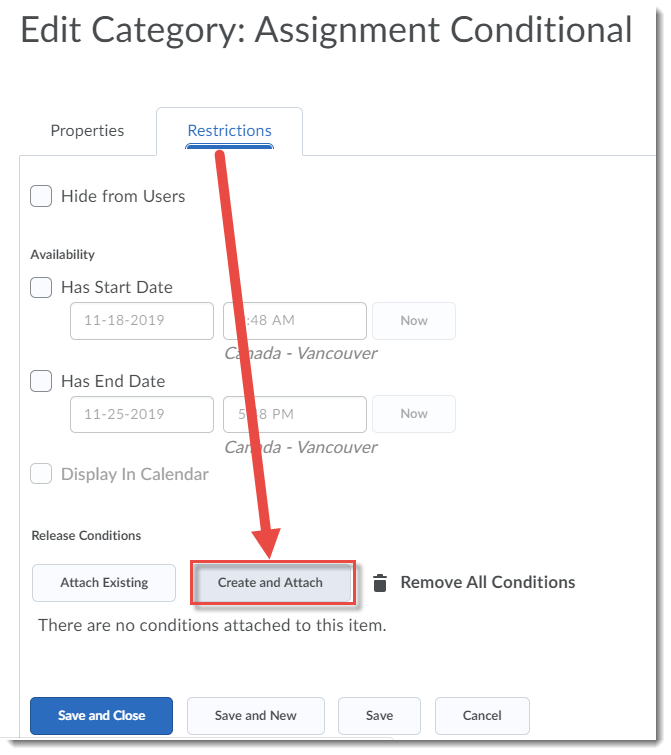
The Assignments tool can be used for handing in assignments, but can also be used for open book exams. An assignment folder can be opened on a specific day and time, and closed at a specific time. You can attach your exam to the folder so students can download it, complete it, and submit it before the time for the exam is up. Students will need to have a word processing program to access the exam, and you will need to consider how you will handle the thought of potential cheating (and you will think about that). But, especially when you have limited time to prepare, this tool will serve you very well and probably be the less stressful of these two tools to use.

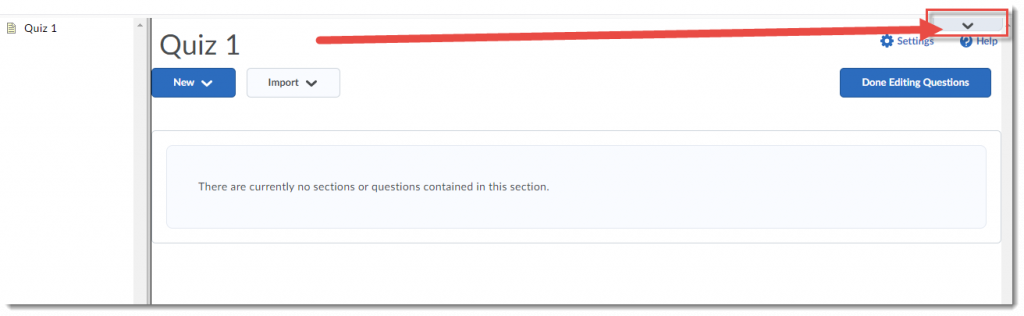
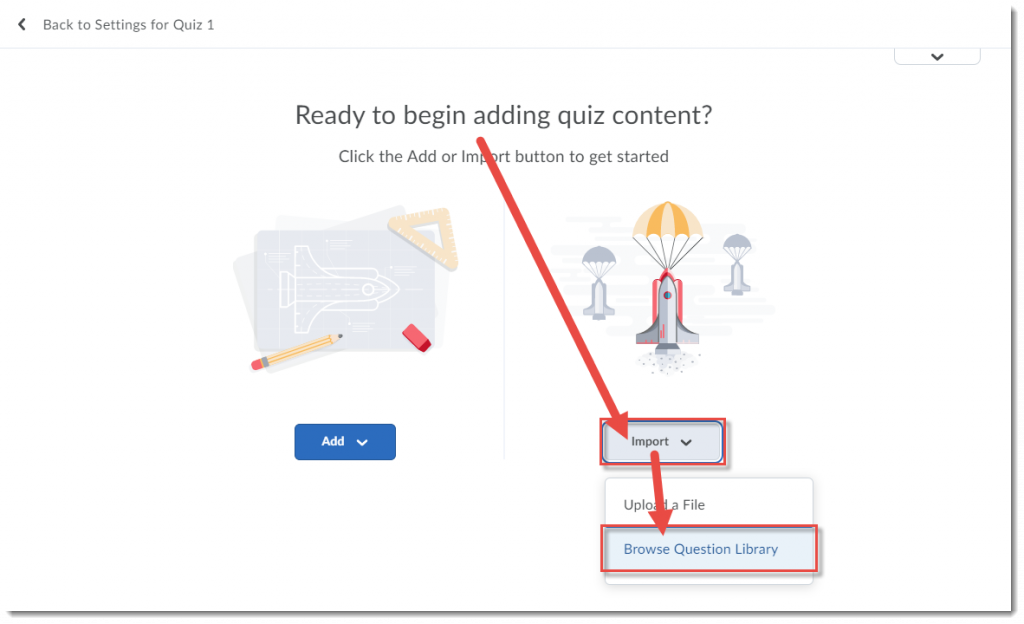
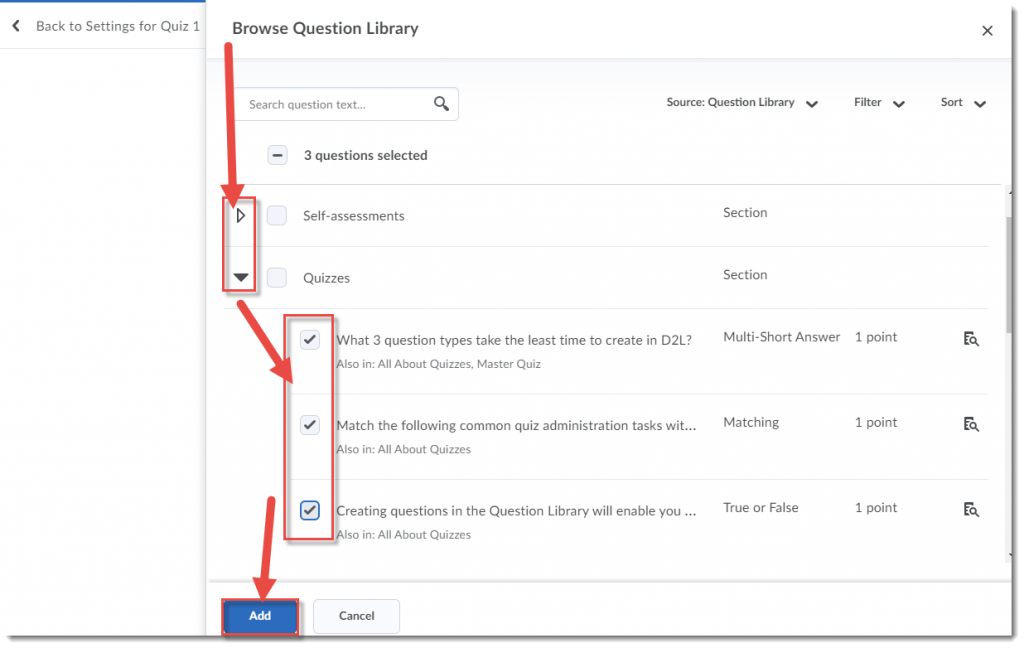
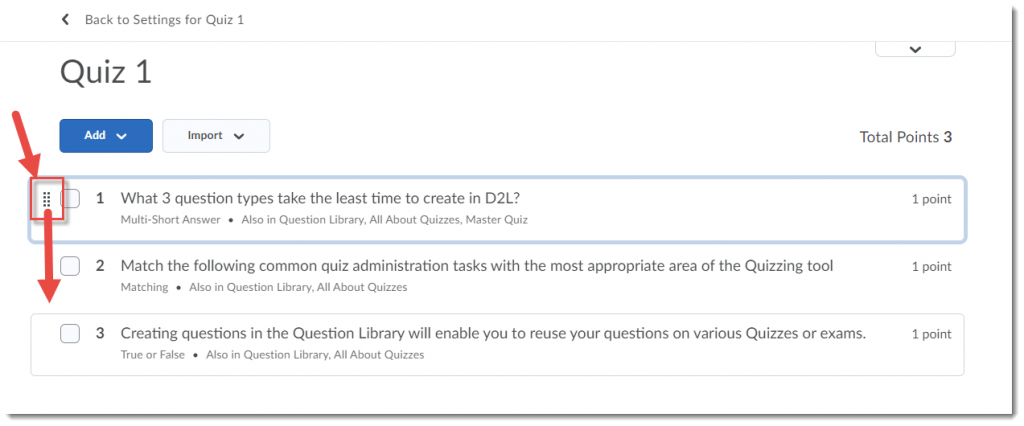
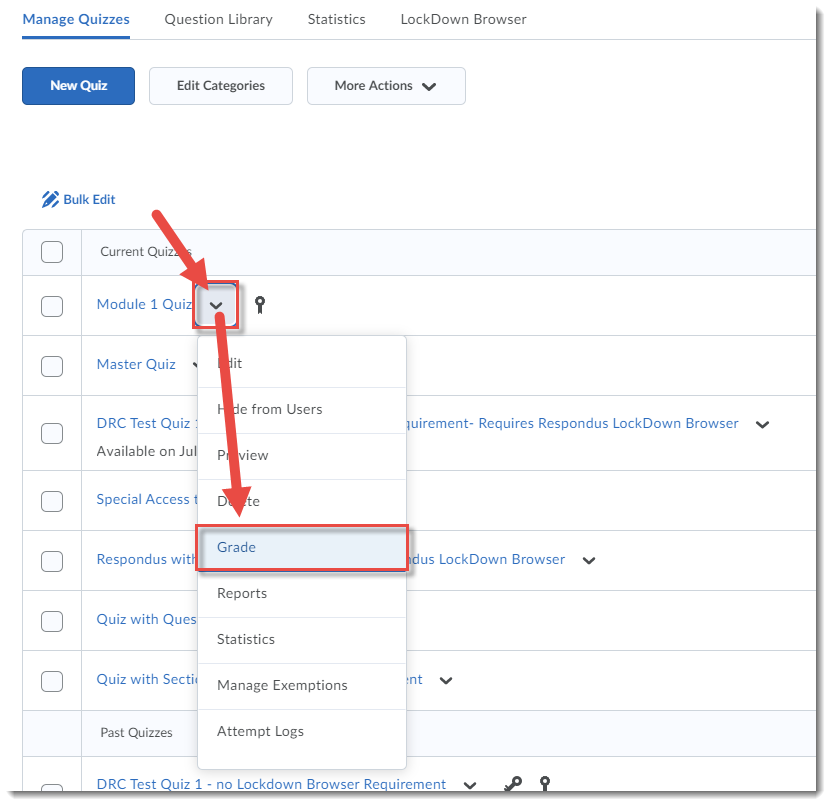
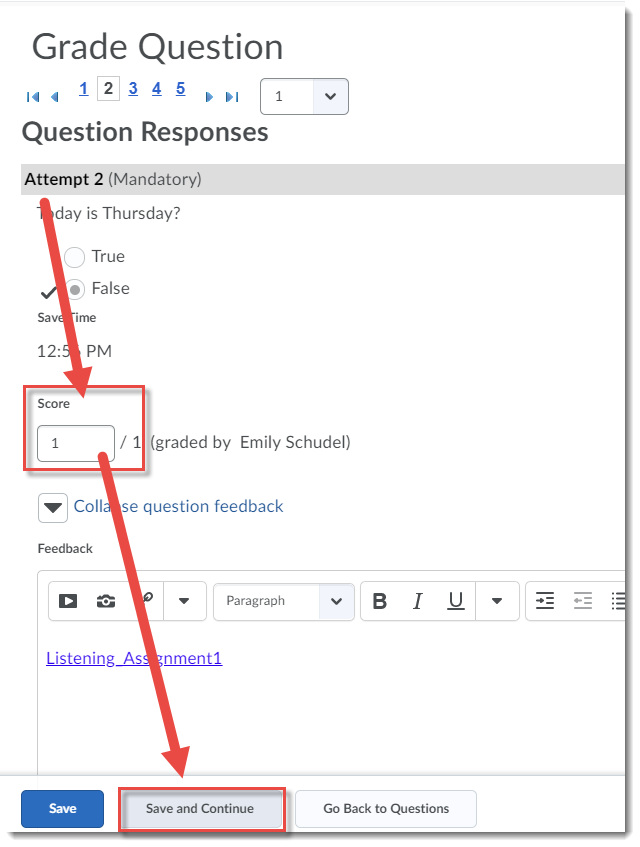
The Quizzes tool allows you to build exams using multiple choice, true/false, matching, short answer, written response (essay) questions. Quizzes can be auto-graded by D2L, except for Written Response questions, and the grades can be connected to the Grades tool. Quizzes can be timed, and questions can be shuffled or randomized.

The Quizzes tool is good for timed assessments (you can use Special Access to support student with accommodations), but I will ask you to consider that your students right now are likely stressed out, dealing with all the same personal issues you are, in addition to trying to finish off their school year, so consider carefully before creating strict time-based assessments. The trick with creating a quiz is that it takes some time to create your question bank, time you might not have when trying to figure out how to teach your students online at the same time.

Whichever tool you choose to use, I recommend creating a practice run – a practice Assignment folder or a practice Quiz – so that both you and your students can feel more comfortable with the tool(s) before a high-stakes final exam.

And perhaps neither of these tools is what you are looking for as you rethink your final assessments.  And that’s where we in eLearning are here to help you make your final online assessments happen in the best way possible for you and your students. Contact desupport@camosun.ca, or contact an instructional designer directly, for more information. If there are additional resources, or specific topics you would like me to cover on this blog, email me at schudele@camosun.ca.

New Quiz Building Experience in D2L

There is a new “Quiz Building Experience” in D2L. What does this mean? It means you have the option right not to opt a new Add/Edit Questions interface when you are creating a quiz. Here’s how to opt in, and how to navigate this new interface:

  1. Create a New Quiz, or Edit an existing one.
  2. Make sure your Quiz has a Name, then click Add/Edit Questions.

    This new experience brings the Add/Edit Question interface in line with the design you have already seen in several of the Question types, as well as adding the drag and drop option for reordering which is already present in other D2L tools.

  3. At the top, right (right above Settings) you will see a little down arrow – click this.

    Click the arrow at top right

  4. Click Turn it on. If you decide you want to go back to the original experience, you can click the down arrow and the Turn it off button that will appear. Note that eventually, this will be the default experience so it’s a good idea to try it out now!

    Click Turn it on

  5. On the “Ready to begin adding quiz content?” screen, click Import and select Browse Question Library (you could also click Add, but we recommend you create your questions in the Question Library first, then Import them into a quiz.)

    Click Import and select Browse Question Library

  6. Use the arrows to open sections in your Question Library, and the select boxes to select sections or questions to add to your Quiz. Once you have selected the questions you wish to add, click Add.

    Select questions and click Add

  7. If you then click on a question, you will be able to edit it (and you will be asked if you want to save it to all the places the question is being used). And if you hover your mouse on a question, and then hold down your mouse on the dots on the left side, you can drag questions around to change their order.

    Click to edit or drag questions

  8. Once you are done adding and editing your questions, click Back to Settings for “Quiz Title” (at the top left).

    Click Back to Settings for Quiz

  9. You can now finish editing your Quiz (Restrictions, Assessment, etc.) and click Save and Close.

    Click Save and Close

This new experience brings the Add/Edit Question interface in line with the design you have already seen in several of the Question types, as well as adding the drag and drop option for reordering which is already present in other D2L tools.

Any questions?  Send a note to desupport@camosun.ca to book a consult with an instructional designer.

Adding Links to your D2L Course Navbar

A quick tip for you today.

Wanting to add links to your D2L course Navbar (for example, a link to My Media to enable Kaltura for your students)? Here’s a quick way to do that.

  1. Go to your D2L course
  2. Hover your mouse over the Navbar, and click on the three dots that appear at the top, right, and select Customize this Navbar (note, if you have already customized your Navbar, you will select Edit this Navbar).

    Select Customize or Edit this Navbar

  3. In the Create a Copy? box, click Yes! I’ll work with a copy of the navbar. (Note that if you have already customized your Navbar, you will not see this box and can move to the next step).

    Click Yes! I'll work with a copy of the navbar.

  4. Change the Name of your Navbar if you like, then in the Links area, click Add Links.

    Click Add Links

  5. In the Add Links box, find and select the link(s) you wish to place on the Navbar, then click Add.

    Select links and click Add

  6. Move the new navbar link as needed (click and hold your mouse button on the new link and move around the navbar), then click Save and Close.

    Click Save and Close

  7. Your new link will now appear in your navbar.

    Navbar with new link

Navigating the New Assignments Page View

Hot off the presses – meaning, I am posting this as a response to a question from a faculty member who just this morning came in to ask about this issue!

In our last D2L upgrade (upgrades happen monthly), you might have noticed a change in the Assignments tool table vide. Up until the upgrade, you would have had a choice to retain the old table, using an Opt-in feature, but now everyone will have to use the “New Assignments Page” view. So, let’s have a quick look and walk through the features and some of the issues that have been coming up with it.

The column headings in the new Assignment page view (image below the descriptions) are:

  • Folder: the title of your Assignment)
  • New: a hyperlink that directs you to all New submissions, both completely new submissions, and subsequent, additional submissions. If you hover over this link, you will see how many new submissions are “New” (FIRST submissions) or “Resubmissions” (any additional submissions to the same assignment AFTER the first one).
  • Completed: Number of students who have submitted (completed) their assignments over the total number of students in the course (here, 4 submitted assignments out of 9 students)
  • Evaluated: The number of student submissions you have already evaluated (here, 0 out of 9).
  • Feedback Published: The number of student submissions you have published feedback for (here 0 out of 9). This differs from Evaluated because you can evaluate a submission, but wait to publish feedback.
  • Due Date

New Assignments Page columns

One of the confusions for faculty has been for those faculty who are in a multi-instructor site where each instructor has small groups of students (in other words, the D2L course is not a one instructor grading all the students in the course kind of situation). In courses like this, the denominator for the Completed, Evaluated, and Feedback Published columns will not feel accurate. The denominators represent the TOTAL number of students in the course, not the number of students on instructor may have in her group.

In addition, the numbers you see when you hover over the hyperlinked number in the New column can be confusing as they refer to submissions that have NOT been evaluated. If you are having students submit regular reflections, for example, and not giving them evaluation/feedback until the end of the term, you will see the hyperlinked number rise as students submit – and their first submission will be the “New” one, and all subsequent submissions will be “Resubmissions”.

New column, hovering over the hyperlinked number, here the number 5 showing as "4 new, 1 resubmission"

While we can’t change this table, we can let D2L how the new terminology is working for our faculty. If you have comments or suggestions based on your own experience with the new Assignment page, email me (Emily Schudel) or any instructional designer in eLearning, and we will submit your comments.

D2L Student Guide – What’s this all about?

I just wanted to take a moment to remind everyone about the D2L Student Guide that is linked from the main Camosun D2L Homepage.

D2L Student Guide link

This guide is for students needing reminders and support (PDF tutorials) around using not only the various tools in D2L, but also for using Kaltura, and Collaborate Ultra.   In addition, the guide also contains links to many of the common student services at Camosun, for example, the Library, Learning Skills and the Writing Centre, Counselling Services, etc.

Student Guide contents

Take a look to see what’s there, and make sure to remind your students about this site.

And remember, if your students need technical help with D2L, Kaltura, or Collaborate, they can also contact eLearning Support at desupport@camosun.ca.


Hiding Modules and Topics from Students – New Interface in Content

This tutorial is designed for faculty who have previous experience using the Content tool in D2L and will cover the steps involved when you wish to hide modules and topics from students using the Hidden/Visible function.. For further information, please contact desupport@camosun.ca for assistance.

Steps

  1. Go to the Content tool in your course. Then, in the Table of Contents box, click on the title of the Module you want to work with.
  2. If you want to hide the entire Module, first, click the open eye icon (at the top-right of the Module page).

    Click the open eye icon

  3. Then, click the checkmark to change the status of the Module from Visible to Hidden. This will hide all Topics in the Module until you make the Module Visible again.

    Click the checkmark
    Hidden status

  4. If you would like to hide only one Topic, click on the down arrow next to the Topic title and select Edit Properties in Place.

    Select Edit Properties in Place

  5. Click the open eye icon (at the top-right of the Topic title) and, as for hiding a Module, click the checkmark to change the status of the Topic to Hidden. This will hide this one Topic from students until you make the Topic Visible again.

    Click the open eye icon

  6. Click the checkmark
  7. If you want to hide multiple Topics in a Module (but not all of them), click Bulk Edit on your Module page.

    Click Bulk Edit

  8. Click the open eye icon (at the top-right of the Topic title) and click the checkmark to change the status of all the Topics you want to hide to Hidden, then click Done Editing.

    Click the open eye icons, then the checkmarks.

Things to Remember

If you set Topics or Modules to Hidden, you will need to remember to go back and make them Visible them for your students to see them. You can also keep a Module or Topic Visible and use the Add dates and restrictions function to automate their release to students.

CC-BY SAThis content is licensed under a Creative Commons Attribution 4.0 International Licence.Icons by the Noun Project.

Blind Marking Quizzes in D2L

Marking quizzes in D2L and wondering if there is a way to mark them without knowing which students submitted which quiz to reduce bias? This tutorial will walk you through how to blink mark in the Quizzes tool.

  1. Go to the Quizzes tool in your D2L course.
  2. Click the down arrow next to the quiz you wish to grade, and select Grade.Click Grade
  3. Click the Questions tab, then select Blind Marking. Then click the first question title to start marking.Questions tab, select Blind Marking, click a question
  4. Mark each question response, and click Save and Continue to move to the next question response.Grade, click Save and Continue
  5. When you have completed your marking, click Save.Click Save

Reminder: Releasing Final Adjusted Grades in D2L

This tutorial is designed for faculty who have previous experience using the Grades tool in D2L and will cover the steps involved when you wish to release your Final Grades to your students. For further information, please contact desupport@camosun.ca for assistance.

Steps

  1. Go to the Grades tool in your course, and make sure you are in the Enter Grades.
  2. Click on the down arrow next to the Final Grade (Calculated or Adjusted) and select Enter Grades.Select Enter Grades
  3. First, you want to transfer all the Final Calculated Grades into the Final Adjusted Grade column. To do this, click on the down arrow next to the title Final Grades, and select Transfer All.Click the down arrow next to Final Grades and select Transfer All
  4. Click Yes in the Confirmation pop-up box to continue.In the Confirmation box, click Yes
  5. Your Final Calculated Grades will be transferred into the Final Adjusted Grade column. To then release the Final Grades, move on to Step 6 below. If you do NOT want to release the grades at this time, click Save and Close. The final grades will be saved, but NOT released to students.Click Save and Close
  6. To release your Final Grades, click on the select box at the top of the student grade table to select all students.Select all students
  7. Click Release/Unrelease. You will then see checkmarks in the Release Final Adjusted Grade column. Click Save and Close. Click Yes in the pop-up box that appears.Click Release/Unrelease, then click Save
  8. You will then see the Final Adjusted Grades in the Enter Grades table, with open eye icons, indicating that those grades are now released to your students.The Final Adjusted Grades are now released

Things to Remember

As alluded to in Step 5, if you are not finalizing the grades for all your students at one time, you can set and save your Final Adjusted Grades without releasing them, and then release them once you have finalized all your students’ grades.

In addition, make sure your Final Calculated Grade is set to the Camosun Standard Grading Scheme:

  1. Edit your Final Calculated Grade.
  2. In the Grade Scheme drop-down menu, select Camosun Standard Grading Scheme, and click Save and Close.Camosun Standard Grading Scheme

Finding Help in the D2L On-Demand Training Course

Getting ready to set up your courses for January, but not quite remembering what you need to remember? Go to the D2L On-Demand Training course site in D2L for 24/7 support through printable PDF tutorials. Here’s how to find them:

  1. Go to D2L and, in the My Courses widget, scroll to find and click on the Training tab.

    Click Training

  2. Find and click on D2L On-Demand Training.

    Click D2L On-Demand Training

  3. Click on Support Documentation in the navigation bar.

    Click Support Documentation

  4. In the Table of Contents, click on the Module you want to see tutorials for – here we will click on eLearning D2L Tutorial Documents, and then on Course Admin.

    Click the module you want to open

  5. Click on the title of the tutorial you wish to view – here we will click on Copy Course Components from one Course to Another.

    Click the tutorial you want to open

  6. To print the file you will have to download it to your device first by scrolling down, and clicking Download.

    Click Download

  7. You can then open the file and print it from your device.

Support documents not enough? We are here to help! Make an appointment with an instructional designer by emailing desupport@camosun.ca.

Customizing Student Gradebooks (using conditional release) – a D2L Tutorial

Here’s something that just came up last week for us!

Looking for ways to individualize a student’s gradebook, for example, if they missed the midterm and you want to move 25% of that grade to Assignments, 25% of that grade to Quizzes, and 50% of that grade to the Final Exam? We have a solution for you: Conditional Release.

You can’t use Exempt for a situation like this. Exempting a student from a grade item means that item’s weight will be equally distributed across the other items in the gradebook (or in a Category if that item is part of a Category). You can, however, put that student in a Group by herself, and create new items just for them, weighted the way you want them to be. You just need to Conditionally Release all items to the appropriate Groups.

Of course, this will also mean your gradebook will calculate to MORE than 100%, because you will, in effect, have two gradebooks, but your students will only see the grade items they are attached to.

This takes a few steps, and if you are not very comfortable with creating grade items and/or using conditional release options, we recommend you contact desupport@camosun.ca and arrange to meet with an instructional designer to go over the steps with you.

So, let’s begin!

For this scenario, we will be creating Groups, creating new Grade Items/Categories (duplicating most of what is already there), and applying Conditional Release restrictions to each item.

Create Groups

  1. Go to the Groups tool, and click New Category.Click new Category
  2. Give your Category a name (we will call it Gradebook Groups). Select the Enrolment Type # of Groups – No Auto Enrolments, and add the number 2 into the Number of Groups box (we will create one group with one student, and the other group with the rest of the students). Click Save.Create your Group Category
  3. Click the down arrow next to Gradebook Groups and select Enrol Users.Enrol Users
  4. Use the select boxes to place each student into a group – the student you wish to exclude from the Midterm should be in a group on her own. For our scenario, Student 1 needs to be excluded, so we will put her in Group 1, and the others in Group 2. Note: You can rename the Groups by clicking on the Group name. Otherwise you will need to remember which Group contains which students. Click Save.Enrol students into groups and click Save

Create and Conditionally Release Grade Items

  1. Go to Grades.
  2. For our scenario, we will create a new Category/Grade Items for each of Assignments, Quizzes, and Final Exam. We will add the word “Conditional” after each. As we create the Categories for Assignments and Quizzes, and the item Final Exam, we will add Conditional Release to them. I will show this for Assignments, then you can do the rest yourself.
  3. Click New and select Category.Click new and select Category
  4. Add a Name (here Assignments Conditional). The weight will now be 20% + 25% of the 20% Midterm, so add 5% to the Assignments = 25%. For this scenario, select Distribute weight evenly across all items. Then click Restrictions.Create your category settings
  5. Click Create and Attach.Click Create and Attach
  6. Under Condition Type, select Group Enrolment.Under Condition Type, select Group Enrolment
  7. Under Group, select Group 1 (the group your single student was in), and click Create.Select Group 1 and click Create
  8. Click Save and Close. The Assignments in this category will now ONLY be seen by the student in Group 1.Click Save and Close
  9. Repeat steps 4 – 9 for a Quizzes Conditional Category (also add 5%) and a Final Exam Conditional grade item (add 10%). Then make sure to add new Assignment items to the Assignments Conditional category and new Quizzes to the Quizzes Conditional category.
  10. You will now need to edit all your OLD categories and items and conditionally release them to Group 2 so your other students only see those items in their gradebooks. When you are done, your gradebook should total to 200%.Gradebook totals 200%
  11. You should now be ready to re-enter the grades for this student. If you have already entered grades for this student, you will need to MOVE those grades to the NEW grade items so they do not get double the marks (go to Enter Grades, delete the grades from the old items and add them to the new items you just created).

As I mentioned earlier, this may seem complicated – but we are here to help! If you want to go over these steps with an instructional designer, or just ask them to check to make sure your gradebook is setup correctly for your situation, contact desupport@camosun.ca.

CC-BY-SA

This content is licensed under a Creative Commons Attribution 4.0 International Licence.Icons by the Noun Project.