Using Kaltura with your students – Discussions

Want students to post videos they have created and discuss them as a small or large group? Have them post their videos in the Discussions tool.

You will first need to create a Discussion Forum and Topic for the conversations, and students need to upload their video(s) to their My Media space in Kaltura. Tutorials for these activities can be found for faculty in the On-Demand Training site, and for students, in the D2L Student Guide, both in Camosun’s D2L.

Once you have a Discussion Forum and Topic created, students should go to the Discussions tool, and follow these steps:

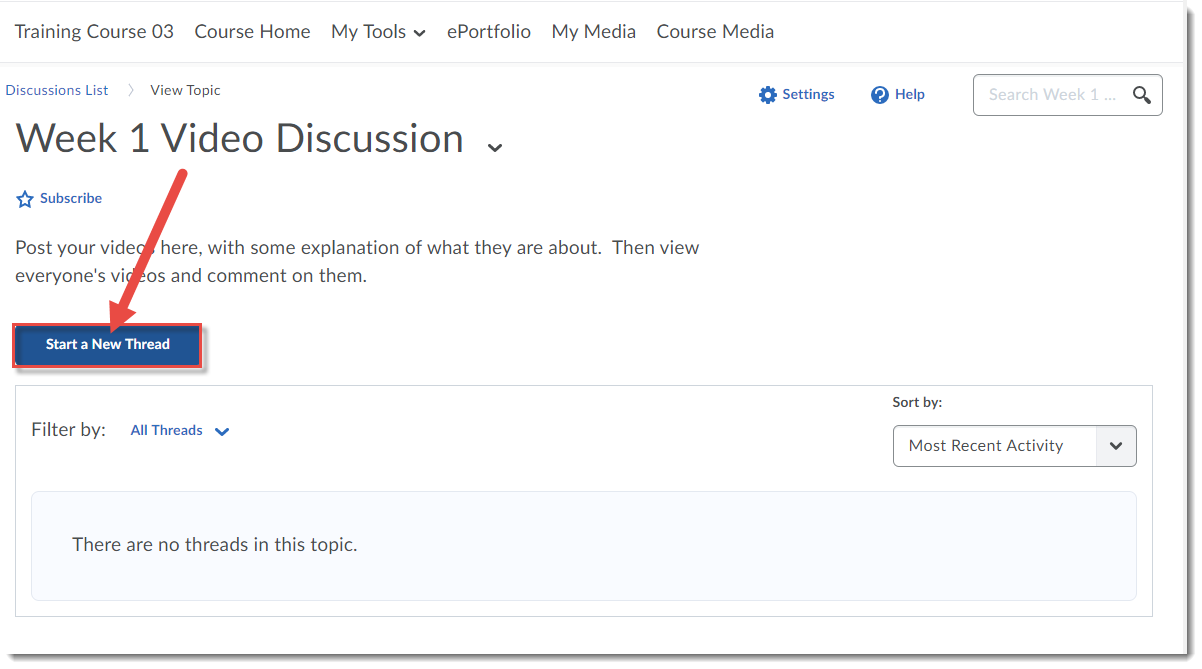
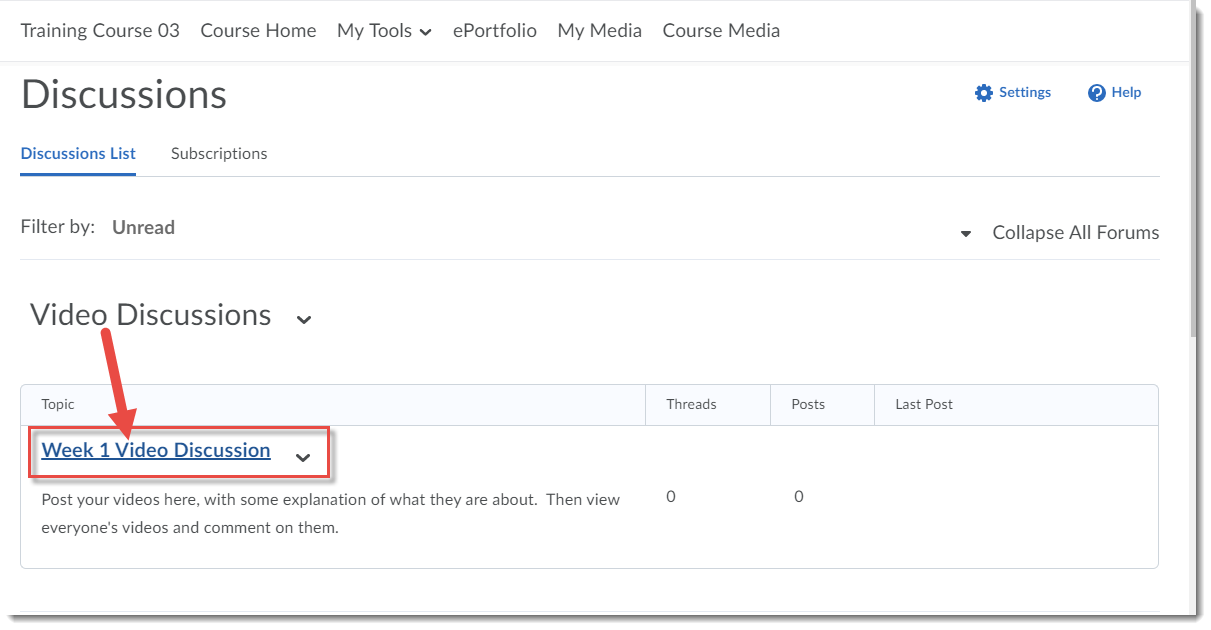
  1. Click on the title of the Topic they will be posting to.

    Click the Topic

  2. Click Start a new Thread.

    Click Start a New Thread

  3. Add a Subject for the Thread. Note that it is good practice to have your name in the subject so everyone knows who is posting.

    Add a subject

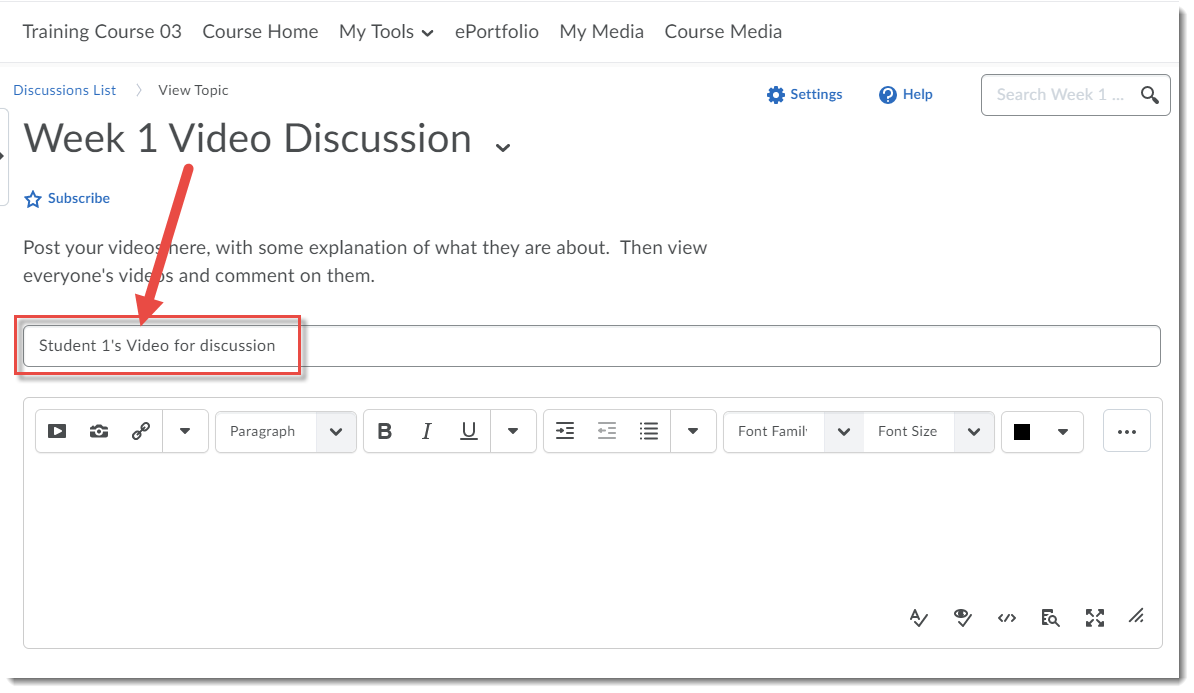
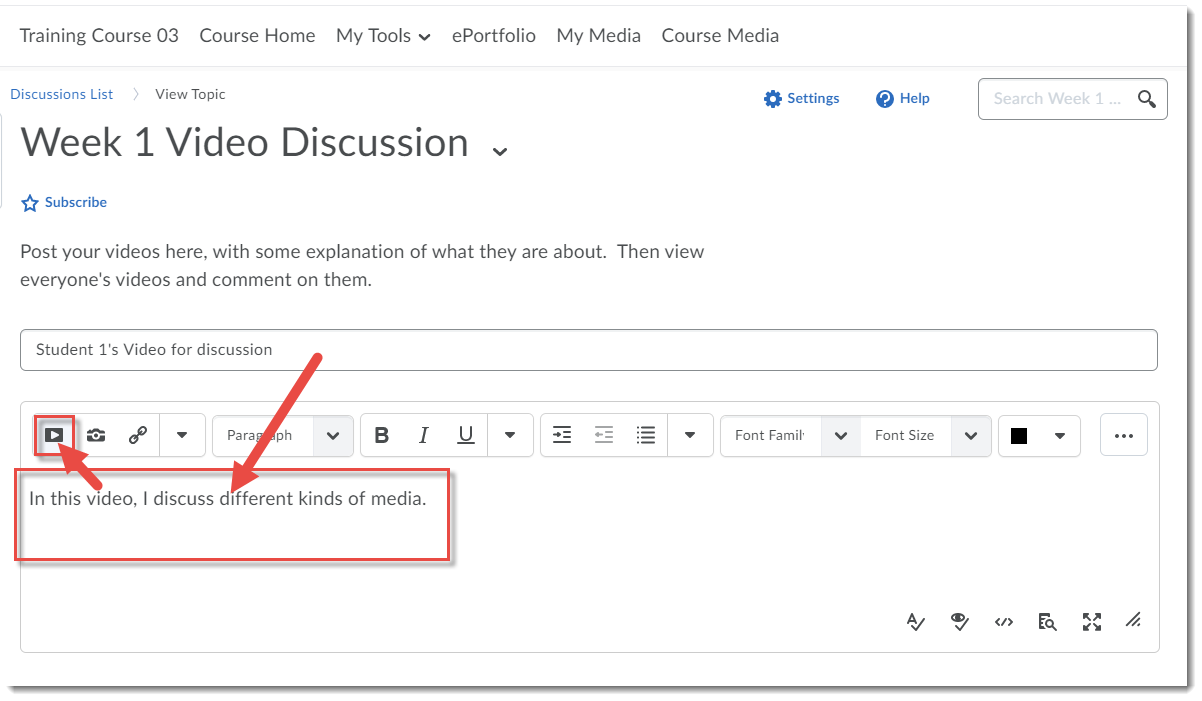
  4. Type some explanatory text into the message box, and then hit Enter. Then click the Insert Stuff icon at the top, left of the message box.

    Add text, then click Insert Stuff

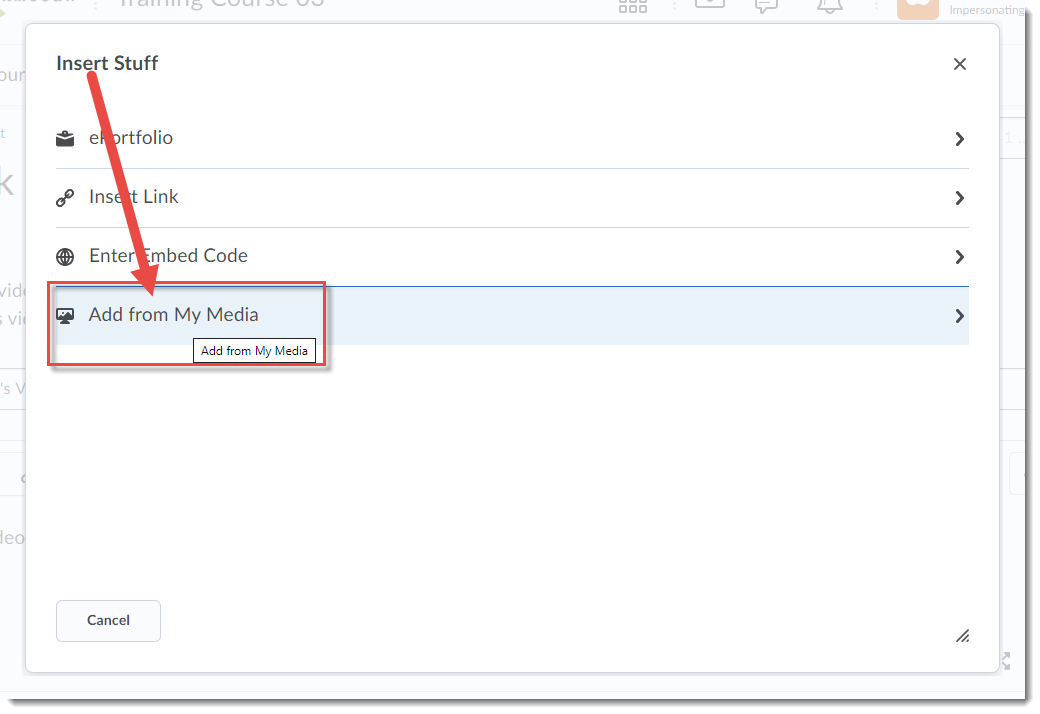
  5. In the Insert Stuff box, click Add from My Media.

    Click Add from My Media

  6. In the Add from My Media box, click Embed next to the video you want to embed into the Text submission box.

    Click Embed

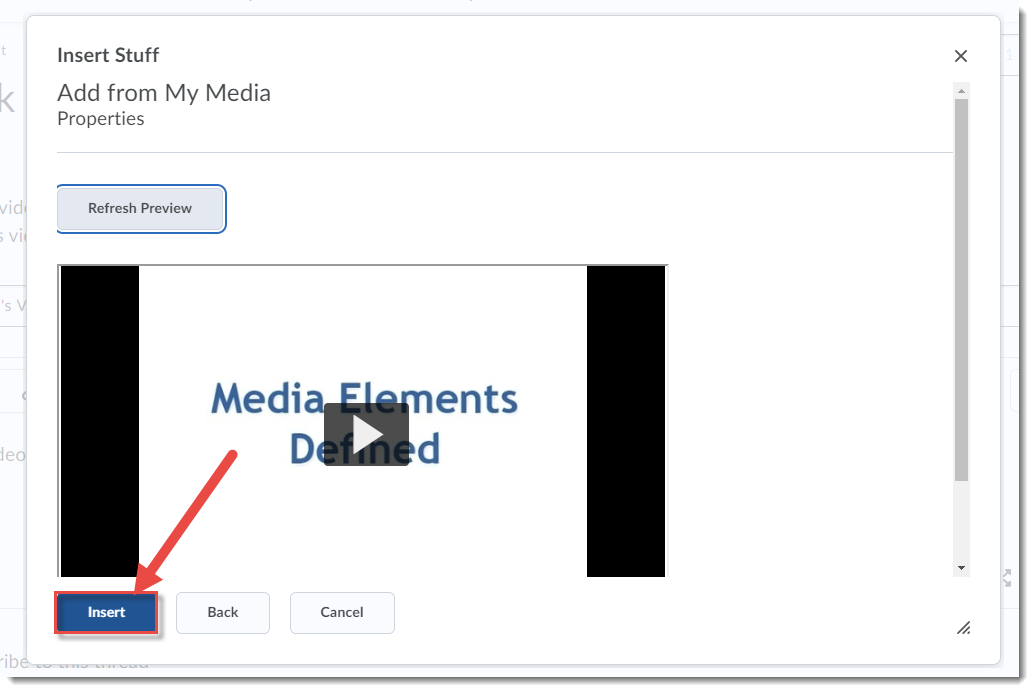
  7. Click the preview to make sure it’s the right video, then click Insert.

    Click Insert

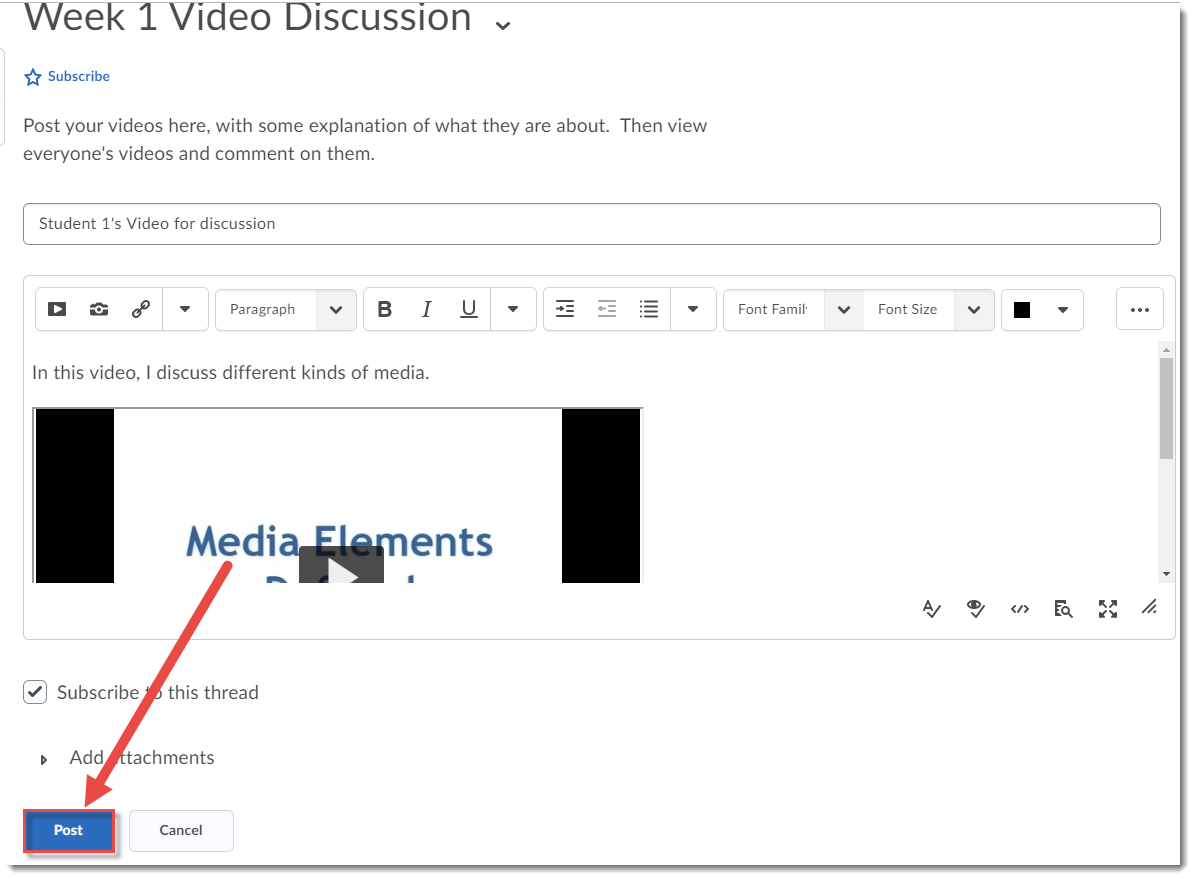
  8. The video will be embedded in the message box. Click Post to post the Discussion Thread.

    Click Post

As students post their embedded videos, they will be able to see each others’ videos and comment on and discuss them in the Discussion Topic area.

If you have any questions about this, or want to talk to someone in eLearning about this, email desupport@camosun.ca.

This content is licensed under a Creative Commons Attribution 4.0 International Licence.Icons by the Noun Project.

BCcampus’ Festival of Learning (and Call for Proposals)

Some of you have heard of, and maybe attended, BCcampus’ Festival of Learning in the past. It happens every 2 years, and I am excited to let you know that the 2020 Festival of Learning’s Call for Proposals is up and ready for you to submit to!

The Festival will take place May 11-13, 2020 at The Pinnacle Hotel Harbourfront in downtown Vancouver, and this year’s theme is all about Disruption and Transformation in Higher Education.

To find out more, and submit your proposal, go to Festival of Learning Call for Proposals (https://festival.bccampus.ca/call-for-proposals/) – deadline is November 15th.

Using the Whiteboard in Blackboard Collaborate Ultra in D2L

This tutorial is designed for faculty who have previous experience using D2L and Blackboard Collaborate Ultra, will cover how to use the Whiteboard in your Blackboard Collaborate Ultra session. For further information, please contact desupport@camosun.ca for assistance.

Steps

  1. Go to the location in your D2L course site where you have linked to your Blackboard Collaborate Ultra room (for example, in the Content tool), click on your Blackboard Collaborate Ultra session and enter your session.
  2. Open the Collaborate panel (the bottom right icon).Open the Collaborate panel
  3. Click the Share Content icon.Click Share Content
  4. Click Share Blank Whiteboard. The Whiteboard will open in the main session area.

    Click Share Blank Whiteboard

  5. Use the drawing tools at the top-left to Select items, Point to items, draw with the Pencil, add Shapes, write Text, and Clear everything (note that there is NO undo for this!). When you select Pencil, Shapes, or Text, the Colours selector will also appear.

    The drawing tools

  6. You can also use the View Controls to Zoom In, Zoom Out, see the Best Fit, and view the Actual Size.

    View Controls

  7. Click the Stop icon (top right of the slide in the main window) to stop sharing the Whiteboard.

    Click Stop

Things to Remember

You can’t save a Whiteboard session, and once you have stopped sharing the Whiteboard, it will disappear. If you need to keep a copy of what happens in the Whiteboard, you can either use the screen printing option on your computer, or right-mouse click on the whiteboard, to save an image of the Whiteboard to your computer.

You can’t add an image (picture, graphic, etc.) to the Whiteboard. To present and work with an image in the main session area, you need to use Share Files.

This content is licensed under a Creative Commons Attribution 4.0 International Licence.Icons by the Noun Project.


Assignments and Discussions Now a 2-Way Connection to Grades

Coming this month in D2L: a 2-way connection between Assignments and Grades, and between Discussions and Grades.

If you have linked an Assignment or a Discussion to a Grade item, you will now be able to enter marks in the Grades tool, and when saved, those grades will be sent to the Assignment or Discussion item. In other words, you can now grade your assignments in either the Grades tool or Assignments tool – whichever is your preference.

This function will be especially useful for assignments that are handed in in class (there are two new Submission Types in the Assignments tool to allow for “On-paper submission” and “Observed in Person”) or when you want to give students the option to either submit assignments to the Assignments tool or hand in paper assignments during class.

Want to know more? Contact eLearning Support (desupport@camosun.ca) to arrange for a consult with an instructional designer.

The Problem with Checklist Approaches Open Online Course


Another free, online course, Check-Please!  Starter Course, created by Mike Caulfield (and others) that you can copy and customize for your own use.

Mike Caulfield is the author of the Open Textbook “Web Literacy for Student Fact-Checkers”. If you’re looking for a good, easy to access resource on fact-checking and resource vetting, this is a good place to start!

From the course site:

“In this course, we show you how to fact and source-check in five easy lessons, taking about 30 minutes apiece. The entire online curriculum is two and a half to three hours and is suitable homework for the first week of a college-level module on disinformation or online information literacy, or the first few weeks of a course if assigned with other discipline-focused homework.

…This course will take you through the basics of quick source and claim-checking, and introduce you to our “four moves”, a series of actions to take when encountering claims and sources on the web.

These course materials can be used for self-study, as part of a formal course, or as a set of independent assignments to practice your skills.

The course is broken up into lessons, each of which can be completed in a single sitting. They take from 20 to 45 minutes, are composed of 5 to 15 pages, and include instruction and a series of exercises. While some exercises may seem repetitive, we recommend you complete them all, as the point is not just learning what fact-checking is, but building a fact-checking habit.”

To find out more about this course, here is an excellent blog post by Joshua Ell, Check Please Starter Course. My reactions and takeaways.

Showing PowerPoints in Blackboard Collaborate Ultra in D2L

This tutorial is designed for faculty who have previous experience using D2L and Blackboard Collaborate Ultra, and will cover how to show PowerPoints in your Blackboard Collaborate Ultra session. For further information, please contact desupport@camosun.ca for assistance.

Steps

  1. Go to the location in your D2L course site where you have linked to your Blackboard Collaborate Ultra room (for example, in the Content tool), click on your Blackboard Collaborate Ultra session and enter your session.
  2. Open the Collaborate panel (the bottom right icon).

    Open the Collaborate panel

  3. Click the Share Content icon.

    Click Share Content

  4. Click Share Files.

    Click Share Files

  5. Click Add Files to upload a PowerPoint from your computer (or drag the PowerPoint into the Add Files box).

    Click Add Files

  6. When the file has finished uploading, select it, then click Share Now.

    Click Share Now

  7. Select a slide to begin sharing (the slide will appear in the main window of your session).

    Select a slide to being sharing

  8. You can either use the arrow under the main slide to navigate through your presentation, or click on any slide in the Navigate Slides area to jump to another slide. Use the drawing/pointing icons at the top-left to enhance the presentation. Click the Stop icon (top right of the slide in the main window) to end the presentation.

    Presentation controls

Things to Remember

Once you have added a PowerPoint file to a session, it will stay there as long as the session is active. Once the session is over (and disappears from your Blackboard Collaborate Ultra room in D2L), it will disappear and have to be re-uploaded to any new sessions you create.

This content is licensed under a Creative Commons Attribution 4.0 International Licence.Icons by the Noun Project.

Some additional notes about using the Annotations Tool (in Assignments) in D2L

On September 5, I announced the new Annotation Tool in the Assignments tool in D2L . And today, I wanted to give you some additional notes about this tool, because of some questions that have come up for us from faculty.

First, the Annotation tool, which is enabled by default, can be disabled for specific assignments.  To do this:

  1. Click the down arrow next to the assignment you want to edit, and select Edit Folder.
  2. Scroll down to the bottom of the Properties tab to Annotation Tools, and deselect “Make annotation tools available for assessment”. Then click Save and Close.

    Disable Annotations

Second, I wanted to mention the difference between downloading the annotated version (PDF version) and downloading the original document when assessing assignment submissions. Note that this is for file submissions when the Annotation tool is enabled.

  1. Click the down arrow next to the assignment you want to grade, and click View Submissions.
  2. Click on the Evaluate link for the student’s assignment you want to assess.
  3. To download the document itself, click the arrow next to the assignment link, and select Download.

    Download assignment file

  4. To view and download the Annotated file (as a PDF), click on the document link to open the Annotation tool, add your annotations, then click Download.

    Download annotations file

  5. To close the Annotations tool window and return to the original view, where you can download the assignment document itself, click the X above, on the right side, of the Annotation window.

    Click X to close the Annotations tool

Stay tuned next Monday where I will tell you about a few new updates regarding the connection between the Assignments and Discussions tools, and the Grades tool.

Creating Groups in D2L

This tutorial is designed for faculty who have previous experience using the various tools in D2L, and will cover the steps involved when you want to put your students into groups in D2L.

Using Groups means that you can release tools, activities, and content to specific groups of students, for example, Assignment folders which would be accessible only by a group of students, or modules of content which only specific groups of students can view. For further information, please contact desupport@camosun.ca for assistance.

Steps

  1. Go to the Groups tool in your course. If you don’t see Groups in your My Tools drop-down, you can find it by going to Edit Course.
  2. Click New Category. A Category will contain the groups you will put your students into. For example, Assignment 1 Groups might be your Category, then you will have several Groups within that category into which you will enrol students.Click New Category
  3. Give your Category a Category Name (e.g., Assignment 1 Groups).Give your Category a Category Name
  4. Scroll down and select your Enrolment Type. Here are the choices:
    1. # of Groups – No Auto Enrolments – Use this when YOU want to enrol students into specific groups yourself
    2. Groups of # – Use when you know how many students you want in each group, but you want D2L to automatically enrol them
    3. # of Groups – Use when you know how many groups you want, but you want D2L to automatically enrol students into them
    4. Groups of # – Self Enrolment – Use when you know how many students you want in each group, but you want students to self-select which group they want to be in. (Self-enrolment can also be given an Expiry Date, after which remaining students will be auto-enrolled into empty group spaces),
    5. # of Groups – Self Enrolment – Use when you know how many groups you want, but you want students to self-select which group they want to be in
    6. # of Groups, Capacity of # – Self Enrolment – Use when you know how many groups you want AND how many students you want in each group, but you want students to self-select which group they want to be in
    7. Single user, member-specific groups – Use when you want to create groups of ONE (this is great if you want to provide students with Discussion forum space for personal journaling – so they can post journal entries that only you can see).Fill in the required boxes for whichever enrolment type you chose (e.g., Number of Groups, Number of Users), then select which tools/workspaces you would like to automatically create as you create your groups (note that you can connect tools/activities/content to groups AFTER you have created them as well). Then click Save.

      Select Enrolment Type, then select tools/workspaces. Click Save

  5. Follow the instructions for creating the additional tools (Discussion, Locker, Assignments) if you have selected them, clicking Create and Next as you go. When you are finished, click Done.Click Done
  6. Finally, click Save.Click Save

Things to Remember

Note that if you have created self-enrolment groups, you will not be able to use View as Student to see what this looks like to your students – you need to be a registered student in the course to see how the process works. However, we have created a handoutfor students on Self Enrolling into Groups that you can find in the On-Demand Training course in D2L look at, or point students to in the D2L Student Guide.

This content is licensed under a Creative Commons Attribution 4.0 International Licence.Icons by the Noun Project.

Supporting Students with Disabilities in BC Postsecondary Online Course

Today, I’d like to take a moment, and a short post, to promote an online course offering, available for you, for free, from the Justice Institute of BC:  the open, online course Supporting Students with Disabilities in BC Postsecondary .  In addition, content in the course and associated resource site are Creative Commons licenced, so material is available for you to Retain, Reuse, Revise, Remix, Redistribute!

From the website:

“In collaboration with Selkirk and Camosun Colleges, Justice Institute of British Columbia (JIBC) has developed this course and a resource website to educate trainers on disability issues in the classroom. The purpose of the course is to increase the success of people with disabilities in a trades / technical program by dispelling common myths about students with disabilities and to address faculty’s concerns and questions about different disabilities. It will help each faculty member to obtain the appropriate knowledge and problem-solving skills to offer accommodations and select appropriate teaching strategies for their disabled students. The expectation is that the new techniques learned will help students achieve their full potential and success in their chosen programs.

This multi-modal course can be taken online independently, or in a facilitated face-to-face group. Throughout the course there are several engaging learning activities including scenarios with reflection questions, case studies followed by discussions, and simulation exercises aimed to trigger learner empathy.

This course provides practical information and easy-to-use strategies to help you to better support the learning of students with disabilities in your classrooms and campuses.

At the end of the course, you will be able to

  • Define what is meant by having a disability and become familiar with a wide range of disabilities and how they impact learning
  • Identify the concepts of duty to accommodate and understand the process of reasonable accommodation
  • Apply strategies and tools from Universal Design for Learning (UDL) to create an inclusive learning environment to accommodate your students
  • Develop personal goals, address institution-wide responsibilities and identify next steps for creating inclusive campuses”